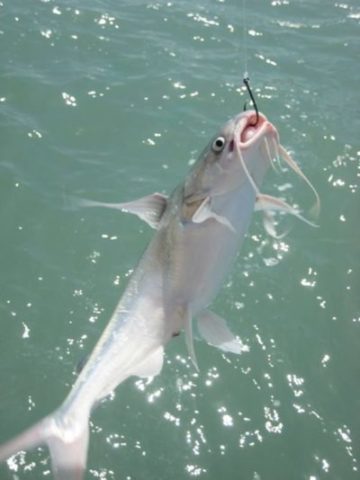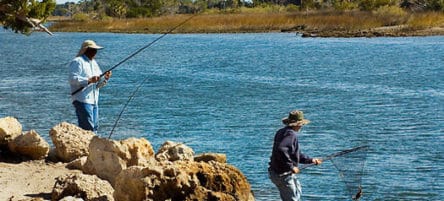

As you get out in the water, you might think you would have to spend hours on end looking around for fish. Fortunately, the best fish finder GPS combo will give you a better readout for any intention and assist you with getting out on the water. So you will no longer have to go around blindly hoping to find fish as you get out on the water. You can instead use a GPS fish finder unit. This lets you get an idea of where fish are located.
This helps you to do two things in particular:
- It uses a sonar sensor or other form of technology to see what is under the water. This includes looking at how the floor is formed, any plants in the region, and where fish might be moving around at.
- A GPS signal is also produced. This lets you know where you are located while in the water. It may even be linked up to a program that has information on a specific body of water you are in.
Comparison For Finding The Best Fish Finder GPS Combo
| Model | Screen Size (Inches) | Depth (Feet) | Sensor Or Connection | View On Amazon |
|---|---|---|---|---|
| Garmin Striker 4 Built-In GPS Fishfinder | 3.5 | 1,600 feet in freshwater, 750 feet in saltwater | 50/77/200 kHz | Check Price On Amazon |
| Deeper Smart Sonar PRO+ | Varies based on your mobile device | 1,000 feet | Wi-Fi connection | Check Price On Amazon |
| Raymarine Dragonfly Pro Chirp Fish Finder | 4, 5 or 7 inches | 600 feet | 50/200 kHz | Check Price On Amazon |
| Garmin 010-01798-01 echoMAP Chirp 53cv | 6 inches | 600 feet | 50/200 kHz | Check Price On Amazon |
| Lowrance Elite-4 HDI Combo Plotter/Fishfinder | 4.3 inches | 1,000 feet | 50/83/200 kHz broadband, 455/800 kHz down scan | Check Price On Amazon |
| Raymarine E70294 US Dragonfly-4 | 4.3 inches | 500 feet | 50/200 Khz | Check Price On Amazon |
| Humminbird 410210-1 Helix 5 Chirp GPS G2 | 5 inches | 1,500 feet without transducer, 2,500 feet with optional transducer | 83 kHz; expands to 28 to 250 kHz when a transducer is added | Check Price On Amazon |
| Humminbird 409610-1 Helix 5 | 4 inches | 1,000 feet | 200/83 kHz | Check Price On Amazon |
| Lowrance Hook-5 Sonar/GPS Mid/High/Downscan Fishfinder | 5 inches | 1,000 feet | 200/83 kHz | Check Price On Amazon |
| Simrad GO7 XSE Chartplotter and Fishfinder with TotalScan Transom Mount Transducer | 7 inches | 1,500 feet | Wi-Fi and Bluetooth supported alongside standard 50/200 kHz readouts | Check Price On Amazon |
Features Of The Best Fish Finder GPS Combo With Pros & Cons
Let’s have a look at the top ten GPS fish finder combo. Our reviews and thorough discussion on the features will definitely help you find the best unit.
Here is the list:
- Garmin Striker 4 Built-in GPS Fish Finder
- Deeper Smart Sonar PRO+
- Raymarine Dragonfly Pro CHIRP Fish Finder
- Garmin echoMAP Chirp 53cv With Transducer
- Lowrance Elite-4 HDI Combo Plotter/Fishfinder
- Raymarine E70294 US Dragonfly-4
- Humminbird 410210-1 Helix 5 Chirp GPS G2
- Humminbird 409610-1 Helix 5
- Lowrance Hook-5 Sonar/GPS Mid/High/Downscan Fish Finder
- Simrad GO7 XSE Chartplotter and Fishfinder with TotalScan Transom Mount Transducer
Garmin Striker 4 Built-in GPS Fish Finder

The first option to see when finding the best fish finder GPS combo for your needs comes from Garmin. Garmin has long been known for its GPS products. The GPS technology that Garmin regularly uses in its navigation systems can be found in its Striker 4 fish finder. But there are many other things about this model that make it a strikingly popular choice.
This fish finder model is one distinct choice that fits in thanks to its powerful layout. The 3.5-inch screen has a full-color display. It lets you save hot spots so you can return to them as needed later on. You can use the waypoint map to mark things like docks, stumps, and other obstructions. The screen even displays your speed based on GPS readouts and how they change.
The Garmin CHIRP transducer is a vital part of what makes this model effective. The transducer creates a crisp layout for finding fish as it uses many frequencies at once. These include low and high frequencies that are reviewed individually as they go through the area. The readout creates a clearer readout that helps you identify where fish are located while keeping the targets a little further apart from one another.
As for the GPS support, this Garmin unit lets you mark where you are going in real-time. You can use this unit to quickly list details on where the fish you are looking for might be located. The unit gives you a simple layout for saving waypoints and other vital spots. The unit will read the specific GPS coordinates and will save them to a microSD card that you add to the reader.
Pros
- Audible alarms let you know when fish are in the area
- The suction feature makes it easy to secure the unit onto a boat
- Waterproof battery
- Can review water temperature when connected to appropriate sensors
Cons
- Does not include any maps
- The screen might be too small for some people
- Cables can wear out quickly
Check Availability & Customer Reviews On Amazon
Deeper Smart Sonar PRO+

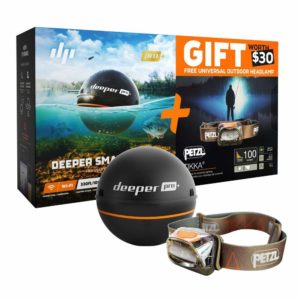
Next, you can opt for the Deeper Smart Sonar PRO+ for when you need help with finding fish anywhere. This is intriguing for how it offers a design that links up to a smartphone or tablet that you bring out onto the water yourself. The Deeper sonar fish finder is in a ball-like body that you troll from your boat or kayak. You can cast the PRO+ unit out onto the water to find fish with ease.
The key part of this model is that it works with your own mobile device instead of a traditional setup. The design also works to analyze what is in your area in real-time, thus giving you all the information you need for fishing.
While on the shore, you can cast the unit out and then reel it in after a period of time. The PRO+ will gather full information on the map layout of a local area that you want to go fishing in, thus helping you to plan your fishing trip accordingly. This is designed to work in fresh and saltwater conditions.
A Wi-Fi signal is also used on this instead of a traditional Bluetooth link, thus ensuring a stronger connection between the fish finder and your mobile device. It can work in ice fishing conditions as well.
You can also use the appropriate mobile app that comes with the fish finder to help you figure out what fish are in a local area. The mobile app helps you gather details on fish based on what is in a region and how the fish are moving about. It even offers a 6-inch target separation feature to help you identify everything in the local area. You can also zoom in on the screen to find details on all of the targets that the fish finder is identifying.
The fact that you can use this on any smartphone or tablet you have particularly makes this a versatile tool for your fish finding needs. But you should make sure that the Wi-Fi receiver on your unit is powered up enough to collect a good signal. Also, the screen should have enough of a resolution to let you see things so you can quickly set parameters or waypoints as you see fit.
Pros
- Works well for shore, kayak, boat, and ice fishing alike
- Allows you to use your own mobile device
- Strong Wi-Fi connection
- Works well in most water conditions
Cons
- The display might look rough on larger devices
- The battery can drain quickly depending on the connection
- Can shift around on the water rather quickly
Check Availability & Customer Reviews On Amazon
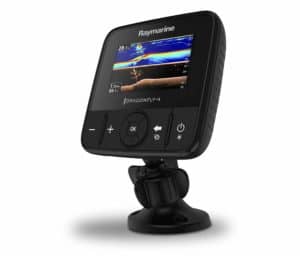
Raymarine Dragonfly Pro Chirp Fish Finder

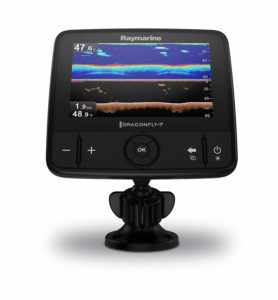
Raymarine makes the Dragonfly Pro fish finder in three sizes. You can choose from a 4, 5, or 7-inch model. The features on the Raymarine fish fisher are the same regardless of the size you choose, so make sure when choosing this option that you have something that comes with a layout you will want to use.
The Navionics+ charts within the fish finder provide you with information on coastal waters and on various lakes around the United States and Canada. With more than 20,000 lakes listed in its database, you can search for the particular lake you want to get out to so you can program the fish finder to find the proper fish you want to get out to.
The sonar images produced by the fish finder are detailed. You can get accurate images from up to 600 feet in the water. You can also get a review of the bottom of the water to see how it is shifting. Dual-channel sonar works for ensuring the unit produces an accurate readout every time.
The Chirp transducer does well for finding fish in deep and shallow conditions. It works at 50 kHz in deep water and 200 kHz in shallow water to find movements and changes in the surface in a local area.
The GPS functionality helps you see where you are going as well. A CPT-DVS transom mount transducer is also included to help you find fish with a wide beam that looks through more spots at a time.
Pros
- Convenient onboard control features
- The layout provides heat signatures of fish as well as ground images
- The wi-fish mobile app links to your fish finder to help share information with others
- Easy to mount onto many surfaces
Cons
- Details on the screen can be hard to read at times
- The display is tough to read in bright and sunny conditions
Check Availability & Customer Reviews On Amazon
Garmin echoMAP Chirp 53cv With Transducer

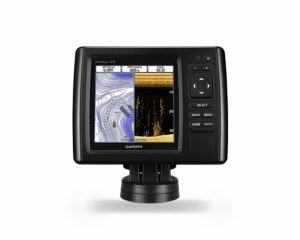
This next choice is another option available from Garmin. It uses the Clearvu scanning sonar feature with a high-frequency readout to find items around the boat. The detailed display on the sonar screen gives you a full readout of what is in a local area, thus making it easier for you to find fish in any case. The intense frequency produces support for finding fish in shallow and deep bodies of water alike. It even cuts through the murkiest and cloudiest water conditions to help you get the results you desire.
The Clearvu system works with a traditional Chirp sonar plus an added 5 Hz GPS to update your location and where other items are in the water multiple times every second. This gives you a full layout of what is in an area so you can find out what is in a region without obstructions. It only takes a few moments for this to update itself.
You can also link the unit to a computer to download the proper maps and charts you need for finding fish. This works with American and Canadian maps to help you find fish in some of your favorite lakes and coastal regions in both countries.
Pros
- Works with continuous readouts for regular information
- GPS is consistently updated
- Can handle up to five thousand waypoints
Cons
- The screen can look cramped at times
- Tough to secure onto your mounting bracket on occasion
Check Availability & Customer Reviews On Amazon
Lowrance Elite-4 HDI Combo Plotter/Fish Finder

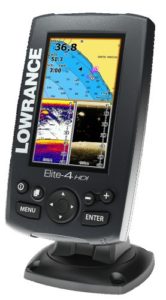
This Lowrance fish finder uses a 4.3-inch LCD screen with several layouts to help you identify fish where you are. It uses multiple broadband frequencies to find fish where you are. It has a GPS chart plotter to help you save information on where you are going, thus helping you to find all the best spots that you know you can find fish at.
This is one of the top options to find for how versatile it is. You can choose to get one of the frequencies set up based on the depth of the water and any other conditions in a local area.
The GPS antenna offers a full map of more than 3,000 United States lakes and offers a deep layout to where the most minute turns and curves are noticeable from 1,000 feet deep.
The screen lists information on how fast your boat is moving and also on any changes in the water depth in your area. It can use a series of antennae that you can insert around the bottom part of your boat as well, thus making it easier for you to keep the reader working effectively and quickly.
The LCD screen also features a detailed layout with a good resolution to help you see everything well enough. You can even use this to identify what is in a place while fishing. The simplicity of this is important, but the ability of this unit to load up data quickly and effortlessly is a huge part of what makes this an ideal material to have in your boat.
Pros
- Multiple frequencies ensure a better overall readout
- Varied control buttons make adjusting the unit easy
- Takes only a few moments to install
- Works in deep conditions
Cons
- Does not come with a transducer; Lowrance sells it separately
- Displays on the screen can become bunched up quickly
- Does not have information on as many lakes as what other models offer
Check Availability & Customer Reviews On Amazon
Raymarine E70294 US Dragonfly-4

Raymarine has another valuable fish finder GPS to look into as this model offers a 4.3-inch backlit LED screen. It uses a map database that offers information on thousands of lakes around the United States.
A dual-channel sonar feature works with Chirp DownVision sonar to help you find detailed images of what is under the water. A Chirp conventional sonar channel is also included to help you with finding fish. This creates two separate visual layouts on the screen with each display being distinct in various forms.
The 50-channel GPS feature is popular for being exceptionally accurate. You can quickly find fish of all kinds as the GPS and sonar combine to create detailed readouts of items within a foot from their actual spaces. The accuracy rating is among the best on the market in terms of what devices are available for use.
The Wi-Fish mobile app from Raymarine lets you link your smartphone up to the fish finder. This lets you share information on boating areas and where fish are located. You can also save information on your fishing trip so you can plan ahead for whatever is next.
The mounting ball on this model also helps you with handling the unit and positioning it in the right spot. You can use this mounting ball to adjust how the unit is displayed.
This is ideal for when you need to get a good read but you are unable to move out of your boating seat well enough. Of course, this point is best for those who have canoes or kayaks and might not have much room to move around in when trying to get something to work well enough.
All the maps on this unit are pre-installed so you know where you are going when getting this to work for you. You also have the option to get your maps added onto a microSD card that you can quickly add to the unit.
Pros
- The screen is easy to view in most outdoor conditions
- Does not experience internal fogging
- Dual-channel sonar works in shallow and deep conditions alike
Cons
- Takes a while for it to start up
- Cables are short
- Tough to mount onto a kayak or other small boat
Check Availability & Customer Reviews On Amazon
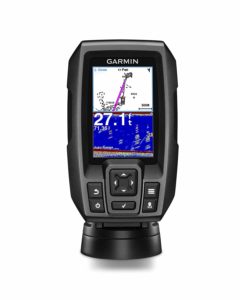
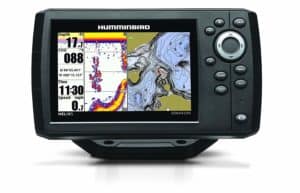
Humminbird 410210-1 Helix 5 Chirp GPS G2


The 5-inch color WVGA screen on this Humminbird sonar unit provides you with a crisp and easy to review layout. The Chirp dual beam sonar sensor included here offers more power for finding fish in even the toughest conditions. The internal GPS chart plotting feature also helps you to save multiple waypoints.
The SmartStrike feature is a popular part of the Helix fish finder to see. With this, you will set a series of parameters on the unit relating to wind conditions, the water temperature, how fast the water is moving, and so forth.
The fish finder can analyze conditions in your area and help you find the optimal spots for fishing based on the parameters you have entered in. With this, you can find the fish that you want to go after in just a matter of moments.
The map data offered by Humminbird includes information on thousands of lakes around the United States plus its coastlines. You can even get readouts on bottom hardiness, underwater plants, and other items that might make an impact on your fishing trip depending on where you are going.
A Micro SD card slot is also included in this model. The slot lets you save more waypoints or add new map data onto the fish finder. This, in turn, gives you more information on what might be found in your area.
Pros
- The display offers a clear layout
- Can work at up to 1,500 feet deep; optional transducer works at 2,500 feet
- GPS readouts are fully accurate
Cons
- The mounting bracket is hard to use
- Cables can wear apart quickly
- Menu screens are rather small when compared with other items
Check Availability & Customer Reviews On Amazon
Humminbird 409610-1 Helix 5 Fish Finder With GPS

Another choice from Humminbird, this model features UniMap base maps to help you identify where you are going. The UniMap setup uses several layouts for all the items you want to find. It includes multiple readouts for various types of fish and even gives you a good idea of how large each fish is, thus letting you plan accordingly for when you’re aiming to get the fish you want without struggles. The screen also includes a full layout that lists information on depth, boat speed, and precise GPS coordinates.
The XNT 9 20 T transducer is included in this model. This uses a 200/83 kHz frequency layout to give you more coverage over the water. It works with 20 and 60-degree coverage to help you identify where specific fish might be found at.
The internal GPS receiver lets you find information on what is in your area and lets you program dozens of routes, waypoints, and tracks. You can also link this to your computer and use it alongside other Humminbird programs including the company’s LakeMaster program to produce detailed charts of what is in certain lakes.
Humminbird also lets you create your own maps. This lets you set your own waypoints and parameters for individual spots that you need to keep a clear note of when fishing.
Be advised that this works best when you link the unit up to a computer while using another one of Humminbird’s map generation tools. This should be appropriate for when you have something of value to work with.
Pros
- The screen is easy to view in most conditions
- Button layout helps you move from one menu to another fast
- Easy to switch from one route to the next
- Readouts and produced quickly thanks to the strong GPS sensor
Cons
- Transducer mount is solid and does not flip up in the event you hit something under the water
- Costs extra to get LakeMaster charts or other items added to the fishfinder
Check Availability & Customer Reviews On Amazon
Lowrance Hook-5 Sonar/GPS Mid/High/Downscan Fish Finder

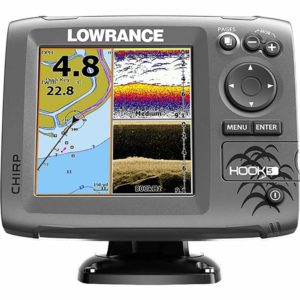
The 5-inch high-resolution color display on this Lowrance fish finder GPS combo is a popular feature, but there are many other points about this model to watch for. The Lowrance Hook-5 makes the perfect combination among the benefits of CHIRP sonar and down scan imaging technology to show us the clear and perfect underwater view.
ASP (Advanced Signal Processing) helps to see the fish, bottom structures, and environment beneath the boat more clearly. Manual adjustment for the bottom view is not always necessary.
This super-machine with a built-in GPS antenna plus the detailed U.S. is pretty accurate. More than 3000 lakes, rivers, and coastal contours to 1,000 feet in a map featuring are really brilliant and precise. It has options for Americas chart upgrade and global chart upgrade.
The Hook-5 gives us excellent target separation and super noise rejection which make the fishing easier and more entertaining.
Pros
- Easy to install and handle
- Excellent sonar sensitivity
- Good noise rejection
- Advanced signal processing (ASP)
- It’s a complete machine that comes with all (transducer, MSD/SD card, mounting system, etc.)
- Can be connected to a smartphone or tablet.
Cons
- The power cable is short.
- The transducer mount height is short.
Check Availability & Customer Reviews On Amazon
Simrad GO7 XSE Chartplotter and Fishfinder with TotalScan Transom Mount Transducer

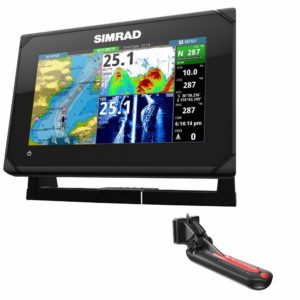
The main selling point of this Simrad fish finder is that it features the company’s TotalScan transducer. This model uses medium and high-range Chirp frequencies and high-definition imaging to find more items in the water.
Wi-Fi and Bluetooth connections are also supported so you can connect your fish finder to a mobile device. It also uses multiple mapping protocols including the Navionics and Insight options to help you track information on close and far items in a region.
The 7-inch display screen reveals information on everything in the local area that you are fishing in. Use the screen to get information on how the water is moving in an area, your boat speed, and the water temperature in a region.
The mapping setup lists points on water depth and changes in the waves around an area. You can even identify cases where the water is moving a little faster in certain areas, thus giving you more of an idea of what spots might be easier for you to fish around in.
Pros
- Flexible readout options help you find data in real time
- The 7-inch screen is easy to mount
- The display is customizable for most boating activities including sport boating
- Control system similar to what you would use on a tablet or smartphone
Cons
- Weighs quite a bit
- Takes a bit for Wi-Fi or Bluetooth signals to be produced
Check Availability & Customer Reviews On Amazon
Buying Guide
The functionality of different fish finders can make a world of difference. You have to see how well such a unit works so it is not all that hard for you to make it work and stay effective for your demands. After all, something that can handle both details on your location and where fish are is always worth having.
You will need to find a quality GPS fish finder if you are planning to head out onto the water. A great finding tool will help you with identifying where fish are in your local area. But even as you look for the best fish finder GPS unit, you will have to look around to see what choices are available and how they are made to be different from one another.
Each model on the market offers different features to help you with finding fish in any local area. You will have to watch for how well these tools operate and how you can get them to work for you in any situation.
The type of fish finder you get is critical to your success on the water. Some finders come with large screens while others are a little more compact. Some might work in very deep conditions.
Others have their own very specific points for how you can get them to start working or analyzing things under the water. You might even find a few models that come with Wi-Fi or Bluetooth support.
But no matter what you find on the market, you will surely come across a model that fits in with your particular needs. You will have to look at what is available and how well different products can work for what you want to get out of the water.
The variety of products you can find for your demands is worth checking out thanks to how well these fish finders are organized and how effective they can be for your general efforts.
There are a few useful points that can be used when you are trying to get the exact fish finder GPS combo that you can utilize.
You should look carefully at what you can find when getting a good fish finder that you know fits in with your needs for finding where you are and for getting information on the fish that are located in your area.
These points for finding a good GPS fish finder are vital to see when finding something intriguing and ideal.
Some of the best marine VHF radios come with GPS functionality which may be important for our readers and for water activity lovers.
Watch The Transducer
The transducer that will go onto the bottom part of the boat is important to see. The concern though is that not all fish finders come with their own transducers. This does not mean that a fish finder cannot work well without a transducer.
Even the main unit you get can still work by producing its own signals into the water. But you would have to watch carefully for how well a transducer might produce stronger signals.
The transducer should be made with sturdy steel material so it does not break off quickly. Plastic might be cheap and easy to set up, but it could also break apart fast if you are not careful enough with it. Also, a transducer should come with a body that can retract or fold off temporarily in the event it comes across any solid materials in the water.
See How Well You Can Adjust It
The fish finder with GPS models always come with plenty of frequencies. You should look at how well you are capable of adjusting your fish finder based on the frequency you want to use or how far the transducer will move. Anything that makes it easier for you to find what is out there is always worth having.
Physical adjustments are just as important. Look at how well you can tilt or turn the unit after you have mounted it onto your boat’s side. Anything that lets you position the finder without having to remove the base is always worth having in any situation.
Battery Power
Most of the fish finders you will come across require battery power for them to stay functional.
A good battery will provide you with enough energy for keeping the unit running for hours at a time. Sometimes the battery is rechargeable, but in most cases, it will simply use traditional disposable batteries that you will supply on your own.
Check on how such a fish finder might work for a longer trip you wish to take, but be sure to bring a good source of energy with you just to be safe.
Wattage Points
Review the wattage on your fish finder. This refers to the amount of power that the finder will get. This wattage is produced by the battery used on the inside. When there is greater wattage, the finder will respond faster and give you more detailed results in as little time as possible. But at the same time, a unit with a higher wattage total might take up far too much energy and battery power.
A good point to see entails measuring things based on every 100 watts of power based on the frequency you use. If you are using a fish finder at 50 kHz, you would read things about 400 feet deep for every 100 watts you use.
For a 200 kHz setting, you will read the water from 100 feet deep for every 100 watts. Be aware of this when figuring out how well the readout is laid out and that you have a good plan on hand for handling the unit.
Resolution
Although the screen on your fish finder could be large, it needs to come with a good resolution rating so it is not hard to see what is on the finder at a given time.
You must have a fish finder that is at least 240 x 160 pixels in resolution. This should give you enough pixels to help you distinguish between different items that your fish finder will identify.
But even with that, you should still at least look for something that produces readouts you can actually identify. You might need to get something with a better resolution level attached to it if you are unable to actually read what is being produced on the screen.
What Do You Want to Find?
Some fish finders are made exclusively to help you find fish and nothing else all that elaborate. Some other models come with features that let you find where the floor of a body of water is or any underwater plants. The type of underwater floor is simply helpful especially when we are thinking about how to anchor a boat properly.
You might want to stick with a fish finder that focuses on fish above all else if you just want to find them. Meanwhile, a more detailed fish finder that lists information on other items is best if you plan on going out to more advanced sites.
Review the Price Versus the Boat
It might be better for you to buy a cheaper fish finder if you have a smaller boat or a kayak to work with. The more high-end options, particularly the larger choices, are best if you have big vessels that cost a little more.
The key is to avoid getting something that might be too massive or otherwise offers more features than what you might actually be comfortable with.
How Big Should the Fish Finder Screen Be?
Naturally, you would want to find a fish finder with a screen that is easy to read. You should only look for a model that is not overly complicated or hard to follow through.
The screen should have a convenient design with enough overlays or sections that you can quickly distinguish from one another.
Map Functionality
Some fish finders work with outside map programs that let you program different routes, waypoints, and other features. A few come with controls where you can save particular spots on the GPS layout in real time.
But when looking at the map functionality, you should see that you can get all your map data points linked up to a microSD card or something else you can use for getting your data secured properly.
Check on the Installation Point
You should be able to install the fish finder you get just well enough. A quality fish finder has to be easy to affix onto the bottom of your boat for the best results. You can always use a clamp or other series of fasteners depending on the model you use.
But regardless of what you have, watch for how the wires are utilized. The wires that go from the monitor to the transducer should be easy to link up and use. Anything that can link to the body of your boat without hanging off or possibly getting loose or caught in something is always worth using.
Brands to Consider
You can find many good brands when looking for a quality fish finder. These include Garmin, Humminbird, and Lowrance.
Garmin has been a popular name over the years thanks to how it offers quality GPS devices. Garmin combines both the features of a fish finder with a GPS unit to help you find fish in even the toughest spaces.
The setups that Garmin offer even let you save many routes, waypoints, or other spots that might be valuable to you. These include some places that you might want to return back to depending on how your trip is moving along and if you can find fish in certain spaces.
Humminbird is a company that has been producing quality fishing maps for years. These include maps that are produced through GPS signals. These maps can combine well with a fish finder tool from the company to help you with finding fish in the right spots.
Many of the models Humminbird makes include options that let you find fish in larger spaces. The setups that Humminbird uses for getting its devices organized are all worth looking into for when you need help with getting around any large lake in the United States or Canada.
Lowrance offers marine and fishing electronics with a focus on sonar devices. The company has been in operation since the 1950s and continues to be a trusted provider of quality marine and fishing units for all kinds of purposes. The designs that Lowrance offers for various fishing needs are worth looking for.
Weight
The overall weight of your fish finder should be checked well. A typical finder should weigh about two or three pounds on average. This is the combined weight for both the receiver and the transducer.
Cable Length
The cables on your fish finder should be a few feet in length if possible. Check on how long the wires are versus the size of your boat so you have an appropriate layout to work with.
Can It Resist Water?
Your fish finder should be able to resist water and wind among other threats. The housing needs to come with a secure and watertight body to keep moisture from moving into its circuits. This is to keep the unit from being too hard to utilize.
It is even more important for the fish finder to protect a microSD card that you might add to its body. A good cover can go over the card slot, thus keeping the card from being exposed and it will save the card from the possible risk of harm from excess water among other threats that might get into your unit.
Display
Color displays are used on a majority of fish finders. A color display is perfect for how it offers a convenient layout that lets you identify many things inside the water. You can use this to find warm and cold temperatures based on the plants, fish, or other items that might be found in a certain space.
Varying shades of blue might also help you identify how deep the water is or how it might be changing in how fast it is moving or what its temperature might be like. Every piece of information is important for the fishing plan. Our winter fishing tips can be a field of interest for many.
This does not mean that a black and white screen is not good enough. You can always use a black and white screen to see what is in an area while reviewing the intensity of each tone to see what is near or what might be moving. This would require a little more concentration for finding something, but it at least works quite well.
Button Controls
The button controls you can use on one of these units should be explored well. A great layout should come with a body where the buttons are easy to distinguish and give you enough of a control setup for making it easier for you to get something to work right.
Loading Times
The loading time on a fish finder should be explored based on how long it would take for the finder to identify where the fish in a spot might be located.
In particular, the loading time can be around a few seconds on average. This should be enough to give you an accurate layout without forcing you to wait for longer than what you can afford to.
Frequently Asked Questions
What causes one of these fish finders to produce its readouts?
A combination of a transmitter and transducer is required to get your fish finder to work. A transmitter is the monitor or another head item you will use while the transducer is a material that goes into the water and is mounted onto the bottom part of the boat.
The transducer will produce signals that move into the water and will identify the echoes that come back as data for what is inside the water.
What frequency should be used?
The frequency that a good fish finder GPS machine can handle should be something that fits in depending on the specific space you want to go fishing in. You will need a 50 kHz frequency if you are going out to a deeper body of water. 200 kHz is best when finding something in shallow spots. The 83 kHz frequency option typically works in the middle.
A higher frequency of around 200 kHz works best when you are inland or in freshwater conditions. It is also suitable for lure tracking.
The 83 kHz setup or something around that works when you are in a larger or more wide-open space. It is not as detailed, but it does give you a better range of view for finding fish.
The lowest 50 kHz frequency is for when you are in deeper spots. This is especially when you are in waters more than a thousand feet deep. A low-frequency setup will identify more items deeper in the water and may work for darker conditions or for saltwater among other cloudy spaces.
What is the Chirp Sonar Feature?
Compressed High-Intensity Radiated Pulse or Chirp sonar is a popular modern choice to look into when finding the perfect GPS fishfinder combo. This uses signals with varying levels of frequencies.
The pulses produced by the sonar are also a little longer in length. This is a desired feature to find in fish finders because it produces clearer signals that are a little more distinguishable and easy to figure out.
How deep does the finder have to get into the water for it to work?
You don’t necessarily need to get one of these fish finders to go far too deep into the water for it to work. You just need to get it supported on the bottom of your boat. It can stick out by a few inches or maybe even a foot.
All you need is enough of a protruding spot to allow the finder to see things in a local area while allowing its waves to move around many spots.
Does the software on your fish finder have to be updated?
Some fish finder models come with software programs that can be updated. These are often updated based on map settings and for any new upgrades that may be utilized.
Although you do not have to necessarily link your fish finder up to a computer to update its software, it does help to at least do it a few times here and there. This is to provide you with a better experience through a stable software program that is easy to utilize.
Can you adjust the speed of your transducer?
Many fish finder models let you adjust the speed of the transducer to let it move a little slower or faster. That is, it rotates at a different speed to produce varying sonar signals.
It is best to turn it to a slower speed when you are looking for larger pools of fish. It can be faster when you zero in on an area where the fish might actually be at. Review the settings on your transducer to see how it works.
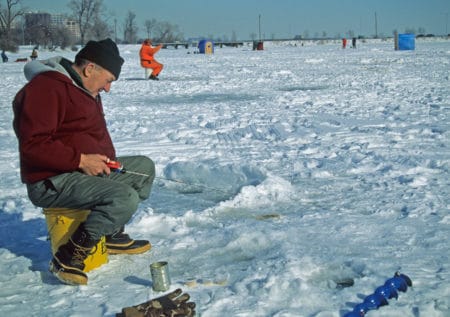
How cold can the water be when using your fish finder GPS Combo?
Every fish finder is different in terms of how cold the water can be when you are trying to find fish through it. You must look at how well the fish finder can work based on how chilled the water might be. The good news is that many fish finders are made to work even for ice fishing considerations.
Remember that a fish finder should come with a readout that includes details on how cold the water in a spot is. The temperature readout can help you see what the conditions are like so you have an idea of whether the fish might be dormant in a spot or not. Remember that lots of fish will not move around all that much when the temperatures are too cold.
Can you add the transducer into the water when ice fishing without having to use a boat?
You have the option to cut a hole into a sheet of ice and then inserting the transducer into that hole while the main readout sticks out from above the ice.
But you would have to watch carefully as the wires for the transducer might be small. Also, you would have to use a fish finder that can actually handle the cold temperatures in a spot.
Can anything get in the way of a GPS readout?
It is very easy for a GPS unit to read the information on what is in the water at a given time. But you might want to watch for how well that GPS unit can target satellites in space.
Anything that covers over the GPS unit will keep you from getting an accurate readout. The GPS sensor must have a clear view of the sky if it is going to work well enough.
Will a fish finder assist you with finding certain patterns?
A great fish finder will have a readout setup that lets you identify items within a few inches apart from one another. This is vital when you are trying to find schools of fish or other sizeable groupings.
You can even use this to see if there is a certain formation that the fish might be trying to enter into. You might see the fish getting into an attack formation or just in a form where they are going to move at a consistent speed.
Is an after-market transducer best?
Although the transducer that comes with your fish finder might work well for you, it never hurts to see if an after-market model might work a little better for you.
An after-market transducer might offer a faster readout and can work with more area in a spot. It could also work in more water conditions, particularly in colder or warmer spots.
You would have to look at how well an after-market model is capable of getting onto your fish finder though. It should come with enough wires that can link up to your finder and create a consistent connection.
Anything that can connect well without creating any loose wires that could easily come apart is always worth having.
Conclusion
You will need to look around to see what is available when you are trying to get the best fish finder GPS combo for your use. A great model can help you with not only seeing where you are but also with finding fish in any spot.
The things that can be found in one of these fish finders are diverse and can help you with finding fish in deep and shallow conditions alike. Make sure when finding one of these units that you have a choice that fits in well with your efforts or plans for fishing the right way.
Don’t forget to look at how well the fish finder is designed and that you have something that you can control. The versatility of a fish finder is appealing, but it should also be something that you can quickly adjust and control on your own.