How to Paint a Boat? Aluminum or Fiberglass

Do you want your boat always to look stunning as though as it’s new? If that’s the case, then you need not overlook the significance of applying fresh paint. Here’s an exhaustive guide on everything you need to know about how to paint a boat. And while applying paint might seem like a tedious task, it’s relatively easy.

How to Paint a Boat Fiberglass or Aluminum

All you need are some simple guidelines on the steps to follow while painting your boat, and in no time, it will be looking as good as new. If you’re prepared to undertake this process but don’t know where to start, you’ve come to the right place. With this, you’ll be in a great position to restore your boat to an excellent condition in no time.

10 Steps To Follow When Painting Your Boat

Painting your boat is a step-by-step process. You must follow all these steps correctly to ensure your boat’s look doesn’t get ruined altogether.

Here are the 10 steps to follow for painting a boat:

  1. Gather the tools and materials
  2. Prep your boat
  3. Clean your boat
  4. Remove all the hardware
  5. Remove the wax coating
  6. Mark the area you intend to paint
  7. Scrape off the peeling paint
  8. Sand your boat 
  9. Paint the boat
  10. Remove the painter’s tape

Gather The Tools And Materials

Before you can start painting your boat, make sure you have some useful tools and materials, including;

  • Putty knife
  • Mask
  • Paintbrush
  • Primer
  • Tape
  • Protective glasses
  • Paint roller
  • Epoxy filler
  • Dewaxing solvent
  • Rag or tack cloth
  • 80 to 120 grit sandpaper
  • Finishing sander or random orbital sander
  • Boat bottom paint
  • Topside boat paint

Once all these items are assembled, you can now embark on your boat painting journey, and here’s an overview of the steps to follow.

Prep Your Boat

This is undoubtedly the most vital part of the cleaning of your boat. Because of this, you need to take your time, and here are some of the activities that will be involved when doing all this.

Clean Your Boat

The first thing to do is thoroughly cleaning your boat. It’s best to do this immediately once you’ve taken your boat out of water because, at this point, it’s a lot easier to clean. And when doing the cleaning, make sure to use a high-pressure hose or wash together with rags and a scraper.

Once you’re almost done cleaning your boat, make sure to rinse it thoroughly and ensure no soap is left on your boat. And after a thorough cleaning job, you can be sure that sand, dirt, or hard growth won’t interfere with you achieving a clean paint job. How to clean a boat hull is a cleaning related article that could be helpful for you.

Remove All the Hardware

You must take out as much as possible to achieve a clean and smooth paint job. And although this might be time-consuming, it’s the only way to guarantee that your paint job efforts don’t go to waste. This step entails removing all the aluminum siding on your boat, but if there are hardware pieces that completely don’t come off, place a painter’s tape over them.

It’s essential to make sure that all the hardware has been removed because the paint will be on the boat’s hardware piece. As a result, this paint is more likely to allow debris and water to penetrate, which makes it start cracking over time.

Due to this peeling off paint and flaking, another paint job will be necessary, which is expensive and time-consuming. Therefore, you should avoid such possible issues in the future by thoroughly removing all the hardware from your boat’s surface.

Remove the Wax Coating

Paint or primer doesn’t stick to the wax. And because almost every boat comes applied with a wax finish, it’s essential to make sure it’s removed before applying the paint to avoid possible issues. If unsure whether your boat has a wax finishing, run your finger along the boat’s surface for a definitive answer.

When removing the wax coating, you need to use boat solvents. And as you do this, make sure to apply some pressure when using the coarse sponges to ensure all the boat’s wax has been removed. This might take your time, but you should only proceed once you feel no boat wax is left on the boat.

Mark the Area You Intend to Paint

It’s critical to identify the area that needs painting. This means inspecting dings, dents, and any other area where the paint is peeling or flaking. Once you’ve identified these spots, go ahead and mark each of them using a tiny piece of tape to make it easier for you to pick out the areas which you should address.

Scrape off the Peeling Paint

Once water and air find their way between the boat’s surface and paint, it causes the paint to start peeling. And this will continue happening even after you’ve applied a fresh coat of paint or primer. If you don’t want to waste your time and efforts, start by scraping off the boat’s paint. By removing all the peeling paint, you’ll be able to make sure it’s spread uniformly and well-adhered.

When the paint you’re applying differs from that of your boat, you need to scrub and sand off the entire pre-existing paint. You should do this using a sharp-putty knife and, while doing this, confirm the knife’s edge is parallel to your boat’s surface. By doing this, you avoid cutting the boat’s surface and making new dents, which is more work.

Sand Your Boat

Get 80-grit sandpaper and start sanding the whole boat surface. Doing this is essential since it improves the paint’s grip on the surface and facilitates the uniform coat of paint. When sanding your boat, there are crucial things you need to observe, including;

  • Never use a belt sander on the boat.
  • Completely stripping off the old damaged or flaky paint entirely.
  • Wearing eye protection and a respirator while sanding due to safeguard yourself from the toxic paint chops.

Paint Your Boat

The next to do after prepping and priming your boat is the paint job. Here’s an outline of the steps you should follow when painting your boat.

  • Use a rag to wipe your boat: You need to wipe away any loose dirt or dust that’s accumulated on the boat’s surface using a tack cloth after the primer dries.
  • Tape your boat’s edges: After wiping down the whole area, go ahead and tape along the boat’s edge of the topside and the waterline. And as you do this, always make sure to be using a long-mask tape. It’s advisable also to consider antifouling or to cover the region underneath your boat.
  • Go through the manufacturer’s paint guidelines: There are different kinds of topside boat paints. Therefore, it’s essential to review the manufacturer’s paint instructions before you can start to paint. Doing this is crucial since certain paints have specific mixing instructions while others need thinner. Thus, it’s evident that you need to always adhere to the manufacture’s guidelines before you can begin applying the fresh coat of paint.
  • Apply the first paint coat: Feel free to start applying the fresh paint after mixing the paints as advised by the manufacturer’s manual. You can choose to either apply the paint by brushing or rolling the topside coat, but first read the manufacturer’s manual to see if they recommend it.

When brushing or rolling vertically to the waterline, first ensure to start with a small area and take shorter strokes. And while rolling or brushing the paint, make sure to do this parallel to the finish’s waterline. Once you’re done, give the paint time to dry and then go ahead to other needed coats as advised in the manufacturer manual.

Remove the Tape

You should start taking out the tapes before drying the last coat of paint. Doing this is essential because leaving the final coat of paint to dry increases the chances of the paint to peel together with tape. Due to this, you’ll need to start the prepping and painting of your boat again.

Do You Have To Sand A Boat Before Painting?

Yes, sanding your boat before you start painting is a must. Doing this necessary to remove all the old coat of paint that might have flakes or loose material after water or air found its way underneath. 

If you don’t sand this surface before applying the fresh coat of paint, this loose material will remain on the boat’s surface. And over time, this will result in it starting to peel off slightly, meaning your hard-earned money and efforts painting the boat all go to waste.

Therefore, you must never skip this step if you’re committed to ensuring your boat gets to retain its impeccable look once you’re done painting it.

How Do You Paint A Boat Hull

One part of your boat that needs to be extreme care of when painting the boat hull. If you don’t observe this, the paint will start to peel off quickly, wasting your money and efforts. The steps to follow when painting the boat hull are;

  • Use a sponge to apply an industrial solvent to the surface of the boat hull
  • Clean the boat hull using power sand to get rid of old paint remains
  • Fix any existing flaws in the hull before using a roller to apply the primer
  • Use a painting brush and roller to apply the marine paint layer
  • Give the paint a few hours to dry

How Do You Paint The Boat Bottom

The area underneath your boat gest exposed to water and different organisms and growth. Because of this, it’s necessary to use different paint to that used when painting the boat’s top parts.

The paint to use when applying the areas under your boat have biocide, which is a type of copper that fades away over time. This boat bottom paint is essential in preventing barnacles as well as marine growth.

How To Paint A Boat Bottom

Here’s an outline of the steps to follow when painting your boat bottom:

  • Select the desired bottom paint: Due to the broad range of paints to apply underneath your boat, it can be confusing to pick the ideal choice. The main factor to consider when picking the most suitable one is identifying the region or climate you’ll use your boat.
  • Prepare and sand your boat: Like painting your boat’s topside, preparation, before you start painting the bottom side is essential. This entails removing all the peeled or loose old paint if your boat was already painted. If the bottom area wasn’t painted, there’s an additional step to follow, and for Hydro coat, this means applying 92 Bio-Blue Hull Surface Prep. However, this process differs from the painting product, so you need to go through the manufacturer’s instructions.

You should also sand your boat before applying the fresh coat of paint regardless of whether it had paint or not.

  • Apply the paint: Once you’ve adequately mixed the paint; go right ahead and apply it on your boat. And as you do this, make sure to continually stir it because some of the ingredients, such as cuprous oxide, usually settle on the container’s base.

How to Paint the Boat Deck?

You’re required to mask off the boat’s bottom part with an extreme care deck before painting it. When doing this, you should ideally use a 3M masking tape, which is the preferred option by many boat owners.

After you’re done, go ahead and using a solvent to get rid of all traces of dust and dirt on your boat. You should then thoroughly mix the paint using a high-nap roller. Once you’re through, please take off the paint and give it one to two days to dry.

What Kind of Paint Do You Use on a Fiberglass Boat?

There are three different types of paint you can choose to apply to your fiberglass boat. This includes;

  • Two-part polyurethane paints: If you want the best quality paint for your fiberglass boat, look no further. The two-part polyurethane paint looks the best and lasts for the longest period ensuring your boat retains its appeal. Nonetheless, their application is labor-intensive because they need specific humidity levels and exact temperatures to mix the primer. Also, they’re costly.
  • Single-part enamel paints: If you’re on a budget and searching for the best value, look no further since this paint offers you just that as it’s affordable. It’s also easy to apply. With that said, it has some downsides, including the constant need to be maintained and waxed due to its fragility when exposed to UV rays, which destroy its gloss over time.
  • Single-part polyurethane paints: These paints guarantee to last for long and are cheaper than the two-part polyurethane paints; this is the perfect pick. Due to their long-lasting gloss and affordability, they have become a popular choice for fiberglass boat owners.

How to Paint a Fiberglass Boat

There’s isn’t a lot that differs in how you paint a wooden and fiberglass boat apart from several details during prepping and application and the kind of paint used.

And for the best outcome, spray paint must be used instead of a roller or brush and for this task to be done by a professional. With that said, you can still paint your fiberglass boat, but you need to maintain extreme caution throughout this entire process.

The steps to follow when painting your fiberglass boat are;

  • Inspect the boat’s hull to see whether there are any holes or cracks and use putty to do these repairs. And while doing this, you also need to sand your boat to remove any rubber or silicone caulking and old stripes of vinyl graphics.
  • Apply a layer of epoxy to strengthen and safeguard the boat’s fiberglass surface.
  • Apply a primer layer and give it time to dry before sanding the surface.
  • Start applying ablative anti-fouling paint on your fiberglass boat.

How to Paint an Aluminum Boat

The popularity of aluminum boats has slowly been on the rise because they’re fun exploring water and inexpensive. But to best enjoy using this boat, you need to properly look after it to ensure it remains in excellent conditions, and this includes repainting it with a good aluminum boat paint after some time.

How to Paint an Aluminum Boat

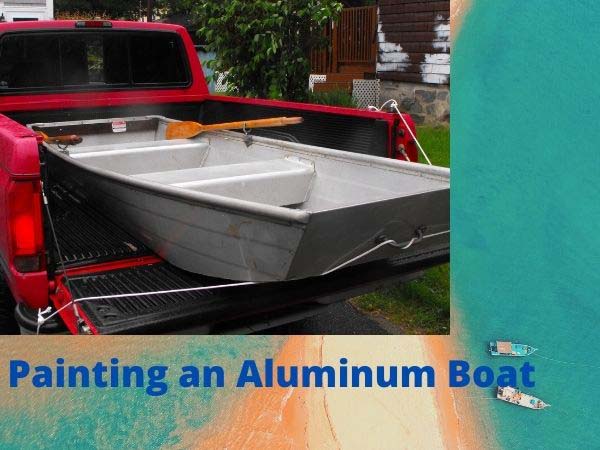
The steps to follow when repainting it include;

  • Apply the paint stripper to help ease the hassle of removing the old paint on your aluminum boat.
  • Sand your boat to remove all the imperfections that might be on the surface. You can start by using 220-grit sandpaper and advance to achieve your wished polish level.
  • Thoroughly wash your boat using mild soap and water to remove all the dirt and dust. Once you’re done, make sure to rinse your boat correctly.
  • Proceed to apply the primer coat.
  • Once the primer dries, go ahead and paint at least two layers of aluminum coat.
  • Proceed to apply a clear protective coat once you’re done with the painting. This prevents scratches and ensures the paint remains undamaged.

Let’s Watch A Video On How to Paint An Aluminum Boat

Applying Non-skid Paint for Boat

The application of non-skid paint is essential to give it additional protection and ensure the boat doesn’t slip easily. But before doing this, you need to start by picking the right paint to apply to your boat. Here’s an outline of the different ways to apply non-skid paint on your boat;

  • Broadcast the powder using your hands all over the boat’s surface.
  • Stir the powder in the paint and then proceed to apply it. This technique is somewhat complicated because you’ll need to make sure the powder doesn’t bunch up when pressure is placed under the brush or roller, resulting in an irregular effect.
  • Drill several 3mm holes onto a plastic container on the lid and start using the container as a big pepper shaker. Do this until the entire surface gets covered with a powder layer.

What to See When Selecting a Boat Paint?

It can be quite confusing to decide which boat paint to pick with many options on the market. But to know which boat paint best suits you, there are a few useful tips to consider, including;

  • Identify the area on your boat that needs to be finished.
  • Determine the types of look you want your boat to have once you’re through painting it.
  • The manufacturer of the paint, primer, and every other compound needed. You should ideally use products from one manufacturer.

How Long Does Boat Paint Last?

How long does your boat paint last? The fresh coat of paint you’ve applied will inevitably start wearing off due to exposure to the harsh environmental elements.

You’ll start to notice the paint of your boat scrapping or peeling after four to five years. It really depends on your boat type, paint quality, use of the boat, type of water, boat storage, etc. And there are a couple of signs you need to be on the lookout for, including;

  • Peeling of paint on specific areas of your boat.
  • Craters resembling the look of a moonscape on the boat’s surface.
  • Blisters on the surface of your boat are caused by water getting trapped underneath the paint bubble.

How Much Does It Cost to Paint or Repaint a Boat?

The cost you incur painting your boat depends on a couple of factors, including;

  • The boat’s size
  • Difficulty painting the boat
  • The kind of materials needed
  • The degree of repairs necessary

If you decide to do the painting job by yourself, be ready to spend about $1,500. However, the average cost you’ll spend if you choose to hire a professional will range between $2,500 to $3,500 or more. And while you might be tempted to paint your boat on your own, it’s crucial to factor in various factors such as the energy, how challenging this is, and how much money you’ll spend.

How Long Does It Take to Paint a Boat?

The duration you take to finish painting your boat ranges between two to four days. How long this should take you also depends on your boat’s size and whether you encounter any interruptions when painting your boat, such as rain. But if everything goes smoothly, you shouldn’t take more than four days to be done painting your boat.

Conclusion

The process of how to paint a boat is one that many boat enthusiasts are always eager to know. If you also wanted insight on how to go about all this, reading this in-depth guide has been of great help. With these insights, you can now go ahead and paint your boat and ensure it remains in superb condition.

Lowrance Elite-7 Ti2 Review For Professionals

Over recent decades, technology has revolutionized the fishing landscape, making fishing sessions more effective, easier, and highly productive. The Lowrance Elite-7 Ti2 review will introduce you to one of the stellar gadgets that have made fishing easier and exhilarating. With cutting-edge technology, this gadget helps you to locate the best fishing grounds and find fish to reel in.

Lowrance Elite 7 Ti2 Review

Imagine a fish-finding device that promises not only to pinpoint where the schools of fish are but also comes with digitally integrated maps of various lakes, that can help you chart your way to higher potential areas with minimal ease.

No longer do you have to rack your head, trying to determine where to let down your net or bait. You can now get top-notch quality displays of fish within their hideouts in underwater drop-offs, ledges, and rapids up to 30 feet deep.

Well, this and more has been made possible with Lowrance Elite 7 Ti2, renowned and trusted fish-finding product manufacturer when it comes to deep-sea and shallow water fishing. Let’s dive right into this review.

Check Availability & Customer Reviews On Amazon

Features of Lowrance Elite 7 Ti2

1. Active Imaging

This gadget boasts of a formidable 3 in 1 transducer that enables CHIRP, side imaging, and down imaging.

CHIRP is the short form for Compressed High-Intensity Radiated Pulse. This technology operates by radiating a range of frequencies of varying strengths continuously. These frequencies are then translated into electrical energy forms and signals.

The immense data gathered is interpreted and displayed in clear cut images and details on the display screen.

Lowrance Elite 7 Ti2 Fish Finder Chartplotter Screen

Check Availability & Customer Reviews On Amazon

Some of the information displayed will include: high potential fish breeding grounds, how deep they are located, water temperature, ground speed, nearby vessels, and objects.

This helps you become more aware of your fishing environment and where you will set up for a ‘guaranteed’ catch. When you go for catching big fish or for finding a school of fish, This fish finder really works.

The 3 in 1 transducer has had a ground-breaking effect compared to its predecessors. Broadband sonars of the past only released single frequencies and thus the amount of data collected and information interpreted was limited. Previous units also only afforded limited imaging.

2. Genesis Live

This is another revolutionary piece that enables its users to update the mapping of their fishing spot and also map unmapped areas. Genesis Live allows you to take advantage of an ever-changing fishing site landscape.

Lowrance elite7 Ti2 Real Time Mapping

It appreciates that the best fishing grounds are not cast in stone and thus with further input of information, it can update the map to mirror the latest trends.

The movement of schools of fish is primarily determined by the depth of water and speed of the current. As these two determinants continuously change in various seasons and times of the year, so does the fish change their ‘breeding grounds’.

The Genesis Live helps you to be abreast with the changes at the given time of the year and thus have more productive fishing exploits.

3. Real-time Map Creation

While fishing, the Lowrance Elite 7 Ti2 continuously maps out your path and placement. This real-time map creation works hand in hand with the Genesis Live feature to ensure the maps developed are accurate and up to date. You are never left guessing.

4. Wireless Networking

The Lowrance Elite 7 Ti2 enables wireless sharing between elite Ti2 screens. This makes it easier to share fish routes, sonars, and maps as no cables are required to connect the devices.

This is especially helpful when fishing as a team in two or more boats or where you have two or more Lowrance gadgets on deck. The sharing is seamless and fast. There are little to no buffering hiccups and delays experienced.

The device also allows you to access your messages and see who is calling once connected with your phone or tablet device. However, the networking does not allow you to share your elite Ti2 screen with your tablet or phone.

5. Pre-loaded C-MAP for Inland Mapping (US)

The preloaded C-Map includes an astounding 4,000 lakes with 1-foot contours. These master maps make it easier when you go fishing on ‘new terrain’ and don’t quite know where to start. The lakes are map out in great detail, giving you all the information you may need to fish.

6. Excellent Display Technology

This Lowrance Elite gadget has a wide 7-inch SolarMax display that offers unmatched great clarity. With its high-resolution display, you get the see the vivid detail of water columns and schools of fish in the fishing ground.

Additionally, the gadget has great target separation. It helps you identify fish from covers the muddy bottom and other innate objects nearby your fishing site. You can also easily see your bait, sinker, and fish making the experience lively.

Who Can Use This Product?

This product is available for all who would want to have more fulfilling and productive fishing times. The young, the old, the pros, and the beginners.

The gadget has a pre-loaded C-Map for the majority of the US lakes, making it ideal for US citizens. However, if you are not in the US, maps for your local geography can be easily obtained by purchase from Navico.

Also, further updates of the Lowrance Elite Ti2 series incorporate additional (non-US) maps which you can change in the settings.

With all these amazing features, here is a quick list of the pros and cons of the Lowrance Elite 7 Ti2.

Pros

  • Excellent use of CHIRP technology
  • Additional detail such as water temperature and ground speed are included.
  • Easy to use user interface
  • Easy to integrate with a power pole or trolling motor
  • Great WIFI connectivity which allows you to easily download updated software
  • Faster Map refresh rate once updated
  • Wireless links between two same screens to share data
  • Does not greatly differ in functionality and structure from other earlier Lowrance Elite Ti2 models, making it easy to learn to operate
  • Fish reveal Smart Target view- this feature helps distinguish fish from other structures and cover.

Cons

  • Need to buy the right map for your area from Navionics or download some free maps from C-Map Genesis (if no pre-loaded C-Map for your area exists)
  • Occasional sonar 0.0.0. failure in some units rendering the entire gadget non-operational.

The Best Setting for Lowrance Elite 7 Ti2

Many individuals prefer various settings depending on their current fishing needs. It is therefore prudent to play around with the settings to see what is conducive for you.

However, the gadget delivers great results in its highest possible setting. In most cases, this includes, the highest possible frequency and the appropriate range.

If you would like to try out this setting, on the Menu Button on the screen set the:

  • Contrast at Auto
  • The frequency at 800Hz. This frequency setting gives you the highest possible resolution without limiting your range options.
  • Range – choose the 1st or 2nd level for greater details.

Choose a range that allows you to see the necessary details on the screen. If you pick an extremely wide range setting, you may not be able to see the fish and other objects floating nearby or close to your vessel

Frequently Asked Questions

Some of the popular questions about this device are here.

1. Does the gadget have a Chart Plotter?

Yes, the Lowrance Elite 7 Ti2 has an inbuilt chart plotter system.

2. Is the 3 in 1 transducer is compatible with carbon units?

Yes, the 3 – in 1 transducer is compatible with carbon units. To reap the best results update your unit to the latest software and buy the 3-in 1 active imaging transducer. Plug it in and play

3. What is the difference between a 2 in 1 transducer and 3 in 1 transducer?

A 2 in 1 transducer only provides side imaging and downward imaging, whereas a 3-in 1 transducer provides both side imaging, down imaging, and CHIRP active imaging.

4. What is the capacity of the transducer?

The 3 in 1 transducer supports medium and High CHIRP (83/200kHz) + 455/800kHz frequencies

What do people say about the product?

The product has done astoundingly well in the market with many of its customers giving it 5-star reviews. A particular review from a satisfied customer read ‘…what was I doing all this while?…’ and moved to explain all the benefits he had amassed from using the product.

However, some complained of the sonar 0.0.0. failure and defective unit head. Some even said the units are not as ‘quality’ as they used to be because of the same.

Lowrance Elite-7 Ti2 Update

Several other Elite Ti2 hardware upgrades have been released such as the Lowrance Elite 9 Ti2. This device not only has a 9-inch screen interface but has superior quality touch screen features and is not Geo Fenced.

UK citizens such as those from Canada can now access maps by utilizing the map setting Navico US/Can Nav+.

The company also releases software updates which are accessible through the app or can be downloaded online from their website.

Alternative Options

Other competitively priced devices that can serve as alternative options include:

Conclusion

Lowrance Co. has done it again, proving their expertise and efficiency in developing this product. The gadget is a worthy investment, given its superior features and quality outlook.

Check Availability & Customer Reviews On Amazon 

Motorguide xi5 Review With Pros & Cons

A trolling motor plays a vital role in boating, fishing even for kayaks. The Motorguide Xi5 Trolling Motor review will let you know everything about the Motorguide Xi series. However, it offers some reliable features compared to similar Trolling Motors on the market, and it’s quite efficient.

Something that makes this motor unique is the fact that it comes with plenty of power, varieties, and excellent features like the sonar, and Pinpoint GPS, among many others. Salt water and fresh water options make the motor a complete one.

Check Availability & Customer Reviews On Amazon

What is Included in the Product?

The good thing about the Motorguide Xi5 is that it includes plenty of useful features that make it easier to use and value for your money. The first thing you need to realize is that it enables you to choose between the thrusts, power options, and sizes. The GPS feature also included in the Motorguide has great digital technology to maximize battery life.

With the GPS on the Motorguide Xi5, you can easily set the course or anchor mode. You can also mount the hardware.

Features of the Motorguide Xi5

As mentioned earlier, the Motorguide Xi5 includes a lot of useful features, which we are going to highlight below. Check them out.

Thrust, Power & Size

When it comes to power, you can highly count on the Motorguide Xi5. Another thing is that it offers a variety of thrust and size options to choose from. It has 3 power options to choose from, and they include the 12V, 24V, and the 36V.

Keep in mind that every voltage is directly related to thrust. The thrusts include the 55 pound, 80 pound, and 105 pounds thrust motor. When it comes to choosing the motor’s thrust, you need to consider the size and weight of your boat. However, there’s also the alternative option of considering the voltage of the motor system in your boat.

There are also 5 different shaft lengths included for you to choose from. These shaft lengths range from 45-72 inches. Therefore, this provides you with an opportunity to select the one that is suitable depending on the size of your boat. You also have to consider the depth of the water where you will be fishing.

The power variations and peak thrust of the Motorguide Xi5 Trolling Motor are quite strong and have the ability to withstand strong winds and currents, to help you get to the destination without much strain. However, it is highly recommended to consider using the 36V-105 pounds thrust if you happen to go out fishing in areas with strong currents.

Durability and Guarantee

The Motorguide Xi5 is quite durable, since all the parts of this Trolling Motor are designed with high-quality material made to last longer. The shaft is made with composite material that can withstand hard hits.

That means the Xi5 has the capacity and strength to fight tough currents or hit various obstacles without experiencing any crack or breakage. Its high level of durability makes it worth the price it’s being sold at.

What’s more, it has a composite that features a marine-grade design houses all the electronics and crucial components to prevent any dust or moisture, thereby providing another layer of protection for the trolling motor.

The durability and features of the Xi5 Trolling Motor provide users with the guarantee of a high-quality product and efficiency.

Mount

The Motorguide Xi5 comes with a low profile mount that helps to reduce the bulkiness included in the trolling motor. This makes it easier for you to use the motor without the need to sacrifice on the power, stability, and speed.

Motorguide Xi5 Mount

Battery

Since this is an electric Motorguide, it is essential to consider its battery life so that you can be on the safe side. The Motorguide Xi5 has impressive power and durability. You can use the 105 amp hour trolling motor batteries which are able to last for a few days after which you’ll have to recharge them.

The trolling motor also has digital technology that helps to increase the efficiency of the battery by up to 50 percent. Therefore, when the battery’s efficiency is increased, this contributes to an increased lifetime.

It also comes with a digital display that enables you to track the battery power, so that you can know when next you need to recharge it. This eliminates any future issues of breaking down or finding yourself stranded after the battery has died abruptly.

Display, GPS, and Steering Control

When it comes to the steering and navigating features, the Motorguide Xi5 has some advanced combination of bearing systems and a protective rigid and housing shaft that provide increased efficiency and performance.

Therefore, when steering heavily, you can rest assured that this motorguide will keep you safe and protected. It also comes with a speed system with user-friendly controls that make it easier to steer the boat.

There’s also an included wireless foot pedal that you can utilize for controlling most of the functions on the Xi5 trolling motor.

However, the Motorguide Xi5 lacks a display but it connects to a list of fishfinder plotters through the NEMA 2000 unit. You can find a many compatible units from Lowrance. However, you need a transducer for mounting the motor for the advanced sonar features.

The trolling also has a reliable LED display that shows when the power is ON or Off, and even the battery life.

Thanks to the included GPS, you can easily anchor your boat in the right position, track your courses properly, and lock in the heading and speed. When you lock in the heading and speed, you’ll have time to relax and let the trolling motor do the work for you. That means it has autopilot and cruise control features that help to make your work easier.

Sonar

The Xi5 trolling motor come just a standard built-in sonar transducer that you can easily connect to a fishfinder that is compatible with it. But, you’ll have to use a NEMA 2000 connector cable, although the good news is that it is compatible with most units.

It’s a pretty decent transducer and functions properly in terms of imaging, although it doesn’t do any side imaging. What makes it efficient is that it has an advanced system which is better than not having any sonar in your motorguide.

Configuration

When it comes to configuration, you need to have a bit of knowledge so that you can properly use the Xi5 trolling motor. First, you need to learn about the deployment and mounting a trolling motor as well as the GPS and sonar.

Pros of Motorguide Xi5 TM

  • Durable and able to withstand tough currents
  • Great control permits to fish anywhere
  • A really silent motor permits to move without noise
  • It has a sonar transducer that is compatible with many brands
  • Efficient battery
  • Various sizes and power options to choose from
  • User-friendly
  • Reliable LED indicators
  • Affordable

Cons of Motorguide Xi5 TM

  • The battery is affected by the anchor mode
  • Peak thrust models have a gap
  • Lack of side imaging in a sonar transducer
  • You need to have a NEMA unit 2000 for connecting with the fishfinder

Other Alternatives to Consider

There are also other alternatives to consider on the market. One of the alternatives of the Motorguide Xi5 is the Garmin Force Trolling Motor, which is quite new on the market although it offers so much efficiency. Coming from Garmin, a top-rated manufacturer, this trolling motor is compatible with most electronic devices, has excellent features, and it’s also quite affordable.

The second alternative is the Minn Kota Ulterra 80. This is a top-notch motor manufactured by an industry leader in electric trolling motors. It comes with an auto-deploy feature and there are many accessories of the Minn Kota products available on the market.

Where to Use the Motorguide Xi5 and Who Is It For?

When it comes to using the Motorguide Xi5, it all depends on the type that you decide to buy. There is the option of buying the fresh water Xi5 or the salt water Xi5. The most recommended one is the salt water version because it has extra corrosion resistance which makes it quite durable.

The Motorguide Xi5 is ideal for a serious fisherman, and since it comes in various sizes and offers different thrust options, it’s considered the perfect choice.

What Do People Say About the Motorguide Xi5?

Our Motorguide Xi5 review focused on almost every side of the motor, the public opinion is always important.

Most people are satisfied with the motor. They think that the Motorguide Xi5 is an efficient trolling motor that is ideal for a fisherman ready for some great work. It not only offers efficiency but also comes at an affordable price.

Frequently Asked Questions

1. Do you need to have a separate battery?

Definitely! Although it comes with 2AA batteries in the foot control, you still need to have extra batteries in the boat in case they go dead and you’ll have to change them.

2. How do I use the anchor feature and does one need to upgrade the motor once you buy it?

The anchor feature is included in the GPS version, while the non-GPS version can easily be upgraded with GPS to provide the anchor feature.

3. Is the quick release bracket important when using the Xi5?

Yes! The quick-release bracket comes with the outer and inner plates. The inner plate is bolted to the boat’s deck, while the outer plate is attached to the inner one, which helps to eliminate any noise during movement. This is why a quick-release bracket is crucial when using the Motorguide Xi5.

Conclusion

The Motorguide Xi5 is an affordable, efficient, and reliable trolling motor to use in both fresh and salt water areas. If you are a serious fisherman, then this is an ideal motor to consider using for your next fishing escapade.

Check Availability & Customer Reviews On Amazon

Exit mobile version