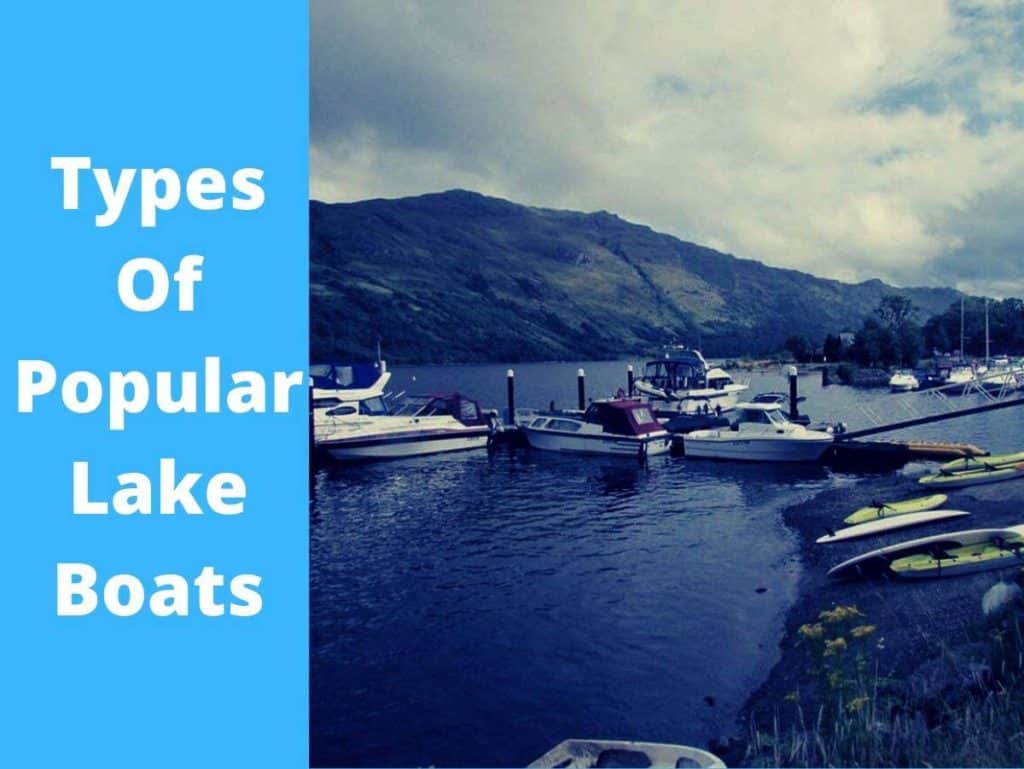
Are you searching for a boat to enjoy yourself on the lake? If so, the first thing you need to do is learning about the different types of lake boats to consider. This is vital because the wide variety of options might make it somewhat challenging for you to pick one that best suits your needs.
Types of Lake Boats
If you’ve been going through such a problem, worry no more. This article is a detailed guide on the type of lake boats you should consider buying. However, before deciding the kind of boat to buy, make sure first to consider the lake you intend to use your boat.
Moreover, you need to consider the type of boating activities you enjoy perfuming. With this in mind, here are the different types of boats you need to consider.
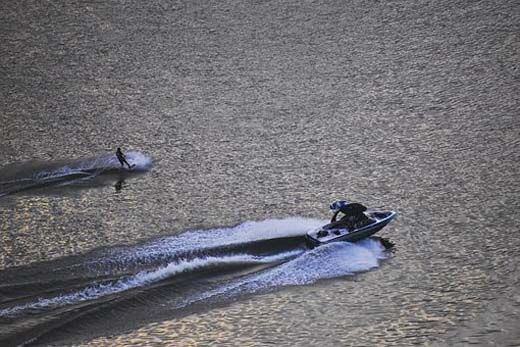
Ski and Wakeboard Boats
If you’re into adventure and want a boat that provides you with immense power, then consider getting a ski or wakeboard boat. The difference between the wakeboard and ski boards usually comes in their field of action.
You can tell of this difference since in-board wakeboard boats have deep hulls, incorporate a V drive engine system, and a big wake to start moving. In contrast, ski boats usually need a powerful acceleration range, with the engine’s propeller and shape accentuating it.
Ski and Wakeboard Boats
Therefore, with the wakeboard and ski boats, you’re guaranteed to enjoy a captivating experience while out on the lake. Nonetheless, these boats are expensive and with the average ski boar priced between $25,000 to $50,000.
Pontoon Boats | A Popular Type of Lake Boat
Another popular type of boat used on lakes is the pontoon boat. This boat’s size ranges between less than 16 feet to over 25 feet and features a broad range of sizes, performance, and amenities.
Nowadays, these boats are rigged to deliver enough power to skiers and tow tubes to cruise at speeds of 40 MPH or faster as opposed to in the past when they were only used for slow cruising.
Pontoon Boats for Lakes
The amenities found in this boat range from basic to luxurious, with different options aimed at fishing, watersports, and entertainment.
Adding a trolling motor for pontoon boat these boats could be very effective for fishing. You will have to add rod holders, tackle boxes, and bags for fishing.
Handling a pontoon boat is very easy and stable on the water. Moreover, they have a huge interior space, so you can accommodate your entire family and friends when sailing through the lake.
This boat’s downside is loading a trailer onto it is quite challenging and don’t handle rough water as excellent as other boats such as the deck or runabout boat. It also isn’t very efficient or fast as these boats, something some boat enthusiasts don’t love about it.
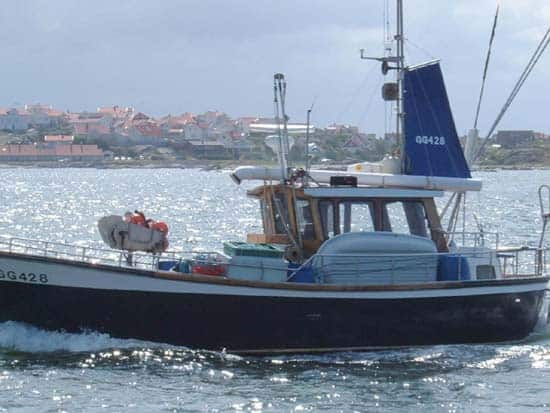
Fishing Boats
These boats come in different sizes and are designed specifically for fishing both on fresh and saltwater bodies. Fishing boats can either be un-manned or manned and incorporate many useful features that make it an ideal choice.
This includes having rod lockers, live well, an outboard power cell, a trolling motor system, and a front bow. These many useful features give its many appealing traits such as durability, strength, and stability.
Fishing Boats
Unlike other boats built to be used on rivers and lakes, fishing boats have more robust build quality, making it more than capable of withstanding extreme conditions and saltwater.
It’s also taller in size, and for the fishing boats made from aluminum, they’re very durable and weigh less.
Furthermore, fishing boats usually feature two or three anglers on board and have a slim profile, making them the perfect choice when fishing. You’ll need to pay about $5,000 when buying a small fishing boat of decent quality.
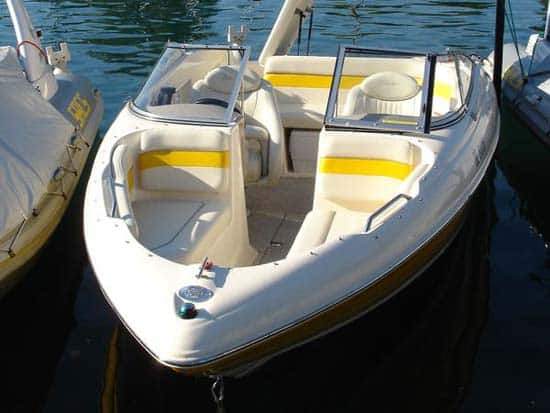
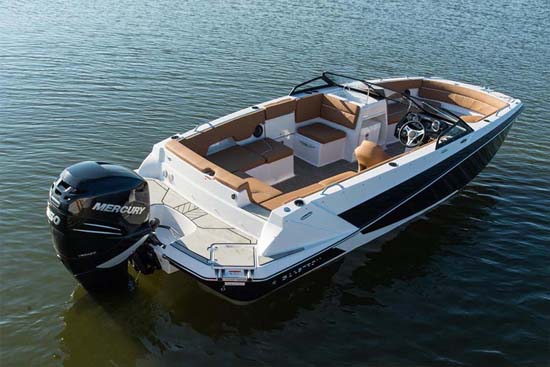
Bowriders
This boat has a size of between 17 to 35 feet and has an open bow area where additional seats are positioned in front of the helm. They provide you with great flexibility in terms of speed, power, usage, and access to beaches, land, and coves. In addition to this, they’re powered by an outboard engine or stern drive.
If you’re new to water sports and fishing on lakes, bowriders are the perfect boats since they’re user friendly.
Bowriders
The bowrider’s starting price of acceptable quality is $15,000, and you can use it for swimming, watersports, or cursing.
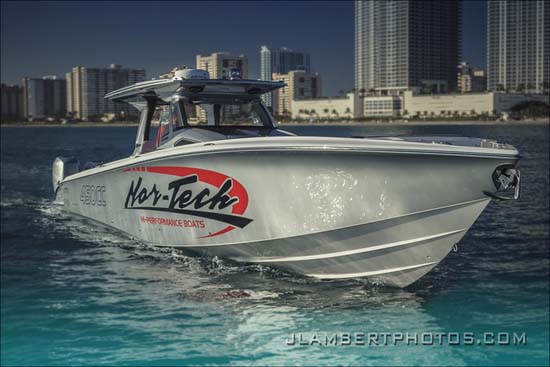
High-Performance Boats
Do you enjoy incredible speeds while cruising in the lake? If you do, then consider buying a High-Performance boat, which is typically built for speed.
The unique features of this boat include a high power to weight ratio, a steep deadrise, as well as a narrow beam. Inside, this boat features cockpit seats that can accommodate two to six passengers and Spartan cabins.
High Performance Lake Boats
Another feature found on this boat includes surface drives, stern drives, and high horsepower outboards. As a result, this boat, which has a length ranging between 25 to 60 feet, is strong, light, quick, and an excellent choice for fast cruising or racing.
When looking to buy this boat, the minimum amount of money you’ll need to spend is $50,000, while the premium models cost millions.
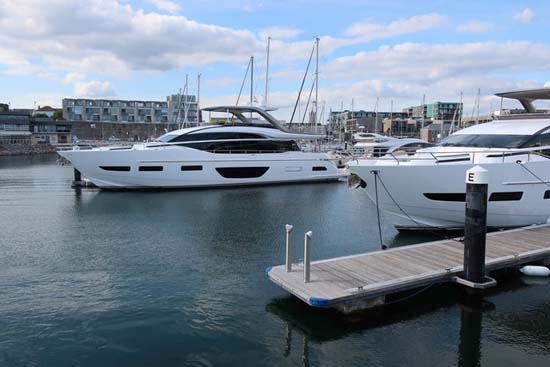
Yachts
When looking for a boat that includes all the needed amenities while out on the lake, the yacht is a perfect choice. These boats’ use is mostly for relaxation, and their sizes vary significantly from 39 feet and above.
Moreover, the yacht may either feature one or two diesel engines depending on the navigation requirements, whether for use in the ocean or inland water bodies.
Yachts
There are many different types on the market, meaning you’re spoilt for choice. The popular varieties include Cruising yachts, Day sailing yachts, luxury sailing yachts, Weekender yachts, among many others, depending on your individual needs.
The starting price of yachts is about $30,000, which depends on its feature and size.
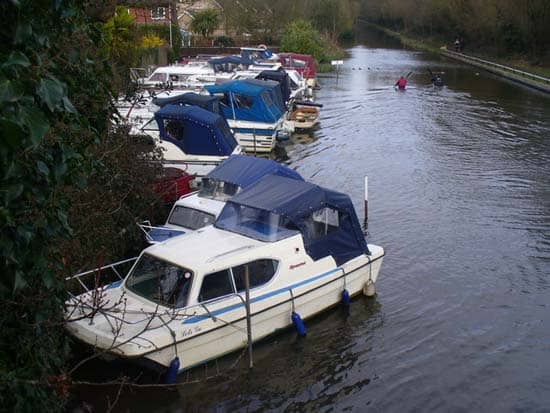
Cabin Cruisers| Comfortable Lake Boat
Do you want to enjoy a relaxed sailing while out on the lake? If you do, then cabin cruisers are, without a doubt, one of the best picks due to the many essential and exciting features it incorporates.
This boat comes designed with a berth and galley and thereby provides you with modern comforts, including power generators and air conditioners. It also features a secure shaft drive mechanism, deep-V bottom, and rudder steering and is perfectly suited for use in salty water.
Cabin Cruisers
If you want to buy a cabin cruiser, be ready to spend at least $10,000, and this price continues to increase as you increase the size.
Sailboats
This type of boat is unique as it depends on sails and masts to navigate through the water powered by the winds instead of a diesel-powered engine, which might only be installed as a backup. As a result, it has a majestic feel brought about by its easy open-air feeling, making its riding experience out of this world.
However, before you know the sailing basics and get to perfect how to ride sailboats, you must perfect your skills on how to rig. Furthermore, you need to be open to working with a team as it’s something that requires both technique and teamwork.
Sailboats
When looking to buy a sailboat, the minimum starting price is $10,000, but other models are usually expensive, averaging several hundred thousand dollars.
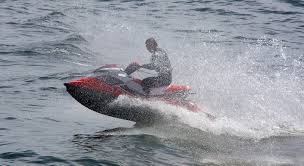
Personal Watercraft (PWC)
One of the most popular types of boats you’ll find on most natural water bodies is PWC boats. These boats are also referred to as jetski or water scooter and incorporate customizations that make it suitable for undertaking adventures.
With this recreational boat, you can partake in various games, including sportfishing and water-skiing, hence why it’s especially popular among the youths. It also is an excellent choice for exploring water.
Personal Watercrafts
Personal Watercraft comes in two types, that is, the stand-up and sit-down models. The stand-up models can only be used by one rider, whereas the sit-down models are perfect for two or more persons. If you’re looking to buy this boat, be ready at about $5,000. You can have a look at the buying guide for PWC.
Bass Boats | Useful Lake Boat
This is also another boat type of lake boat that you need to know about when looking to buy a boat to do freshwater fishing. The size of bass boats usually ranges between 14 feet to 23 feet.
Furthermore, incorporated into its design is a V hull as a low freeboard. Therefore, when searching for a boat to use on rivers and inland lakes, look no further since bass boats are the perfect pick.
Bass Boats
Nevertheless, these boats are costly as they incorporate high horsepower outboards, special gear as well as trolling points. With an average length of 15 to 25 feet, these boats’ starting price is $10,000.
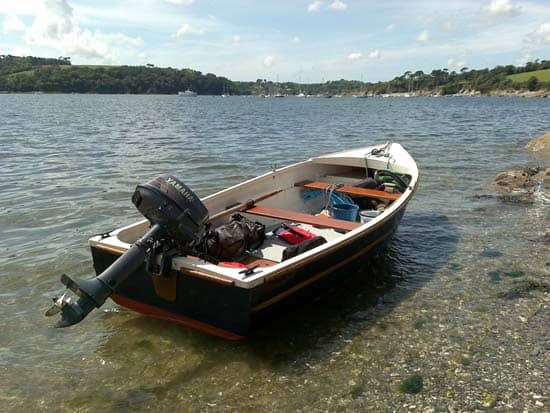
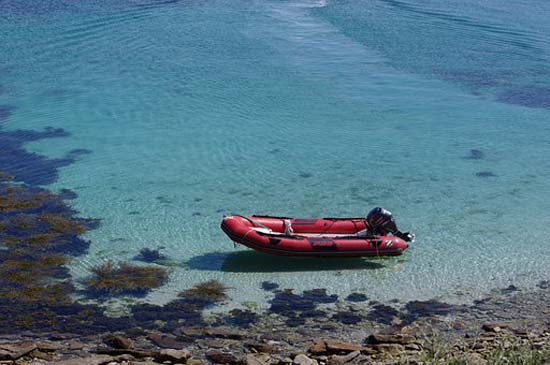
Inflatable Boats | Cheap & Good Enough
Another type of lake boat you need to know about is the inflatable boats, which have a length between 6 to 14 feet. On the sides of this boat are inflatable tubes, and its floor is either made using rigid or flexible aluminum or plywood depending on its size. They also feature outboard motors that are useful on a rigid transom.
Inflatable Boats
The best part about inflatable boats is that they’re easy to transport due to their deflectable design. Because of this, these boats are generally used like dinghies on bigger boats.
If you’re new to boating, this is a great boat to get as it’s affordable with a starting price of $150. Other more expensive models cost $10,000.
Deck Boats
These boats are available in a broad range of sizes, from not more than 16 feet to over 27 feet. Deck boats are usually designed with fiberglass with others incorporating aluminum construction.
When buying this boat, you should choose between jet propulsion, sterndrive, and outboard.
Deck Boats (Photo Nautical Ventures)
Deck boats have an open bow that has a lounge space and is designed in a sporty look. Therefore, if you want a boat with a spacious and big deck area to relax while still having a V-shape for cruising, look no further.
This boat’s price ranges between $15,000 to more than $100,000 depending on its size, varying from 12 to 30 feet.
Conclusion
There are numerous types of lake boats to choose from, and finding the ideal one can sometimes be confusing. If you didn’t know where to start in your search for a lake boat, this article has been of immense help to you.
Now that you know this, it’s a lot easier to know which of these boats mentioned above is best suited for your needs.
After the boating season is over what you need to think about is how to winterize your boat and protect your valuable asset. Winterizing a boat checklist will definitely help to do so. The effort and time you put on winterizing can go a long way in affecting its performance and will save you money, time, and effort come spring.
Winterizing A Boat Checklist
Preparing your boat for winter requires various steps that should be performed so that the boat is kept in the best possible condition. Step one on how to winterize a boat is to create a checklist of everything which needs to be achieved. Here is a step by step winterizing a boat checklist.
Start by inspecting the boat for damage which needs to be repaired
Clean propeller shaft before applying protective grease
Install a de-icing device inside the boat and store in water
Inspect then repair wiring
Ensure that the fuel valves are sealed
Change the oil as well as any filters
Use fresh water so as to flush the engine, afterward ensures that you drain everything
Lubricate grease fittings of the engine
Grease external engine fittings
Circulate antifreeze via engine block as well as manifolds
In case the boat has an inboard motor you can change the transmission fluid
Clean the boat inside and outside then remove barnacles or plant life
Remove valuables inside the boat
Remove the battery and store in a dry and safe place
Ensure that you lock the boat and the keys are left with a responsible person
How to Winterize a Boat for Avoiding Loss?
Step 1
You can start by cleaning out the interior of your boat like water sports equipment or fishing, accessories, ladders, and floatation devices.
Also, ensure that you remove non-factory installed electronic equipment like depth finders, and external audio players then storing them indoors so as to prevent theft or damage.
You can thoroughly clean the floor of the boat or pontoon boat so as to remove dirt, food crumbs, and dust. Also, ensure that you wipe down everything inside the boat then ensure it is dry. You can use boat seat cleaners or upholstery cleaners.
This will eliminate the chances of mildew or mold growing inside the boat thus making the boat or pontoon boat less prone to rodents. In addition, clean off the exterior of the boat so as to ensure it is dry before you cover the boat.
How to Winterize a Boat
Step 2
Ensure that you remove equipment from inside the boat. You can remove any miscellaneous equipment from the boat. This includes anything from floatation devices such as tubes, skis, floatation devices, towels as well as fishing equipment which traps moisture leading to mildew.
Additionally, ensure that you remove any electronic equipment that should be removed then stored indoors so as to protect it from moisture and cold temperatures.
Step 3
Confirm that you winterize the fuel tank and engine. Because the engine of your boat will remain dormant for a few months, ensure that it is well protected. Ensure that you check the owner’s manual because it shows you the specific instructions on how to prepare the engine for storage during winter.
During cold temperatures, any water inside the boat’s engine expands thus resulting in damage and cracking. You can lubricate the engine cylinders then spray fogging oil into spark plug holes as well as carburetors.
From there, ensure that you store the fuel tank that is 3/4 full. In case, the fuel comes with ethanol, you can add a fuel stabilizer that protects the fuel.
Like the engines, the freshwater system, waste system, fixed generators, and fixed air conditions should be taken care of. The water should be reduced from the tanks and the antifreeze should be circulated through the lines and tanks.
In Step 4
Make sure that you charge then store the battery. In case you are planning on taking your boat outside the water, you can remove your boat battery as well as store it inside a dry environment which is near room temperature. Ensure that your boat’s battery is charged fully before it is stored away.
The final step ensures that you cover the boat with the right winter boat cover. You can choose to cover your boat with a tarpaulin which is designed to withstand harsh winter and extreme temperature conditions. A good boat cover for winter should fit the boat snugly as well as expand and contract slightly so that it does not rip from changes in temperature.
Step 5 of Boat Winterization
After preparing everything properly we need to cover the boat and the trailer with a good quality boat cover. Different types and shapes of covers are available in the market.
A Brief Video on Boat Winterization
How to Winterize a Boat Motor?
The first step is to prepare your boat motor for winterizing. To reduce the chances of the tank being filled with air, you should fill it with gas. Air is not a good thing because it can lead to condensation when the temperature is low.
If you fail to fill up your tank with gas, you will end up with water inside which can lead to major problems later on. From there add fuel stabilizer which prevents buildup when the boat is left for extended periods. Next, warm the engine by running it while in water.
The second step, add antifreeze as well as spraying fogging oils. After cleaning the motor ensure it is prepared as above. You can add antifreeze so as to prevent condensation of water inside the motor.
In addition, make sure you add antifreeze to engine blocks. It is important that you follow the boat’s manufacturer specifications on how to drain the engine block. The antifreeze to add once you drain the engine block of the coolant is propylene glycol. You can also add antifreeze to sterndrives, which refer to an inboard motor.
The third step, ensure that you replace the oil filter and change the engine’s oil. It is easier to drain then change the oil when it is warm. Your transmission as well as engine oil can be contaminated with particles and dirt, which harms it during winter when it is not dealt with well.
You can change your transmission and engine oil which can be contaminated with dust particles and dirt.
Fourth step and finally, conduct a final inspection of the boat motor. The first inspection to do is to check the exhaust system for corrosion. To inspect the exhaust system you need to disassemble it from the water lift muffler then check for defects such as corrosion.
For example, if you are using a trolling motor for a pontoon boat or an outboard motor for any other boat, don’t forget the last inspection which may be the most important.
Second, inspect the hose clamps and hoses. Check the clamp and ensure it is shredded, cracked, or rusty. The third inspection to do is to seal off cracks from the air intake.
You can double-check the exhaust outlet and air inlet. Ensure that you take care of the battery and remove then keep it indoors. You can choose pests whether you keep them in storage or lift. Invest in theft prevention so that you can stay vigilant as well as a stop so as to check on the boat once after a while.
Boat Winterization Kit
If you have already researched on winterizing a boat checklist, then you probably have come across the term “winterization kit”. Simply put, a winterization kit refers to a compact supply of different tools and supplies which are needed to winterize a boat yourself.
Unless you live in sunny areas that allow you to boat throughout the year without worrying about the cold season, you should think early about preparing your boat for the winter season.
You can find a trusted and reliable shop that sells winterization kits that you can count on, which allows you to maximize your boating experience the following season.
Even if you are a DIYer, it is likely that you will winterization kits that you can use to protect your valuable asset.
In case you have never winterized your boat yourself, it is recommended that you choose Starbrite’s Do It Yourself Kit. This winterization kit comes with everything you need to protect your boat during the winter season, including step by step instructions on how to use the kit.
Other winterization products you can get include Starbrite and Camco. The benefit of these winterization kits is that they come with items such as an antifreeze jug, including tubing which pumps out moisture as well as antifreeze.
Some of the items which come with a boat winterization kit include antifreeze, tubing which is used to pump out moisture, and an antifreeze jug. If you are looking to buy a boat winterization kit, you can expect to spend anything from $50 to $100.
How Much Does It Cost to Winterize a Boat?
It is true that the cost of winterizing your pricey boat when the cold season sets in can be a drag. However, the cost of not winterizing your boat can be much higher.
If you fail to winterize your boat, you will find that the engine can be ruined by frozen fluids mildew and molds fouling the interior of the boat, cracks in the hull, wiring, and corroded spark plugs.
Ideally, you should expect to pay around $300 for winterizing. However, if you are winterizing a small boat you should expect to pay something like $100 or a lesser amount.
In case, you have a large cabin cruiser or a specialty boat, then the amount you will pay to winterize it is much higher in the region of $500 to $600 or more.
This might seem like an added cost for boat owners but it is cheaper compared to purchasing a new boat.
Do I Have to Winterize My Boat?
In case you live in places that have a warmer climate, then it Is easy to think that you do not have to winterize the boat.
However, despite the warm climate, you should not be surprised when you experience freezing weather which can lead to costly damage if you failed to winterize.
If you stored your boat unwinterized inside the garage all winter, then you should monitor the weather so that in case there is a storm or the temperature drops you have a backup plan which includes a heating source.
It is important to winterize your boat during the cold season because it will save you money in the long run. You need to de-winterize the boat also before Spring.
Additionally, you can winterize your boat because it is not only effective to protect your pricey boat but also you can increase the lifespan of the boat.
In case you did not know, your boat is not just a precious machine but a complex one. During the spring season, you need to inspect if your boat is fine. It cannot be possible for someone to tell if the boat has thawed or frozen parts, but it is possible to see visible damage.
In case you failed to winterize your boat you should be ready for commissioning your boat. Thus winterizing your boat will keep it in a clean and perfect condition which will in turn affect the trade-in and resale value when you decide to upgrade it to the latest model.
If you want to avoid problems in the spring season, you can make a checklist of the things you should do in the cold season such as applying corrosion protection to the boat’s engine, adding fuel stabilizing additive to the fuel system, changing the engine’s fuel system, adding antifreeze to the plumbing system, and removing drain plugs.
What Temperature Do You Need to Winterize Your Boat?
The question of what temperature you need to winterize your boat is on everybody’s lips. It is important to note that the temperature you choose to winterize your boat will determine whether you get the most of your winterization process or not.
According to experts, you should winterize your boat at temperatures between 29 and 32 degrees Fahrenheit.
Can I Winterize My Boat Myself?
Yes, you can winterize your boat yourself and only spend a few dollars to complete the job. You do not have to incur the extra cost of hiring an expert to winterize your boat for you.
If you are a handyman, you can winterize your boat yourself. The benefit of this is that you will not only save money but also time. This is because winterizing your boat yourself will take less than one hour, which is less than the time you will spend driving the vessel.
Typically, you should expect to spend anything from $125 to $150 for doing it yourself boat winterization.
However, while you are at it you should not hurry up to get the job done in record time because it could lead to waste.
How Long Does It Take a Boat Winterization?
The length of time it takes to winterize a boat will vary depending on whether it is DIY (do it yourself) or getting the help of a professional. Usually, DIY winterization of your boat will take a shorter time compared to when you seek professional help.
If you are a handyman, it should take you about 4 hours to winterize your boat. This includes draining the ballast system then blowing the lines for the shower and heater, including changing stuff in the engine such as oil change.
What Happens if You Don’t Winterize a Boat?
You may experience a lot of problems if you fail to winterize your boat. First is your engine which may crack and break in case the seawater lines are not properly drained which means that you can have cracked parts. Freshwater cooled engines that come with inadequate anti-freeze can also crack and freeze.
Dirty oil comes with acidic contaminants as well as salt which causes a wide array of problems thanks to corrosion. If you leave unchanged oil including an unflushed engine, it might lead to damage which reduces the lifespan of your boat engine.
The second problem you will experience if you fail to winterize your boat has to do with the batteries. Batteries that are not completely charged at the beginning of winter can completely be discharged before the coming season can damage the life span of the battery.
Third, frozen bilge can sink in your boat in case it is left in the water during the cold season. The problem with frozen water inside the bilge pumps is that they do not go out.
Therefore, if they are run when frozen they will be damaged, while the expansion will lead to expansion and damaged forces from water. Also, through-hulls are in the water and it freezes thus getting damaged or cracked.
The fourth thing that will be affected when you fail to winterize a boat is the deck fittings and hardware. A boat that is left uncovered may have a pile of ice and snow on the decks which lets water inside the deck fittings and stanchion bases as well as other parts that are exposed to external elements. The deck areas that are around fittings may come with cracks which lead to water sipping inside via cracks and openings.
Fifth if you do not winterize your boat you risk it having molds and mildew. This is especially true if the boat is unventilated which traps moisture, leading to mold, mildew, and rot.
In addition, trapped moisture can expose the upholstery, boat canvas, curtains, as well as sails to the risk of mildew and mold. If you leave the boat uncovered it might accumulate dirt during the winter. Also, if you store the boat near trees, you are likely to find filth, rotted leaves, and stained deck during the spring.
Conclusion
To sum it up, you might think that winterizing your boat requires a lot of hard work and that you will spend a lot of money on repairs. However, the truth is that winterizing just before the cold months can save you lots of dollars as well as time.
Failing to winterize your boat in the name of saving your money can prove to be a costly mistake because the water inside your boat can freeze leading to damaged engines, pipes, or the boat itself. The benefit of winterizing your boat is that it will give you the peace of mind that you will not experience any problem when you want to take the boat back into the water.
If you are thinking of a way to keep fit and have fun then you should consider kayaking. Kayaking is one of the best outdoor activities that puts you right in the middle of nature and provides a great workout. When you go kayaking, you will not only build lean muscles but also burn fat. The question that you are probably asking yourself is kayaking good exercise? Yes, kayaking is a good exercise.
Is Kayaking Good Exercise
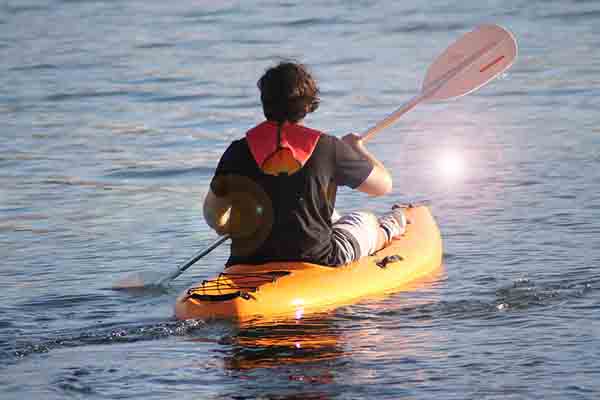
Because kayaking engages your arms, it can be a good exercise for strengthening your arms and forearms. The controlled upper body twist that comes with kayaking can help enhance your core strength. Additionally, kayaking is one of the best ways to build your back, shoulders, and chest muscles. Most people can go kayaking without requiring special training or skill, which makes it a great sporting activity for the entire family.
Physical benefits of kayaking
Reduced stress It goes without saying that exercise plays an important role in reducing stress. The good thing about kayaking is that it benefits users in more than one way because the kayak not only works your muscles as you paddle but also helps you relax as you paddle in open water.
If you are stressed out, you can kayak in a calm lake and enjoy the relaxing sound of the water and enjoy the fresh air as well as the natural environment.
Weight loss
If you want to lose weight, you need to burn more calories than you consume. Adding exercise routines such as kayaking is a key factor that helps in weight loss.
To move at a speed of 5 mph you are going to require approximately 0.1 hp of effort which burns about 400 calories per hour. So, if you kayak for 4 hours you are going to burn about 1600 calories.
Health Benefits Of Kayaking
Enhanced heart health
Kayaking can help raise your heart rate, which produces a wide variety of cardiovascular health benefits with time. When you are kayaking at a high level, you will not only burn more calories but also improve your blood pressure.
Additionally, your good cholesterol will go up while the bad cholesterol down, which makes it less likely to develop medical conditions such as diabetes or heart disease.
Flattens your tummy
Kayaking can help tone and flatten your tummy. If you want to glide over open water, you will need to paddle the kayak which takes lots of core movement and strength. Paddling the kayak with the 1-piece paddle on both sides requires twisting that targets muscles which might be overlooked by other workouts.
It strengthens your lats
If you want to be stronger, you need to work out your muscles. The muscle groups which benefit the most from kayaking are lats or lower back muscles.
With every stroke you make on a kayak, your lats are heavily exercised. If you want to work out your lats more you should consider varying the rowing speed. You can choose rowing at a fast speed for a short time or do it more slowly.
Great source of Vitamin D
Vitamin D is one of the essential nutrients required in the body so that at to function optimally. In case your body lacks Vitamin D, your bones might become brittle and break easily.
The good thing about kayaking is that it gives you the opportunity to soak up the sun and get the vital Vitamin D. Kayaking for only 15 minutes in sunny areas can trigger Vitamin D production.
Mental benefits of kayaking
Exercising regularly has been proven to eradicate symptoms of mental health such as depression and anxiety. When you are physically active, it will increase blood flow to your brain and stimulate good hormones such as serotonin, endorphins, and dopamine.
Reports show that kayaking has a positive effect on mental health. Other studies have shown that aerobic exercises like kayaking can release chemicals into the body which can lift your mood, and provide a sense of well-being.
One of the benefits of kayaking is that it contributes to mental clarity. This means that your brain is calm even when you experience the beauty of nature while on open water.
The other mental benefit of kayaking is that it makes you happier. When you combine time spent outdoors as well as physical exercise, it is known that it can lead to happiness.
Additionally, kayaking can help reduce your stress levels. Therefore, if you are suffering from mental health problems like depression, you should consider engaging in a sporting activity like kayaking. Kayaks and canoes are different, but all these mental benefits can also be achieved by canoeing.
For more benefits, you can practice a few minutes of meditation and deep breathing while you are kayaking.
The social side of kayaking
Although a kayak is designed to be used by one person at a time, you should not kayak alone. Kayaking is a social activity that can be done with a team of kayakers.
For example, you can choose to paddle with family and friends. The benefit of this is that if you get into trouble, you will have someone to help you. As a beginner, you may find it difficult to kayak with other people but with time it will change. When you join a kayaking club, you will get the opportunity to bond and make new friends.
Is kayaking a good way to lose weight?
If you have been trying to lose weight, then you will not go wrong with kayaking. But for kayaking to be considered as an effective weight loss workout it needs to effective at burning calories.
For you to see results, you need to exercise as often as you want. Kayaking for 1 hour via the waters can help you burn 400 calories. That means, if you spend 3 hours kayaking on the waters, it can burn up to 1200 calories.
This is why kayaking is considered to be one of the top workouts for those who want to burn more calories in conventional weight loss such as jogging.
What muscles does kayaking exercise?
The first muscle group that kayaking targets are the ones available around your arms. The biceps and triceps are the muscles that help you paddle through the water. These muscle groups work in conjunction with the upper back to propel you forward.
The second muscle groups that are worked out are the ones in your hands and forearms. You will need a tight grip to hold on to a paddle and apply constant tension to your hands and fingers.
Third, you will work out the muscles available on your shoulders. After every pull, you will need to bring back the paddle which exercises the anterior, lateral, and rear deltoids of your shoulder.
The fourth muscle groups which are exercised while stroking a kayak are the ones in your oblique, lower back, and abdomen.
Fifth kayaking targets your lower body muscles which include muscles in your quadriceps, hamstrings, glutes, and calves while you are on the water.
Is kayaking better cardio or strength?
Kayaking is a great strength workout because it strengthens your arms, shoulders, and lower body. As you push the paddle and twist your upper body, you are working out your shoulders, back, and chest.
Additionally, kayaking helps improve lower body strength and increase muscle strength. Kayaking might be good for strength but it offers more benefits when used as an aerobic exercise.
For you to enjoy a good cardio work out, you need to increase the pace and elevate your heart rate. This means you can burn between 400 and 500 calories in 1 hour of kayaking making it an effective cardio exercise just like using a treadmill or elliptical.
Is kayaking good for your back?
The answer to the question is kayaking a beneficial exercise for your back is yes. Paddling, balancing, and controlling a kayak can help strengthen your back muscles as well as lower back and spine muscles.
Make sure you use good posture and twisting motions as you paddle the kayak. With time, you will have a stronger back which is less prone to pain.
Is it easy to kayak?
Kayaking is a wonderful sport that can be learned by any beginner. Just like cycling, it is very simple to pick up the art of kayaking. Within a few hours of practicing, you will paddle along happily. Note that for you to do kayaking, you will need to work out your body.
One of the disadvantages of kayaking is that it leads to sun exposure. Kayaking for one hour might be dangerous but if you kayak for longer it can be a big threat. This may lead to health conditions such as heat stroke, heat exhaustion, sunburn, and dehydration. To protect yourself from the sun, it is advisable that you wear sunscreen or a hat.
Dehydration
When you are exposed to too much sun while kayaking, it can lead to dehydration. Signs of dehydration include confusion, dizziness, fatigue, and extreme thirst, which can adversely affect your ability to paddle a kayak.
Also, kayaking requires a lot of energy which is why you need to stay hydrated. Depending on how hot it is outdoors, you need to carry enough bottles of water.
Hypothermia
Hypothermia can occur when a kayaker is exposed to cold temperatures for extended time periods. This can happen if someone is submerged in cold water but can happen if you are badly dressed and paddling in cold air.
Conclusion
By now you know the answer to the question is kayaking good exercise. Kayaking is a wonderful exercise that strengthens your shoulder muscles, glutes, and core. As you move the paddle, you are strengthening the muscles in your arms, shoulders, back, and chest.
Also, kayaking can lead to increased leg and torso strength as you power the kayak and rotate the torso, which applies pressure to your legs. Kayaking can give you a good cardio workout as you paddle the kayak through the waters.
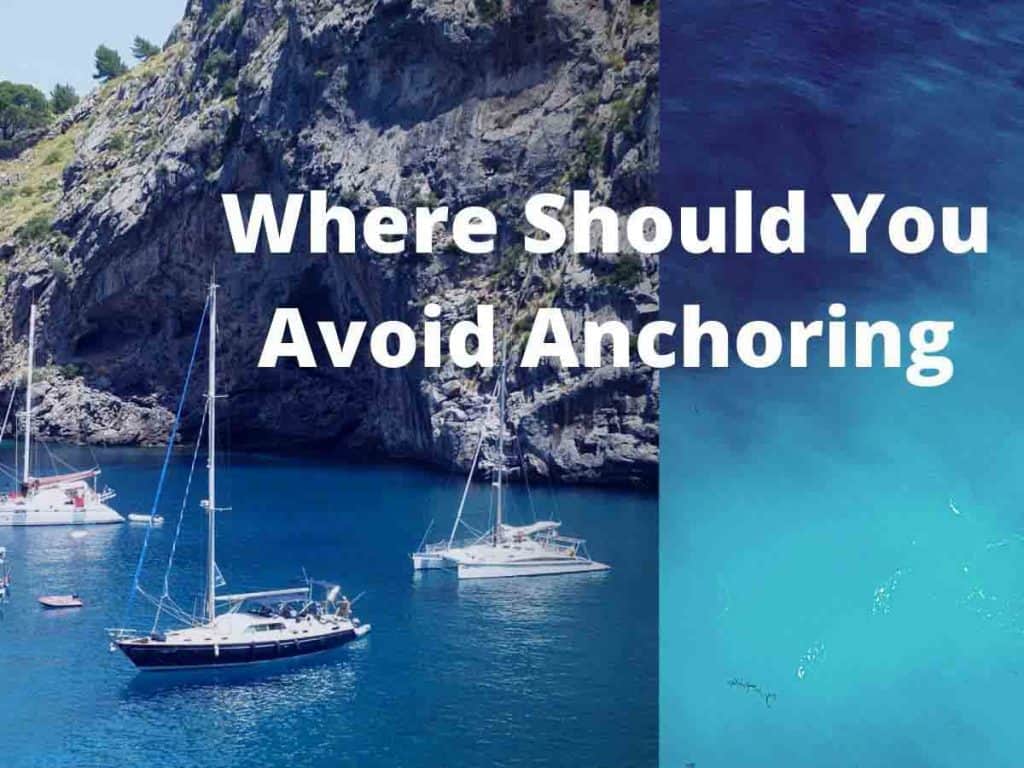
Anchoring is arguably one of the trickiest aspects of operating a sailboat. It requires knowledge, precision, patience, and a healthy dose of self-confidence to boot. For rookie skippers, those early attempts can be nail-biting, to say the least. Where should you avoid anchoring? Did you drop enough cable for high tide? Should you trust your buddy when he says he knows the most incredible spot?
Where should you avoid anchoring?
The point is anchoring a sailboat isn’t easy. There are scores of things that can go wrong – there’s a reason so many skippers are insomniacs – and the consequences may include putting yourself and any passengers in mortal danger. So, it’s a serious skill that even experienced captains never take lightly. Luckily, the rewards are intoxicating.
Once you know how to anchor a boat safely, you no longer need to rely on marinas or moorings for stationary docks. The open water can be your place to stop and think, to kick back, relax, swim, fish, or whatever else makes you feel peaceful. For many sailors, it represents the ultimate freedom. Why head back to dry land when you can spend the night gently rocking on the waves?
The Many Joys And Perils Of Anchoring
Nobody heads out for the first time without some knowledge of how to anchor safely. Regardless of whether you intend to drop anchor and sit stationary for any length of time, understanding the basics is vital. If an accident happens and you get stranded in out open water, the first thing to do is stop moving.
It’s essential to know which types of seabed tolerate anchoring, how to identify these safe spots, and when to watch out for anchor drag. Do it right and you’ll enjoy a tranquil night’s sleep. Do it wrong and you’ll be pacing the deck until the early hours flinching at every creak and groan. Nobody said sailing was easy.
Where Should You Avoid Anchoring And Why?
The following areas are unsuitable spots to anchor a boat. Let’s take a look at why anchoring in these areas is strongly discouraged.
Lee Shores
Fairways
Channels
Prohibited/Restricted Areas
Oyster/Mussel Beds
Unsuitable Sea Beds
Unsuitable Depths
Lee Shores
Lee shore is the term used to describe any shore positioned on the lee side of a sailboat. In this position, the wind is blowing from the open water and inwards toward the land. It leaves the boat stuck right in the middle. It can be difficult to escape a lee shore and, if a vessel loses control, it may be run aground by the pressure of the wind pushing it inland at high speed.
This is why you should never anchor on a lee shore. Pick a weather shore with the wind moving outwards and passing over the boat on its way out to open water. If your anchor drags and/or the engine fails, there must be plenty of space to leeward set the sails and force your sailboat away from a collision with the shore.
Before heading out, check the weather forecast to know when and where these lee shores are likely to develop.
Fairways
Fairways are established routes taken by vessels moving in and out of harbors or offshore mooring facilities. You must never anchor in a fairway because it’s dangerous and illegal in most areas. Think of it as a parking garage. There are lots of boats reversing, performing turns, and trying to maneuver into small spaces.
You can get information on fairways from the local harbor or regional sailing guides.
Channels
Anchoring in a shipping channel is twenty times more dangerous than stopping in a fairway but the reasons are largely the same. These channels are established routes for vessels passing through the areas, many of them extremely large indeed.
Let’s say anchoring in a shipping channel like setting up a tent in the middle of a traffic intersection. These areas are for moving vessels only and they tend to include sprawling container ships that can and will crush your little boat. If you’re planning to sail through unfamiliar waters, consult shipping maps and guides to find out where the channels are.
Prohibited/Restricted Areas
There are many reasons why areas of open water get marked ‘restricted’ or ‘prohibited.’ In either case, there are limitations to acknowledge in these spaces and they’re usually backed up by real, enforceable laws.
The most common reason for a prohibited warning is the environmental conversation. Anchoring may cause irreversible damage to marine species.
Restricted Area
The use of restricted zones is a little more varied. Sometimes, they represent conservation spots but more often they signify areas of potential danger for boats. For example, restrictions are in place around offshore reefs because they are difficult to see. In other regions, such as the Caribbean waters, piracy is a big threat so sailing may be forbidden without special permission.
Oyster/Mussel Beds
Boats cannot anchor in or too close to live oyster or mussel beds. Anchoring causes extensive damage to these habitats which may then severely impact the livelihoods of local pickers and impair food supplies.
When consulting regional shipping maps and charts, look for areas marked with a cross. Where you see a cross icon, you are not authorized to anchor.
Conversely, some maps contain anchor icons representing popular and safe spots for stopping. These are the areas you can definitely navigate to and enjoy for an afternoon or evening.
Unsuitable Sea Beds
Part of the anchoring process is checking the condition of the seabed to determine whether it will tolerate your anchor. This is something you need to do every time even if you’ve successfully anchored at a spot before. Always remember, the seabed is in constant flux. It changes according to the weather.
Mud
Mud is a suitable surface for the majority of anchors. However, the bigger your anchor, the easier you will find it to stop here. It tends to be one of the simpler places to drop but be cautious all the same. Some mud is deceptively thin and may cause an anchor to drag because it doesn’t have the weight to hold it down.
Silt
Being right in the middle of sand and mud in terms of particle size, silt is one of the best materials for safe anchoring. It will comfortably hold most types and sizes of anchors.
Clay
Clay seabeds provide a very secure surface for nearly all anchors. In fact, clay is so secure an anchor may be reluctant to come back out. Those with sharpened tips are best suited to the job and will set more readily.
Sand
Sand is not as secure as clay or mud because it shifts much more rapidly. Nevertheless, harder sand seabeds are suitable for anchoring. You’re strongly encouraged to check the density of the sand where you are before attempting to anchor. The larger the anchor, the easier is it to stop in this type of seabed.
Gravel/Rock/Weeds
Neither gravelly, rocky, or weedy seabeds are easy places to anchor a boat. All three materials can offer treacherous conditions because they do not grip and hold an anchor the same way as sand or mud. There is likely to be a substantial amount of drag if you try to drop in one of these areas.
Some types of anchors are better at holding in these conditions than others. We’ll discuss anchor styles in more depth later.
Unsuitable (Shallow) Depths
This is less of a concern for boats out on the open water, but something to think about for vessels planning to anchor close to shore. Without a rough awareness of the type of waters you’re sailing through and how to pinpoint their depths and shallows, you can’t know how to stop safely.
The length of chain and warp used must be significantly greater than the depth of the water you’re anchoring in. This allows a portion of the anchor’s chain to lie flat on the seabed. Horizontal pulling forces then place pressure on the anchor which causes it to dig into the ground and create a stronger, safer hold.
If not enough chain gets dropped, the anchor can drag across the seabed and take your boat with it. The rule of thumb is to drop a chain four times the maximum length of the depths you’re sailing in. With warp included, it should be around six times this maximum length. Leave space behind the boat when anchoring to accommodate for swing.
Veering Tips
The veering is the process of letting down cable after an anchor drop. For reasons already outlined, a sailor must be able to tell how much cable is beneath the waterline. If you’re anchored close to shore and the tide is dropping dangerously fast, one of the clearest indications will be the condition and position of your cable.
This is why it’s standard practice for sailors to tie brightly colored fabric wraps around anchoring cables. When this is done at measured intervals (every five meters), one glance at the cable tells them how much is still below the water and, more importantly, whether it’s enough for the anchorage to remain safe.
Fabric wraps and cloth ties are most common because pen markings fade quickly. Before creating your cable wraps, devise a clear code that you and any crew members can understand quickly.
For instance, you might use colors of the rainbow (as recited in the children’s song) or attach colored strips to the cable in alphabetic order (blue, green, red, etc.). To determine how much chain is below the surface, you must know the order of each colored tie in the arrangement and the distance it represents (e.g. 15m).
You can make up your own, completely original code. The important thing is that you understand it well. If you can’t work it out in less than five seconds, it’s not a very effective signaling system.
Which Type of Anchor Is Best For Your boat?
We’ve asked ‘where should you avoid anchoring,’ now let’s discuss the best type of anchor for your vessel. There are no hard and fast rules because sailing vessels come in a huge variety of shapes and sizes. The best thing to do is to consider the dominant bottom characteristics of the regions being frequented.
If you’re an experienced boater, you probably won’t be limiting yourself to just one or two regions. However, even well-traveled vessels tend to have a stomping ground. You can’t match every seabed, but you can make anchoring easier by being compatible with the areas you spend the most time in.
Needless to say, the heavier your vessel, the bigger and heftier your anchor must be to hold it stationary in open waters.
Lightweight (Danforth) Anchors
Light, easily maneuvered ‘Danforth’ anchors are commonly used on small pleasure boats.
These anchors range in weight from 2.5lbs to 200lbs at their heaviest and produce a substantial amount of holding power for their slim frame and size. This combination of maneuverability and power makes them ideal for vessels with smaller weight capacities
Danforth anchors perform best in mud or hard sand seabeds. They are less effective in slippery, soft mud, and rocky seabeds.
Kedge (Navy) Anchors
This is what most people think of when they imagine an anchor. Kedge (or navy) anchors come in the traditional curved shape. They’re unsuitable for most pleasure boats as they depend solely on weight for safe anchoring.
Only very large ships use kedge anchors for prolonged periods. They may be used for short term (lunch) anchoring on smaller sailboats that can tolerate a degree of drag.
As kedge anchors are not for burying (flukes don’t penetrate into the seabed), they’re compatible with grassy, weedy, and rocky seabeds. They also perform well in hard sand seabeds.
Anything looser (such as thin mud or sand) and you might experience drag as the flukes struggle to hook on a surface.
Grapnel Anchors
Grapnel anchors are the cheapest, most widely available anchors. They should be used only with very lightweight vessels such as canoes Jon boats, and inflatable boats. Grapnels are unsuitable for serious sailing vessels (even smaller sailboats in most cases). They’re extremely light, easy to maneuver, and simple to use but provide minimal holding power.
As such, Grapnel anchors are rarely dropped far from shore. They’re mostly used for short (lunch) moorings, wreck reef diving, scuba diving, and seabed retrieval (locating items dropped overboard).
Plow (CQR/Delta) Anchors
Plow anchors go by various names. You may see them called ‘CQRs’ or ‘Deltas’ after their different shapes. Delta style anchors have a standard shank. CQR style anchors have a pivoting shank to allow for firmer, stronger hold in more tolerant seabeds. Both styles are very effective and commonly used on small to medium-sized cruising boaters.
Plow anchors perform well in grassy, weedy, and rocky seabeds because they are good at hooking into crevices. They are less effective in very soft seabeds.
Claw (Bruce) Anchors
Claw anchors are similar to plow anchors in that their curved flukes allow for a powerful hold within rocky, weedy seabeds. The difference is they have a uniquely shaped claw. With a strong enough anchor hold, a cruising boater can fully rotate without pulling its flukes out of the ground.
There’s a lot of room for error with a claw anchor. Its unique shape means even a poorly positioned drop won’t prevent the flukes from finding an anchor point.
Box Anchors
Box anchors really work great for offshore anchoring. It also works in lakes and rivers with firmness. These sophisticated high-performance anchors work with almost all types of seabeds.
Mushroom anchors are very basic. They do not have claw-shaped flukes and, therefore, cannot hook into the seabed as other anchors do. They are straightforward weights that rest on the seabed and use a combination of heft and suction to stay still.
Mushroom anchors perform best in soft seabeds where their hollow bottoms can ‘stick’ to surfaces using suction. They are unsuitable for most large vessels and rarely found on anything bigger than small pleasure boats.
Next-Gen Anchors
Many sailors and fishermen are creatures of habit and prefer to stick to the familiar when anchoring. However, new anchor designs do emerge occasionally and there are next-generation shapes and styles currently on the market.
They include, but are not limited to, the Saraca Excel (convex), Mantus (hooped), Manson Boss (concave, no hoop), and Vulcan (weighted tip) anchors. These new styles are very effective and suit a wide variety of vessels.
Where Should You Anchor Your boat?
Asking ‘where should you avoid anchoring’ is only useful if we follow it up with practical knowledge of where it is safe to anchor. This next section will discuss safe anchoring techniques and the things you need to consider when anchoring in crowded waters.
Dropping the Right Length Of Cable
We touched on this a little earlier, but we’ll go into more detail now. The rule of thumb for dropping anchor cables is to use four times the maximum length of the water’s depth. This should be extended to six times the water’s depth if including the warp in your calculations. This method produces what’s known as the scope of your anchor, the ratio of cable to anchoring depth.
Get this right and you can leave your boat unmanned while sleeping soundly in the knowledge it is anchored securely. Get it wrong and you may drag, drift and find your boat floating somewhere else in the morning. The most difficult thing about calculating anchor scope is that rules of thumb only get you so far. They are just a starting point assumed for calm conditions in empty waters.
To be assured of a safe anchor scope, you need to get your calculator out and do some number crunching. Remember, the scope is the ratio of cable/chain to the complete anchoring depth. Complete anchoring depth takes into account the total depth at high tide plus any additional height from the top of the anchor roller to the waterline.
The total depth of water at high tide + height of the anchor roller above the water = complete anchoring depth
Total Depth Of Water At High Tide
To determine complete anchoring depth, first determine the total depth of the water at high tide. This isn’t easy to do – not accurately anyway – so most sailors use an approximated figure. As long as you make a reasonable judgment, your anchor will tolerate the extra distance. Figuring out the depth of the water is easy when you have a cable marked with colored ties at five-meter intervals.
To calculate how much deeper the water will be at high tide, use the following formula to estimate.
Tidal swing x (hours until next high tide ÷ hours between tide) = total depth of water at high tide
You should always account for the effects of high tide when anchoring. It’s particularly important in areas known for turbulent conditions. If the tide comes in strong and your sailboat’s anchor isn’t long enough, it could drag and even cause damage to the vessel.
General Rules of Thumb
Standard conditions (calm to moderate) – 4 to 5 x complete anchoring depth
Turbulent conditions (stormy, windy) – 5 to 7 x complete anchoring depth
Short term (lunch) anchor – 3 x complete anchoring depth
In some environments, it is suitable to use a smaller scope than you might normally. For example, areas with limited space such as crowded marinas and popular open water diving spots require a shorter anchor. It’s vital your sailboat doesn’t drift and twist on a long cable when it’s in a crowded area. This can cause collisions with other vessels.
In crowded spots, dockside mooring facilities will be available or prolonged overnight anchoring will be prohibited. It’s unlikely you’ll need to worry about anchoring powerfully enough for the whole evening.
Anchoring In Crowded Spaces
The key to anchoring safely in crowded spots is to determine the full circumference of the circle your vessel makes when the wind swings through the compass.
If you anchor around multiple other vessels using rope/cable rodes but you are using a chain, your swing will differ from everybody else’s. They are likely to have a larger swing circumference so consider shortening your own anchor to avoid collisions.
Alternatively, you can ask the nearest skipper what length of chain or cable they would recommend. It’s never unwise to seek advice from others.
Anchoring In Severe Weather
The dangers associated with anchoring sailboats are almost always related to a lack of cable length. In open waters, where there’s no danger of collisions with other vessels, it is significantly more dangerous to drop too little chain than too much. Therefore, in severe weather, there is no reason not to drop extra length if you feel it’s required.
You will have to spend more time and energy hauling the chain back up but, sometimes, it’s better to be safe than sorry. If there are other vessels close by, think more carefully about dropping a longer anchor. Regardless of the weather conditions, you must have plenty of space to safely swing.
Use the following formula to estimate the length of cable required for windy conditions close to shore (4 to 8 meters deep):
Wind Knots + 4 x Water Speed + Boat Length (in meters) = total anchor length required
What Is The Best Way to Retrieve An Anchor?
You’ve anchored your sailboat successfully without incident or accident. Now, it’s time to go home. What is the easiest and safest way to retrieve an anchor and start moving again? As with all sailing and anchoring processes, it largely depends on where you are and what conditions are like.
It is harder to retrieve an anchor safely in strong winds or currents if you are close to other vessels. You don’t have the same freedom to ride with the wind until you hit those calmer waters. Instead, you must account for the position of other boats and, particularly, the approximate time left for maneuvering a safe course after de-anchoring.
Retrieving An Anchor Under Power
The first thing to do is weigh down the boat’s anchor which just means tautening its cable. This is the standard pull and belay method. First, pull in a length of cable. Then, wind it securely around a cleat. Repeat until you can feel the whole cable go taut with no relaxed lengths left resting on the seabed. Belay.
If you have companions, ask a helper to switch the boat’s engine on and push forward at its lowest possible speed. This should be done very gently. All you’re trying to do is slowly dislodge the anchor with a little force. The boat needs only move until the rode is just past vertical. Once tripped, you can turn the engine off and continue pulling the anchor back up onto the boat.
Retrieving An Anchor Under Sail
If your boat is too small to have an engine or you’d rather not use it for tripping the anchor, an alternative method is to raise the sails. This is far more dangerous in crowded spaces so consider the decision carefully. The boat may start moving very quickly once the anchor is retrieved. Do you have enough time to safely maneuver to less crowded waters?
The method is largely the same whether you’re using an engine or sails to pull the boat’s anchor out of the seabed. Raise the sail only after the cable has been belayed and is taut enough to be tripped. Keep the sails unsecured until the anchor has been successfully retrieved and is back on the boat. This minimizes the chances of getting drawn.
Retrieving An Anchor Without Assistance
Retrieving an anchor is much harder and more dangerous when doing it alone without any assistance. It is a physically demanding task and requires a great deal of concentration and skill. It’s not impossible, however, and those who enjoy sailing alone become very adept at hauling their anchors overboard.
Again, the method is largely the same whether you’re using sails or the boat’s engine for tripping the anchor. The difference when doing it alone is you’re responsible for both roles. Alone, you need to pull and tauten the rode, belay the rode, and man the engine or manage the sails.
This is going to involve some rather frantic running back and forth between cleat and engine/sails. The process needs to be fast to ensure you don’t spin out of control while the anchor is being hauled. The more physically fit you are, the easier this will be. The sailboat will begin drifting off course as you pull up the anchor. The key is to do it quickly so you can race back and man the engine.
It’s not easy but, for those who love to go it alone, it’s always worth the effort.
What If the Anchor Gets Stuck and Won’t Move?
It’s a question that sailors have been asking for hundreds of years. Sometimes, an anchor simply won’t budge. No matter how it is pulled, twisted, and pried, it remains stubbornly tethered to the seabed. This can be a source of great frustration because, ultimately, there is no guaranteed way to free a stuck anchor.
If you try every trick and method and an anchor still won’t come free, the only option is to abandon it. This is another reason why it’s important to pick your anchoring spots carefully and only drop-in suitable conditions.
If your anchor won’t come free after using the engine or sails for extra pulling power, try one of these methods.
Short Haul
Pull up and belay the anchor cable until it is reasonably taut. Grab hold of the wrap tightly (wear protective gloves) and wait until the boat dips into the trough of a wave. As it rises on the next crest, pull hard. Oftentimes, applying tension at the right moment is enough to dislodge stuck flukes.
Ring Ding
Snap the retrieval ring and the buoy around the anchor’s cable. Then, switch on the engine and push forward at a 45-degree angle. This method applies the ring and the float in a rudimentary pulley mechanism. When combined with a gentle tug from the sailboat’s engine, it’s sometimes enough to free the anchor.
Leave It In Place
This should be a last resort because leaving debris in the water is always strongly discouraged. Nevertheless, if you cannot dislodge an anchor no matter how hard you pull and strain, the only option may be to abandon it.
If you must do this, cut the warp short before you leave the area. This prevents it from obstructing others. You must do this UNLESS you are definitely planning to come back and retrieve the anchor in some way.
The Final Words
In this article, we answered the question ‘where should you avoid anchoring’ and explored others relating to anchoring in crowded spaces, adhering to anchoring restrictions, and retrieving anchors in the safest way possible. Hopefully, it has given you insight into the responsibilities and work involved with manning a sailboat of any size or capacity.
Few would argue with the notion sailing is one of the toughest hobbies to successfully learn and master. It’s lucky then that it’s also one of the most enchanting.
Buying a used boat is one of the easiest ways to achieve your sailing dreams, mostly if you have a little boating experience or a limited budget. Purchasing a used boat may be challenging and daunting, however, below are some of the things you should look into while buying a used boat.
Buying A Used Boat Checklist
Our Buying a Used Boat Checklist
When buying a used boat, one of the significant signs you should check out is the overall maintenance. The clues of the kind of love the boat had been portrayed eve in its fenders, lifejackets, and lines. Below are some of the things you should be keen on. You may also need to consult a pro when in doubt.
Think about your needs and use
Why do you need a boat? Do you use them for fishing or for having fun? How many people will be with you on the boat? Before going to get your boat you must think about these types of basic needs.
Another important point to think about is the type of boat you want. Think before you go for your one.
Don’t Forget to Check the Boat Documents
After selecting the type of boat, we need to confirm if the boat has registered documents. The documents will provide you with important information about the boat and the boat owner.
Check all the documents to understand the boat. You will be able to know when the boat has undergone services and revisions. If any part is changed recently, or if any of them needs to be changed, real conditions of the boat parts and many more things will come out through the papers.
Damage signs checkup
Moisture, flexing, mold, and cracking in the fiberglass and timbered areas such as transom, hull, and floor are indicators of decay, plywood delamination, fiberglass break down and decay in the stringers. These kinds of signs are indicators that the boat is not properly maintained.
Used Boat Inspection
If you find some problems in external inspection, try to estimate how much it may cost to repair the damages. Have a rough calculation to add to the expenditure list. For example, painting a boat will cost you time, energy, and money.
Oil testing
Be keen to identify engine wear and tear, which can be felt by the gritty feeling of oil between your finger. You should abandon the boat if the mechanic confirms it. The presence of milky oil in the lower unit or the engine means there is some water getting in.
A prop shaft that is bent can be uncoiled and worn out seal replaced. But that kind of impact might have caused some stress to the gears, and the bad news could be if the water is sipping in because the gears could get destroyed.
Examining fiberglass cracks below and above the waterline
Tiny cracks in localized parts are mainly cosmetic. They mostly appear around the screws that are not fixed correctly around the wind-shields, handles, and gunwales.
It is not much of a trouble, but it can get worse if not set. Cracks that exceed two inches indicate huge problems underneath. It would help if you asked whether the boat has ever been in a collision and also inspect for indicators that translate to massive repairs such as a gel coat. An expert is also very essential for the inspection.
Loose seat inspection
The loose seat could be as a result of the rotten floor or as a result of stripped bolts. The bolts get strained when one sits on the bench back while driving. The latter can get fixed quickly.
Mildew checkup
You should check whether the top of the boat, the seats, or the carpet has mildew or any other damage. Inspect the storage lockers also.
The covers and the upholstery can be replaced or cleaned, but lots of molds in the seats is not a good sign. Because fungi spread quickly, the areas with the spores may be an indicator of their presence in the wooden parts. A ski locker or a carpet, which is moldy, can also be a sign of more problems underneath.
Start the engine
Checking the engine is also crucial when buying a used boat. Check whether the engine start is a slip or rough, smoke, vibrate, or with a lot of noise. Plenty of oil or old gas in the first tune-up is easily fixed.
These symptoms are, however, indicators of more significant problems like low compression at the cylinders leading to the want of an expensive engine repair.
Inspect the electronics
When it comes to bilge pumps and burned-out bulbs, there are cheap solutions.
The presence of multiple devices failing to work could de due to a faulty battery or wiring is not a big problem. But when it comes to peeling up labels in the engine or melting of the insulation wires, there is trouble because that indicates that the driver is overheating.
Inspect the belts
Worn, thin, or cracked power-steering or alternator is a hint that the boat was not adequately maintained. The belts are supposed to be changed every 100 hours. When belts are damaged, laxity gets noted though you can cover it in your first service.
Survey the Boat if necessary
If you have selected a boat roughly but you don’t have sufficient knowledge to finalize the boat, you may take the help of a registered surveyor. It will definitely impact the cost of owning a boat.
This type of service is not very costly today. It may cost something like 20 to 50 dollars only. But you will get great professional support to confirm your boat.
The boat surveyors may be particulars, from the insurance or from an agency.
Surveying a small boat may take around 20 minutes.
Advantages of Buying a Used Boat
Buying a second-hand boat
Buying a used boat has its benefits; that’s why some buyers would prefer going a used one to a new one. Some of these advantages are:
The price
One of the best advantages of buying a used boat is that you will buy the same boat at a lower price. The cost of a used boat is less compared to a new boat; therefore, if you happen to be on a tight budget, you can save a lot of money, if a good dealer with a quality boat can come along, one can be able to save a lot of money. But all the same, it’s good to check if every part of it is in excellent condition.
Purpose of the boat
The plan you have for the boat also matters. If your project is to use it for recreation purposes, the used boat is perfect for that use because it will not get used regularly. Most of the boats sold by the dealers are of good quality, but in case you are not satisfied with its looks, you can tailor it to your preference.
Additional items negotiation
When purchasing a brand new boat, you will spend quite a large amount of money on it and also on the additional requirements which are necessary as well. For example, you will require safety equipment and other things of that kind.
But when it comes to buying a used boat, you can acquire the additional materials by negotiating with the owner for a reasonable price. It will help you save a lot of money.
Record of maintenance
By checking the boat’s maintenance record, you will be able to identify the parts of the boat have been replaced. It ensures you are fully aware of the condition of the boat, and in case of any new items to be acquired, you may negotiate.
You can also give the boat a new look by painting it and mastering the parts that need more observation with the help of the maintenance record.
Disadvantages of Buying a Used Boat
Buying a used boat has its disadvantages. Here are some of the difficulties that come with buying a used boat.
No warranty
Most of the used boats are usually out of warranty for the engine, appliances, and equipment inside. This means if you decide to buy it, you will have to take it as it is, and in any complication that arises later, it’s all in your hands.
Hose clamp and rubber hose failure
A new boat rarely has the broken hose clamp or spitting hose failure. But when it comes to used boats, this is a common problem. A boat with a rotten hose causes the overheating of the engine and can as far as making the boat to sink.
Oxidized or faded gel coat
Worn out coat is a common problem in used boats. Reviving the gel coat’s luster is very hard unless the outboard had vigorous maintenance by baffling and compounding several times in a year.
Old styling
When someone is not familiar with boats, a used boat may look okay and great, but there are high chances that the styling is outdated. Like in the automobile world, boat designs change and advance after a minimum of four years and a maximum of seven.
Calloused-riding hull
Though most builders never talk about it, the fact is that most old boats have rocky –riding hulls. The reason for this mostly varies from brand to brand.
Poor electrical wiring
One of the most problematic systems in a used boat is the condition of the electrical wiring. Until the previous decade, the connected wires used to be exposed in the air and therefore corroded.
Wires go through the partitions which were not getting adequate protection from wearing. Tracing the wires when something has gone wrong and replacing junction blocks can end up being expensive.
Wrong perception
The status and pride of owning a boat make many people purchase one. However, buying an old boat is an indication that they can’t afford a new one; this ends up being more problematic to them.
Poor engines
Engine makers keep improving the engine’s efficiency over the years. It leads to more efficient engines in both inboards and outboards engines, which are more reliable.
Structures made of encapsulated wood
Many builders were using wood in the decks, transom, and stringers in the making of fiberglass boats. It would make the wood to end up soaking the water mostly because of the drilled holes into the transom. The wood would end up soft and dense, and to some point, it would even rot. So if one is not keen on buying a used boat, it may be problematic for them.
Conclusion
Buying a used boat can help you achieve tour sailing dreams and, at the same time, turn out to be a nightmare for you if you fail to do a thorough inspection before buying. Weigh your options wisely and make a decision that will assure you of value for your money.
While enjoying a ride out on the water in a kayak can be fun, it can prove to be a real chore if you don’t have the right paddle. It is a necessity to have a paddle that is easy to control and provides you with a structure that can handle your movements in the water with ease. The best kayak paddles for the money should be ones that you can handle quite well.
Best Kayak Paddles
The problem is that there are so many paddles on the market that you could lose track of what makes them different from one another. This guide includes information on some of the top paddles that you can use today as well as points on what to find when getting a useful paddle ready.
The best part of these paddles is that they are all affordable. The values for these paddles are all varied, but they are choices that should do well for when you are aiming to move along in the water.
Quick Answer: The Best Kayak Paddle
Our top pick for the quick answer section is, Carlisle Magic Plus is the best kayak paddle. Of course, it depends on each person and the different needs and uses. We have selected a list of top ten. After that, we will review some great paddles for Whitewater and for kids and youth as well.
Comparison Of The Best Kayak Paddles
Kayak Paddle
Length (in inches; measurement based on maximum length for adjustable models)
The first of the best kayak paddles for the money to buy is this Shoreline Marine product. This offers a 96-inch length and a three-position system to help you adjust the paddle based on your ability to use it. This lets you adjust the shaft to move it in or out as you see fit. This is ideal for people of various sizes, but it still works best for adults as it might be too long for a child to use even when at its shortest setting.
Shoreline Marine Kayak Paddle
Drip guards are included to deflect water appropriately after you take the paddle out of the water with each stroke. The blades are made with strong contours that will cut through the water and prevent drag. The water can move evenly over the blades as well, thus keeping them from bogging you down during your ride.
The aluminum shaft keeps the paddle a little less than two pounds in weight. The foam handles keep your hands comfortable while you are using it as well. The aluminum surface also resists corrosion and will last for years to come.
Pros
Easy to move into different positions
Soft to the touch
Moves through the water quickly
Cons
Blades might come apart if the water conditions are too rough
The two-piece construction on this SeaSense paddle ensures the unit is light in weight. This is less than two pounds in weight even with an 84-inch length. The aluminum surface produces a simple design that allows the paddle to float in the water. You can always take it apart for storage purposes when you are not using it.
SeaSense X-Treme 1 Kayak Paddle
The drip guards can be adjusted quickly. They can move up onto the blades and then down again depending on how intense the water is.
Pros
Easy to grip onto
Will not slip out of your hands easily
Cons
Drip guards do not cover water as well as solid cone-shaped guards
Available in 84 and 96-inch lengths, this SeaSense paddle comes in blue and orange colors. The drip guards are made with ring-like bodies that can be adjusted up and down to your comfort.
SeaSense Kayak Paddle
Three locking positions are included on this kayak paddle to let you adjust its length as needed. These positions are secured with sturdy locks that keep each length in place without you worrying about it collapsing while you are using it.
Pros
Weighs a little less than a pound
The aluminum shaft provides an even weight all around
Easy to lock into different lengths to create an even size along with the entire paddle
This is a two-piece model that is made with a polypropylene blade with a light shaft added to its layout. A push-button feature is used here to adjust the paddle blades to move at different degrees.
Carlisle Day Tripper Kayak Paddle
You can adjust the positioning of the paddles for your left or right-handed usage needs. You can also use the push button to separate each part from one another, thus making it easier for you to store the paddle when you are not using it.
Pros
Weighs around two pounds
Easy to adjust the design
Contours on the paddles allow you to move through the water well
Cons
Although there are three sizes, there isn’t much of a difference between them
This is a very popular paddle thanks to its fiberglass shaft. This adds a light design that keeps the paddle just a shade under two pounds in weight. The blades are made with glass-filled polypropylene material. The glass materials add a slightly rigid surface to keep you from bearing with lots of drag.
Carlisle Magic Plus Kayak Paddle
The smooth strokes on this come thanks to the shapes of the blades. This adds a more comfortable layout that is not hard to use. More importantly, the curve allows the water to move along well while keeping you from having to favor one half of the paddle when using it.
Pros
Does not produce lots of stress as you paddle
The distinct curve on the blades creates a fine motion in the water that cuts through evenly
Werner Desperado Carbon the Best Whitewater Kayak Paddle
If you are looking for whitewater or river kayaking, this is going to be your paddle. The asymmetrical blades are made from carbon fiber and nylon. The fiberglass bomber shaft (1-piece) makes it relatively light-weight.
Werner Desperado Carbon-Reinforced Whitewater Kayak Paddle
The advanced design and technology permit to paddle with great balance and smoothness.
Pros:
Awesome whitewater paddle for the price
Not heavy
Available in different sizes (191 to 200 cm)
The manufacturer offers one year warranty
Easy to use
Cons:
The size of a 1-piece paddle can always be a problem.
This 96-inch paddle is another option that can be taken apart with the two halves affixed to the sides of your kayak if desired. This is ideal for a standard rowing motion, but you would have to watch for how the paddle halves are affixed to the sides.
Intex Dual Purpose Kayak Paddle
You might have to get some added anchors to the sides just to get those paddle halves supported. You would also have to keep the blades positioned to where they can move through the water and produce a good propelling motion without favoring one side. But when applied right, it adds a special body you are bound to love using. You can also use just one oar for light paddling or for simply turning the kayak around in one direction.
The ribbed blades are light in weight while the aluminum shaft keeps the paddle strong without adding lots of bulk. The drip rings also keep water from splashing around, but they work best after you adjust them accordingly to fit your demands.
Pros
Easy to take apart the paddle and to put it back together
Grooves on the blades add a nice touch
Cons
It may be a challenge to get the two halves attached to the sides of your kayak
Werner Camano Premium Fiberglass Best Kayak Fishing Paddle
Werner is one of the most reliable kayak paddle makers. They make different types of quality paddles. This beautiful lightweight kayak shaft is made from carbon. The fiberglass blade is simply exceptional in design. These medium blades help to pass more time on the water without being tired.
Werner Camano Premium Fiberglass Kayak Paddle
This paddle suits a beginner to an expert.
Pros:
The design is great for fishing
Available in different colors and sizes
It performs smooth and efficient strokes with very less swing
This next choice is a two-piece paddle with an 84-inch length. It features curved blades while the straight shaft comes with a series of pads for your comfort. Those pads also make it easier for you to keep a grip on your paddle.
AIRHEAD Kayak Paddle
It is ideal for newcomers who are not used to how well a paddle can work, but it can still be suitable for kayaking veterans.
The blades have curves on them to keep a good design where they can move through the water well. You can also adjust the feathering to your liking by working to curve each of the two blades. This can work well for left or right-handed users and should not be complicated to get a hold on.
Carlisle Magic Mystic Poly| Best Beginners Kayak Paddle
This option is less than two pounds in weight and has a polypropylene blade surface. It uses an aluminum shaft with a slight tempered surface added to it. This adds a good layout for handling the motion that you go through and should not be too hard to work with.
Carlisle Magic Mystic Poly Kayak Paddle
This is available in a light blue or orange-yellow color. The alignment positioning can be changed on this paddle to better suit your hands and to keep a firm grip moving. This should be strong enough for most users, but this model can work exceptionally well for newcomers to the field of kayaking.
Pros
The bent shaft allows for a bit of flexing in the wrist for it to work
Blades are reinforced to keep them from bending while in the water
Cons
The shaft can feel rough at times
It can be easy for the feathering to become improperly aligned depending on the water
Intex Dual Purpose Kayak Paddles and Inflatable Boat Oars
The last of the paddles for the money is this set that comes with two different layouts. You can start by using this set as a single 96-inch paddle. You could also take it apart to have two 48-inch oars for lighter paddling needs. But whatever you choose, you will get this to work with a lightweight aluminum shaft that will not bog you down while using it.
Intex Dual Purpose Kayak Paddles and Inflatable Boat Oars
The blades have ribbed surfaces to move through the water and to give you a more consistent sense of control. A retainer ring is also added to keep the oars in place while you use the one-piece layout on this. The ring offers a sturdy connection to lock everything up together so the oars will not come apart.
Pros
Simple assembly and takedown
Weight is balanced evenly between both halves
Blades will stay intact while in the water and will not crack easily
Available in black and yellow colors, this Lifetime paddle is made with youth needs in mind. It is 72 inches in length, thus making it suitable for a quality setup.
Lifetime Kayak Youth Paddle
It only weighs about 1.7 pounds thanks to the sturdy aluminum shaft. You can also use the push-button feature to adjust the feather positions on the paddle to 60 or 90 degrees. The blades also have convenient curves to create a better design.
It’s a great kayak for kids as it creates good power without punishing the muscles. It is lightweight and 75 inches in length. This comfortable touring kayak paddle has a suitable and warm grip for the children. This paddle is for the kids of 8 to 13 years old.
Carlisle Kids Saber Touring Kayak Paddle
Pros:
Comfortable with its grip, weight, and length
The smaller polyethylene blades produce sufficient power without harming the muscles
This kayak paddle is for the 4 to 10 years old kids. It’s a very lightweight (1’3 lbs.) paddle with ribbed blades. For those who want to learn to paddle, this is the perfect paddle for them.
Hardcore Water Sports Kids Kayak Paddle
The youth and adults can use this paddle for tubing also.
Pros:
Lightweight and small in size (60 inches assembled)
There are not too many options for the kid’s kayak paddles. Seaflo makes this PVC shaft kayak paddle for the kids. The 50 inches long paddle is only 0’9 Lbs. The blades are curved and efficient in action.
This 4-part super light kayak paddle offers great portability. This is only 1’6 Lbs. You can manipulate the size and weight according to your needs. The younger people can use it perfectly.
ADVANCED ELEMENTS Ultralite Pack Kayak Paddle
Pros:
Only one middle part can be added to the 2 blades for a smaller size
These paddle blades have a mixed shape. They are like spoons but longer in size like airfoil shape. The wing paddles are good for generating speed in a straightway. They work great in lakes, rivers or on flat waters.
2. Greenland Paddles
Greenland paddle was invented by the people of Greenland. These paddles are normally made of wood. A piece of wood is given shape to have two long and narrow blades.
The blades are usually 2/3 inches wide. But, it is proven that they work efficiently. They are easy to control as we can hold at any point in the shaft. They work well for forwarding strokes and sweep strokes.
The Greenland paddles can be a bit heavier.
3. Euro Paddles
The blades of euro paddles are different. It has a shaft and the blades could be different from each other.
These blades could be flat or bent. There are many variations among the euro paddle blades. Some are spoon-shaped and some are not.
Euro paddles can generate very high speed and at the same time offers great control. They work great for whitewater kayaking and on the rough waters. The difference between Greenland paddles and euro paddles are not so big. But, I love euro paddles.
4. Aleut Paddle
Aleut paddles are one-piece long and narrow paddles too. The front and the back of these paddles are not the same.
To give more strength to the paddle the front side is ridged. This particular side sometimes has a long groove. The back of these paddles is normally made straight. These paddles are good for long-distance tours. They handle choppy waters as well.
Buying Guide
You can use this guide to get a clear idea of what to expect out of kayak paddles so you can find something that fits in perfectly with your needs while on the water. This includes knowing how to tell what size your kayak paddle should be before you get out on the water.
You need a paddle that comes with several features:
It needs to be easy for you to hold onto without bothering your hands or putting you at risk of losing control.
It should also be light in weight.
The paddle has to be sturdy enough to last for your entire trip.
You should not struggle with trying to paddle your kayak.
The length should fit your body well enough. Anything that can be adjusted helps too.
You must look at how well you can get a kayak paddle to work for you. Several points should be used when you are trying to find the top kayak paddle for the money.
Analyze the Length and If You Can Adjust It
The length of the kayak is vital for you to consider. You need a kayak that you can handle to get into the water and to produce the best possible strokes. You will need to choose a kayak based on your size and the width of your kayak. Refer to the FAQ section in this guide for additional information on how to choose the right length for you.
Also, some kayak paddles let you adjust their lengths. You can use a series of poles or fasteners in some models to move the shaft inward or outward. You would have to review the maximum and minimum lengths of your paddle to see how well it can work for you. Also, some paddles come with locking features that secure the paddle in a certain position.
The locks on a paddle should be secure and will not cause you to lose control of it. This should give you extra help with keeping it active and functional.
What Is the Blade Made Of?
The blades on your kayak paddle have to be made with an appropriate surface. The materials on a kayak blade have to be solid and stiff enough to keep you from bearing with lots of drag, but they should also be light in weight. But remember that while some options might be cheaper than others, you could be sacrificing quality depending on what you get.
There are four types of blades you can find:
Plastic
Plastic blades are cheaper to get thanks to how easy it is to get the materials needed to make them. A plastic blade will feature a light-weight and is flexible enough to handle different water conditions. However, a flexible blade might add an extra bit of pressure or drag on your stroke, thus keeping it from being useful. Also, plastic materials can crack at times. They can also wear out quickly if they are exposed to the sun’s rays.
Nylon
Nylon has many of the same features as plastic, but nylon might not be at risk of cracking that much or warping while in the sun. But nylon can still be flexible enough to produce too much drag in the water.
Fiberglass
Fiberglass is popular for being sturdy and lighter in weight than plastic and nylon. Fiberglass is rigid and tough and will not crack apart. A blade might chip after a while though.
Carbon fiber
Carbon fiber is considered to be the best possible material to use for your needs. Carbon fiber is popular for being light in weight and for being much more durable than most other models. It is also very stiff. But be advised that carbon fiber is very expensive.
What Is the Shaft Made Of?
You will more than likely find aluminum in your shaft. Aluminum is popular for being an affordable and recyclable metal. It stays strong and will not bend or break apart easily. However, you would have to watch for how you store the paddle as it can get very hot or cold depending on the weather conditions you keep it in.
You can also find some carbon or fiberglass shafts. These are much stronger and lighter in weight, but they also cost more to get. These are not as commonplace as aluminum materials either.
There are also some plastic shaft paddles, but those are not as common anymore due to concerns about plastic materials breaking apart and keeping a paddle from lasting long.
How Is the Shaft Laid Out?
Most shafts are made with straight bodies, but some of the best kayak paddles for the money come with slight bends to help anyone keep one’s hands on the paddle. Others might have pads that add a bit of extra comfort plus guide the user towards keeping one’s hands on a certain part of the shaft.
Any ring guards or knobs among other locking or support items should be pushed far apart from one another. This ensures that you don’t try to handle the paddle with your arms too far apart from one another.
Sometimes a shaft might include a connecting spot in the middle, particularly for when you have something that might be easy to take apart. The spot should have a locking feature that keeps both parts from coming apart prematurely.
Look At How the Blade Appears
The way how your blade is laid out on your paddle is important to explore. A blade should come with an asymmetrical look. This means that the blade is narrow on one side and wide on the other. This creates a better angle when the blade goes underwater. It also keeps the surface area of the blade consistent as you use it.
You may also notice a slight rib in the middle part of a blade. This lets the water move evenly over both halves of the blade. This should help to keep the pressure being imposed on this as even as possible. Be advised that it might be tough to maintain a full balance over your paddle depending on how well the water moves over those two handles.
You can always find a narrow or wide blade when finding something of value. A narrow blade is lighter in weight and is better suited for when you are going on a longer boating trip. Meanwhile, a wider blade is best for when you need to pull through with more power and accelerate fast.
Review the Feathering
The feathering on the paddle is designed to where the two halves of the paddle can be positioned at different angles separate from one another. You can adjust the feathering on some paddles to offer different angles between the two. This includes a layout where the left blade might be 60 or 90 degrees off from the right or vice versa. When there is a 0-degree feathering, the blades are parallel to one another.
Some models let you use a button or a knob to adjust the feather on the paddle. This is ideal for left or right-handed kayakers who favor half of the paddle. Feathering can also be used for windy conditions. The wind resistance you would come across will be minimal when the feathering angle is higher. Be sure to see how well you can adjust the feathering on your paddle when you get it.
Look At The Drip Guards
The drip guards featured on the blades are vital to your protection in the water. Drip guards are added near the bottom parts of the blades to hold water during the upstroke. The water will drop back down during the down-stroke. This keeps you from bearing with lots of water splashing back onto your body while you are using the paddle.
A guard needs to come with a solid body. It should also move outward from the blade to collect more water. This may work better than a traditional drip ring. A ring might still weigh less and could be easier to adjust.
Holding Correctly a Kayak Paddle
For holding a kayak paddle properly, we should try to be relaxed and comfortable. But, we should follow some basic guidelines to avoid inefficiency and injuries.
The distance between the two hands will be a bit more than your shoulder width. You can put your hands parallel to the ground. Bend your elbow 90 degrees and hold it there. This might be a good distance between the hands to hold a paddle.
The paddle should remain at a comfortable distance from your chest
The longer parts of the blades will remain on the upper side
The knuckle of your right grip will be 180 degrees to the upper blade side
Fix the left hand according to your comfort and you can move it to adjust when paddling.
Setting Up a kayak paddle
It depends on how high you grip your paddle with the top hand and the natural twist of your body when performing a stroke. If we have a 2 piece kayak paddle, then we can set up the paddle in the following way:
Hold the paddle and pretend a forward stroke at the left side
Make the left blade square at the left side, so that it will face the maximum resistance from the water
Maintain the position, open the adjuster of the paddle
Make the upper blade straight aligned with the shaft (180 or 0 degrees)
Secure the adjuster at that point
This is how we set our paddles for maximum efficiency when we are on the water. The angle between the blades will be 0 to 90 degrees. In most cases, the angle is 40 to 70 degrees. If you use more sweep strokes, the angle will reduce.
Kayak Paddle Maintenance
After using a kayak paddle, open the parts and wash each part with clean fresh water nicely. We should keep the parts separately in a dry and clean place inside our house or in a store. For the next day of kayaking exercise or tour, you will have to fix the parts again.
Related Safety Tips
When paddling, we should never touch the side of a kayak hull with the paddle. If we make the mistake, we must not apply any force to take the paddle out of there.
Be calm, take your time to smoothly bring the paddle out of the place. If we get nervous and try to pull it out, we may face an accident. The kayak may have unusual movements or even could be capsized.
Frequently Asked Questions
How can you tell what size is right for you when getting a kayak paddle ready?
There are several steps you can use when figuring out the appropriate size for your kayak paddle:
Review the size of your kayak.
You should use a longer paddle if you have a wider model. A longer paddle ensures that the kayak will be easier to turn.
Check on your torso size.
You need a longer kayak if you have a greater torso size. Youth paddles are for those with torso sizes from 22 to 24 inches. These paddles are typically shorter than 200 cm in length. Meanwhile, the longest kayak paddles are for people with longer torso sizes.
Consider your fitness level.
It might be easier for you to use a longer paddle if you are healthier and capable of using it well enough.
In short, you should look for a longer paddle if you are larger or if your kayak is big, and also if you are physically fit enough to handle it. A good idea is to try and test a kayak paddle out before you buy it or to use a simulated material to figure out how well you can get one of these to work for your requirements.
What should you do if you fall in between two specific sizes?
Your best bet is to use a shorter size if you fall between two particular sizes when getting a paddle. Using the smaller size is better when you are trying to keep something easy to hold and use.
How can you tell if the paddle you are using is an appropriate one in size?
You can tell that a paddle is of a proper size if you hold your paddle outward in a horizontal layout while bending your elbows at a 90-degree angle. See how far your hands are from the middle part of the shaft and your shoulder blade.
Your hands should be around two-thirds between those two parts. At this point, you should have the right paddle.
Do you need a two or four-piece kayak paddle?
You can choose to get either a two or four-piece paddle. A two-piece paddle lets you split the paddle in half while a four-piece one lets you divide the shaft in half while taking the blades apart as well. Each of these paddles will perform in the same fashion, but a four-piece model would suit you best if you don’t have enough space to store a paddle in. This is especially if you are backpacking and you cannot get a two-piece paddle to fit into a storage spot.
Can you add anything to the end of your blade?
Most blades are too sturdy and solid to where you could attach something onto your blade. However, some people like to clamp small hooks onto the ends of their blades for when they need to retrieve bait or other items from inside the water.
This is useful for fishing trips. But this is an optional point that would require a clamp that is separate from the hook or other item being attached. The unit would have to be secured carefully to ensure that it will stay intact and active for as long as possible.
Can I use a kayak paddle for a canoe?
Canoe and kayak paddles are different. The answer is, yes, we can use a kayak paddle for canoeing. But, the paddle must be longer as the canoe is wider than a kayak. The kayak paddle has 2 blades on two ends and a canoe has one blade on one side.
A Final Note
You have to know what you are getting yourself into when you find the best kayak paddles for the money. The best paddles do not have to cost far too much money for your use. They can be effective when you’re looking to head out to the water thanks to their quality materials. These can be made with sturdy metals or plastics and come with features that let you adjust many points around each paddle. The functionality of a kayak paddle is impressive as it can do more for you than just propel you down the water. It can also simplify how well you can move without lots of drag added to it.
But as you look for quality paddles, you will have to look at how they are designed and that you have ones that can be adjusted to your liking. Make sure you also look at how well you can handle your paddle and that it is comfortable enough to use in most situations. You will enjoy getting out on the water more when you have a strong paddle that can get you out on the water and ready to enjoy everything that the outdoors has to offer.