Best Life Jackets reviews In 2021 | For All

It does not take much for an emergency on the water to happen. This is where the best life jackets for your use can come in handy. The last thing you want to deal with is yourself or other people on your boat struggling to keep above the water in the event everyone has to get off or they are forced off due to something happening on the boat.

The good news is that you can use a life jacket to keep yourself and others on your boat protected and safe. A life jacket will work by providing a wearer with an appropriate floatation device. This makes it easier for a person to stay above the water and to get to a proper dry surface in the event of an emergency.

Best Life Jackets
Best Life Jackets For All Ages

All the life jackets you can find on the market include options that are easy to wear and can provide you with a great fit in any situation. Each jacket can also work with a series of buckles to help you get it on and off or to adjust its fit depending on the model. But you will have to watch for the sizing on your jacket so you can see how well it works.

Remember when finding a life jacket that you are getting one with the goal of ensuring that all people in your boating party are safe and protected. You must see that a life jacket is made with care and control. In case of an emergency in water, it is important to be familiar with the marine distress signals and how to use them.

Comparison For The Best Life Jackets And PFD

Jacket ModelSizes availableMaterial UsedNumber of BucklesView On Amazon
Stearns Adult Classic Series Vest30-52 inches for adults, 52-62 inches for oversized needsNylon3Check Today’s Price On Amazon
Stohlquist Women’s Flo Life JacketThree sizes with one plus-size optionNylon and neoprene mix1Check Today’s Price On Amazon
O’Neill Wetsuits Men’s Superlite USCG Life VestAvailable from small to 6XPolyester4Check Today’s Price On Amazon
Stearns Adult Watersport Classic Series VestFor adults at least 90 pounds in weightNylon4Check Today’s Price On Amazon
Hardcore Water Sports Life Jackets For FamilyYouth from 50-90 pounds, adult sizes from S to XLPolyester3Check Today’s Price On Amazon
Onyx MoveVent Dynamic Paddle Sports Life VestThree sizes from 28 to 56 inchesNylon2 (on the shoulders)Check Today’s Price On Amazon
Stohlquist Women’s Escape PFD Life JacketsThree sizesNylon3 (two on the shoulder and one on the bottom)Check Today’s Price On Amazon
Stearns Puddle Jumper Deluxe Child Lift JacketChildren from 30 to 50 pounds in weightPolyester1 (featured on the back part)Check Today’s Price On Amazon
Body Glove Paddle Pals Learn to Swim Life JacketChildren from 30 to 50 pounds in weightPolyester1 (found on the back)Check Today’s Price On Amazon
Absolute Outdoor Onyx A/M-24Works for most peopleNeoprene1Check Today’s Price On Amazon

Features Of The Top Life Jackets For Women, Children & Men

A quick note: The products in this listing include a series of different jackets for men, women, and children. Some of these products are suitable for all members of the family, but it helps to look at what someone might be comfortable with when getting a good jacket ready. Let go through our top ten life jackets:

  1. Stearns Adult Classic Series Vest
  2. Stohlquist Women’s Flo Life Jacket
  3. O’Neill Wetsuits Men’s Superlite USCG Life Vest
  4. Stearns Adult Watersport Classic Series Vest
  5. Hardcore Water Sports Life Jackets For Family
  6. Onyx MoveVent Dynamic Paddle Sports Life Vest
  7. Stohlquist Women’s Escape PFD Life Jackets
  8. Stearns Puddle Jumper Deluxe Child Life Jacket
  9. Body Glove Paddle Pals Learn to Swim Life Jacket
  10. Absolute Outdoor Onyx A/M-24

Stearns Adult Classic Series Vest

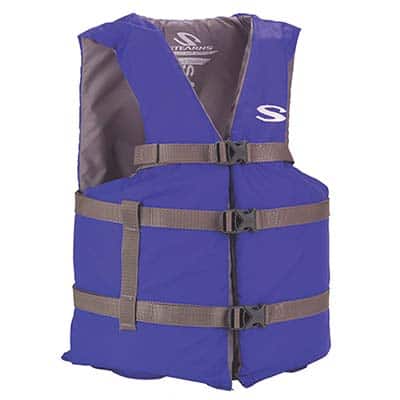
The first choice to see when finding the best life jackets on the market is this one from Stearns. This comes in both a standard and oversized model for adult use. It is made with a nylon body and has a three-buckle layout for basic fitting needs. The strong nylon offers a convenient layout and is also see to see from a distance. You can get this jacket in blue or red color.

The PE foam on the inside also provides you with enough flotation while in the water. The belts are also easy to adjust although you would have to get each of them adjusted in the same way all around for the vest to feel a little more comfortable with a better total fit.

Pros

  • Simple design
  • Easy to put on and take off
  • Webbing materials are sturdy and do not wear out quickly

Cons

  • Each buckle should be applied evenly for the best results
  • Might run small for some people

Stohlquist Women’s Flo Life Jacket

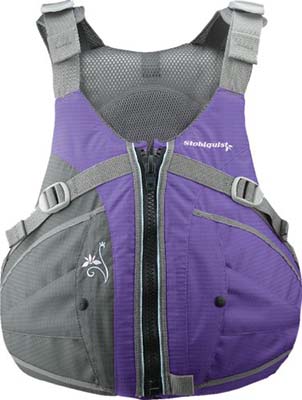
This next jacket is a Type III life jacket from Stohlquist that comes in three sizes for women. It features a five-inch high and 19-inch wide body while a mix of nylon and neoprene is featured all around the body. The waistband comes with a neoprene surface that conforms to your body and is easy to adjust. The nylon on the rest of the jacket creates a smooth surface that does well around your entire body.

The PE foam is light in weight while the mesh lining keeps you cool while wearing it. The liner ensures that water will not seep through while you are wearing the jacket.

A high back is also included in this life jacket. This provides you with a good fit while the neckline stays intact and easy to handle.

Pros

  • Offers foam cups for added physical support
  • Sides offer a slight opening to allow for enough ventilation
  • Does not shift around while in use

Cons

  • The waistband on the bottom can feel tough on some people

O’Neill Wetsuits Men’s Superlite USCG Life Vest Review

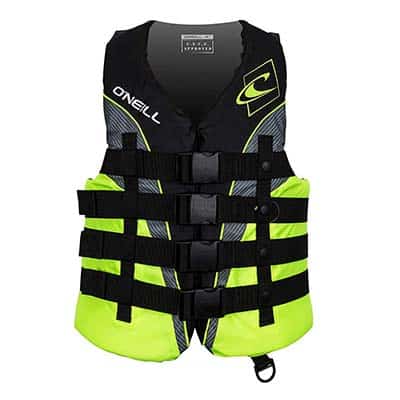
O’Neill made this intriguing life vest with standards set up by the United States Coast Guard. This is made with many sports and swimming needs in mind and works with an extensive variety of sizes.

A polyester shell is used on the outside to create a strong body that does not wear out fast. This is paired with PE foam to produce a softer body that is easy for anyone to swim in. The relaxed fit on this life vest ensures that the user will not struggle with trying to wear it.

The four buckles on this life vest also ensure a good fit. This works well for men of all sizes, but it helps to get a clear idea of the size one might need when getting such a vest ready.

Pros

  • The strong body does not wear out easily
  • Comes in a vast variety of sizes for all men
  • Available in various colors
  • The design does not produce lots of bulk

Cons

  • Buckles are not easily adjustable
  • Can cause anyone to feel rather war quickly

Stearns Adult Watersport Classic Series Vest

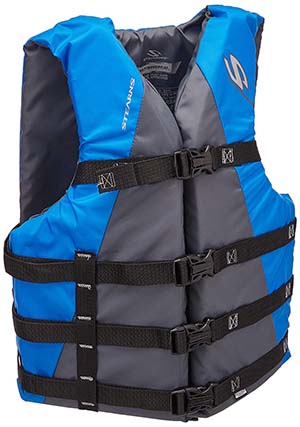
Available in four colors, this Stearns vest uses a nylon shell with a PE foam insert. An open-sided design is featured to allow for a better fit. The four buckles on this one can also be adjusted to create a comfortable fit while still allowing for enough air to move around your body.

The one-inch straps on the jacket provide you with a sturdy setup where the straps will not come apart quickly. The arm openings are wide enough to let air move through while providing you with a better range of motion as you use it while fishing or rowing among other activities. This offers a comfortable fit for adults and is not designed with kids in mind.

Pros

  • Offers an extensive variety of fits for adults 90 pounds or heavier
  • Each buckle can be adjusted separately from one another
  • Offers enough visibility while in the water

Cons

  • Might be a challenge for plus size users to handle
  • Is not appropriate for snorkeling

Hardcore Water Sports Life Jackets For Family

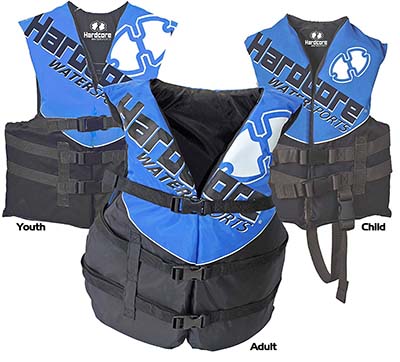
Hardcore Water Sports makes various Type III jackets that are approved by the United States Coast Guard. These include a size for children from 50 to 90 pounds in weight plus universal fits for regular and plus-size individuals.

The polyester body is made with a one-inch webbing material while an open-sided layout offers a comfortable fit while allowing enough air to move around your body.

The various sizes work with the same types of buckles and materials all around. This allows everyone to have matching materials. These are made with different universal fits in mind, so make sure you watch for how well individual features are organized.

Pros

  • Easy to adjust each model
  • Offers a strong fit on one’s body

Cons

  • Might fit somewhat small for some people even when the proper recommended size is worn
  • Graphic design might be a little too flashy for some people

Onyx MoveVent Dynamic Paddle Sports Life Vest Review

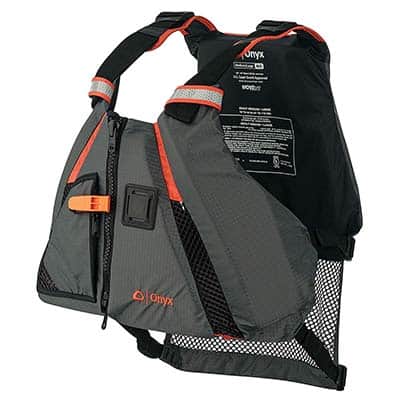
The bubble foam on this vest adds a good layout. The bubble foam can be found on the inside back part to add an extra amount of padding. This can work well for keeping you comfortable and is useful for when you are sitting down while on a boat. It could be a little more comfortable and padded than the actual seats you have on your boat.

This comes with zippered pockets with an extra mesh drainage space. The pockets add a good look and allow you to get a bit of extra storage. A drying loop is also included. You can even use the whistle attached to the vest for getting people to heat you in the event of an emergency.

Pros

  • Available in three flexible sizes
  • Side belt can be fully adjustable
  • Pockets are waterproof and fully lined

Cons

  • Shoulder buckles are tough to adjust evenly
  • Not for people under 90 pounds in weight

Stohlquist Women’s Escape PFD Life Jackets Reviews

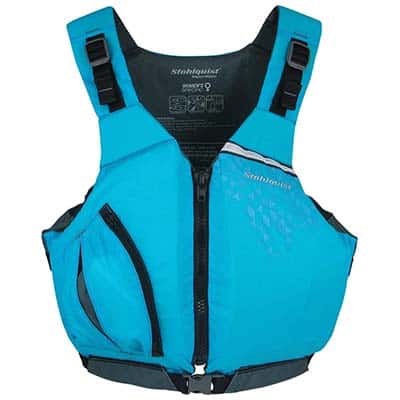
This next option among the best life jackets is made with women in mind. This offers a low-profile design with a soft body. It offers adjustable straps around the shoulders and on the bottom part. This helps to fit around a woman’s natural curve. The front-pull adjuster features let you adjust the jacket to keep it from riding up on your body.

The padding around the entire jacket adds a nice touch. There is also a bit of reflective trim around the body of the jacket to make it easier for you to be spotted in the water in the event of an emergency. The convenient design of the jacket provides you with a good look that is easy to manage.

Pros

  • Simply fit works well for a woman’s body
  • Easy to handle the straps and buckles on this model

Cons

  • Needs to be secured carefully to ensure that the jacket can fit well enough
  • Front pockets are rather small

Stearns Puddle Jumper Deluxe Child Life Jacket

This next choice is interesting in that it is a Type V jacket for children. This means that it is designed with specialized use in mind. It does have some parts that make it so it can work in a standard Type III format like in most cases. Specifically, the jacket comes with a pair of arm cuffs and a chest piece to create enough cover.

The polyester fabric on this life jacket adds a comfortable texture. The buckle on the back part also makes it easier for the jacket to fit onto a child’s body.

The important point about this jacket is that it is not necessarily to be worn with life-saving help in mind. Rather, it is designed as a life jacket that helps children learn how to swim. By keeping the child evenly afloat in the water, it becomes easier for the child to know how the water feels all around one’s body. This also helps with training a child to understand how to use the right motions while in the water.

Pros

  • Soft in texture
  • Can handle a child’s rough play
  • Available in various fine colors and patterns for boys and girls

Cons

  • Does not work well for emergency needs; a separate larger jacket is required in such cases

Body Glove Paddle Pals Learn to Swim Life Jacket

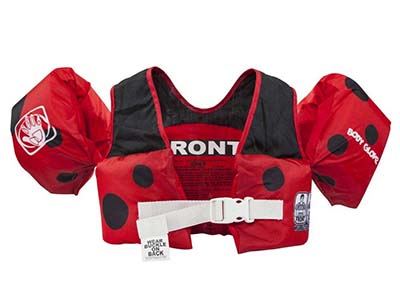
This choice is also made as a jacket for children who are learning to swim. It has a slightly larger body that makes it Type III suitable for recreational boating needs. This means that the jacket can be used to stay afloat.

This jacket features one of many fun designs that kids will love. You can order it with a ladybug, dinosaur, turtle or surfer design among many others. The layout is the same for each in that it comes with a chest piece with a strap on the back and two arm pads that link up to it. This fits most small children and is made with a comfortable polyester material that will not bother one’s skin while it is being used.

The shoulder harness offers a good fit that keeps the child from being able to remove the jacket without a parent’s outside support. This ensures that a child will keep wearing this while learning how to swim and enjoy the water.

Pros

  • The fun layout is something kids will love wearing
  • Simple buckle setup is easy to adjust
  • Does not slip off easily

Cons

  • Only for children from 30 to 50 pounds

Absolute Outdoor Onyx A/M-24

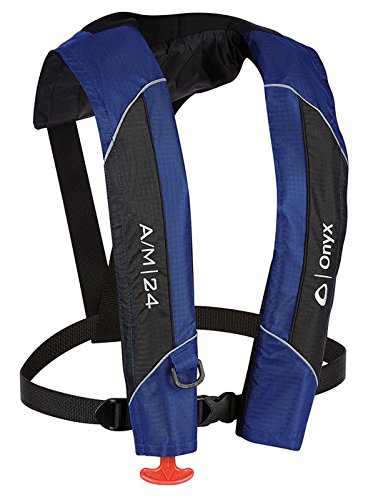
The last of the choices to find is an inflatable model. This Absolute Outdoor jacket will inflate itself with a T-cord attached to it. It can also inflate itself automatically when it gets into the water.

The neoprene body on this jacket adds a comfortable surface. You can especially notice this around your neck as it does not chafe or irritate your skin there.

Pros

  • Keeps you cool without adding lots of weight
  • Fits onto most people

Cons

  • You must check on how well the air can fill up on this before using it


Buying Guide 

Every concept that comes with the process of buying a life jacket should be explored carefully. This is to give you an idea of how well a jacket can work for your needs. You must look at the type of person who will use the life jacket, but several additional points must be reviewed as you will notice in this guide.

See The Arm Cuts

The arm cuts on your life jacket should be wide enough to allow anyone’s arms to fit through. This should also offer enough room to where your arms can move well when paddling a boat or when you are trying to cast a fishing line.

Loops And Other Attachments Help

Many of the best life jackets come with a series of useful hooks, latches, and loops among other items. These are spots that allow you to attach things onto your jacket. You can use this to attach fishing accessories or other boating items onto your jacket.

Check On The Filling

The filling material inside the jacket should be checked accordingly. Polyethylene foam or PE foam is very popular for use in many jackets. This foam is known for being light in weight while offering a solid body that stays afloat.

The foam also offers a closed-cell body that will not absorb water. This should be perfect for keeping your jacket comfortable, but you should watch for how well the foam is covered by the fabric on your jacket, which leads to the next point of this buying guide to see.

What About Inflatable Models?

You can find some inflatable life jackets on the market today as well. These life jackets are a little different from others in that they require you to pull on a lever or to use an air chamber to fill the inside of the jacket. This establishes a lighter feeling all around. You would have to watch for how the air would fill into such a jacket so it can actually keep you afloat though.

An inflatable model is best for those who are more experienced in the water. It is for swimmers who can handle the water but will need extra assistance with staying afloat. The USCG does not approve an inflatable life jacket for the people under 16 years old and the for the non-swimmers.

Hybrid Options

Some hybrid life jackets can be found in the market. These jackets feature a mix of a foam insert and an inflation chamber. These two points combine with one another to create a useful design, but it is better suited for those who are relatively familiar with being in the water. You would still have to look carefully at how one of these jackets are organized so you have something that is easy to wear.

Nylon, PVC, Polyester or Neoprene?

When you find the best life jackets on the market, you will come across one of four kinds of materials for the most part. The best life jackets are typically made with one of these materials in mind:

Nylon

Nylon is used more often than most other fabrics. Nylon is popular among manufacturers for being less expensive, but it is also lighter in weight. This makes it easier for the wearer to stay comfortable while wearing the jacket. The user can wear this while paddling a boat or casting a reel.

PVC

PVC is a polyvinyl chloride material that is known to resist many surfaces. PVC can resist oils and chemicals among other items. It is also light in weight and is not all that hard to wear. It is especially lighter than vinyl, a material that this polymer is loosely based off of.

Polyester

Polyester has been a staple fabric for years in many industries thanks to how it can be made with a thick and dense weave. It will not tear apart easily. It is also flexible enough to handle anyone’s movements. Polyester also fits in perfectly with a foam material and can be shaped or sized to conform to the foam’s shape and pattern.

Neoprene

Neoprene is more commonplace among water sports vests, but it is also an exceptionally useful material for boating needs. It offers a little more buoyancy and can provide a better fit without lots of gaps between the body and the jacket. But this is also a little more expensive than many other models.

Neoprene is made with a series of synthetic rubber materials. This offers a stable body all the way through while also keeping its body intact under any weather condition.

Which of the Three Types Is Right?

When looking for life jackets, you will come across three different types:

Type I

This is an off-shore model that provides the best flotation or buoyancy. It can work well in any body of water. It is also vital for people who might become unconscious during an emergency as a Type I vest is made to get such a person to turn face-up while in the water.

Type II

The Type II life jacket is made for calm and inland water conditions where it might be easy for someone to be rescued quickly. It should also turn people face-up in the water, but its buoyancy is not as strong as what a Type I jacket has.

Type III

This basic flotation option is made for those who are conscious and are located in inland bodies of water or near spots where a quick rescue is possible. The Type III vest is best for people who need to wear vests for an extended period of time. However, anyone who is in the water while wearing a Type III vest might have to tilt one’s head backward to make it easier for that person to stay upright while in the water.

The Type III vest is the most common type of vest you will find on the market. This comes as it is easier for companies to make vests in this style than it is for getting other items ready.

It is true that there are also Type IV and V flotation devices to use. But those are not designed to be worn by people. A Type IV item is a throwable device for people who are conscious and can hold onto something while waiting to be rescued. It is also made with calm conditions in mind. A Type V device is much smaller in size and is made to be worn during very specific situations. But while these can both work, it does help for a person to wear one of the other three types of life jackets when waiting to be rescued.

Review the Ventilation

The ventilation around the jacket should be organized to where air can move through the inside of the jacket, thus keeping you from feeling overheated while wearing it. The ventilation should be found around the sides or ends of the jacket. This should come with enough air pockets to keep you relaxed while ensuring water does not sneak its way into the spot. This is important as the PE foam that many of these jackets used might add enough heat onto your body to where you might feel worn out rather quickly.

Check Out USCG Approval

Many of the life jackets you will come across are marketed as being approved for use by the United States Coast Guard. These USCG jackets are ones that offer extra protection in the water and are flexible for many uses.

USCG-approved jackets are made with suitable flotation materials and fabrics that will not wear out fast. They should also be easy to wear and adjust to create a better total fit. Jackets that are not USCG-approved may still meet many of the standards the organization utilizes, but it is best to stick with something that the USCG actually endorses just to be safe.

Frequently Asked Questions

How can you determine if a life jacket is of the right size?

The best life jackets are always going to fit one’s body well enough. When the jacket is of the best possible size, it becomes easier for the user to wear the jacket thanks to how it allows that person to stay afloat in the water.

The life jacket you order should be sized based on your chest size. For children, it should be based on the child’s weight.

When checking on the fit of a jacket, you would have to tighten each strap from the waist up to the shoulder. You can then pull the vest up from the shoulder straps. The vest may be too big if the vest can pull up rather easily.

You can also test a few paddles with an oar or even test your fishing rod a few times to see if you can keep a full range of motion in your arms while wearing the jacket.

Can a woman wear a universal life jacket or does she need to stick with a women’s jacket?

It is best for a woman to wear a life jacket designed with her frame in mind, what with her body needing support around many areas. But a universal life jacket can still be worn by women provided that it is flexible enough to fit along with her body and to keep you upright while in the water. Check carefully on how well such a jacket can be made when seeing how it might work for you.

How can you wash off one of these jackets?

You should be able to use simple soap and water to get your jacket washed off after a while. This should be enough to take care of most fabric materials, but you should review the specific care instructions on your model to get an idea of what to expect.

How long should it take for you to get a life jacket on?

A life jacket should be easy to fit onto your body without having you put in lots of effort to try and get it ready. You should only spend about half a minute with getting the life jacket on. Before wearing the life jacket in an emergency you should know how to do that. That will save you from being nervous.

Conclusion 

It is vital for all people in your boating party to stay protected while out on the water. Make sure when getting the proper life jackets that you know what you are looking for and that you can find a choice that fits well on anyone’s body. This is the number one of all tips for boating safety.  Make sure when finding the best life jackets around that you have jackets that can fit well onto anyone’s body without being too tight. For your safety in the waters, after wearing the jacket don’t forget to take a quality marine VHF radio with you.

Look at how well the materials inside a jacket are organized as well. The materials should be light in weight and strong enough to handle all of your flotation needs. This is to give you the protection you deserve.

How To Clean A Boat Hull | Fiberglass Or Aluminum

It is the hull of your boat which takes the brunt of the punishment during use. Knowing how to clean a boat hull can be quite helpful and can save your money as well. The hull is exposed to both salt and fresh water, the elements, and the abrasive chemicals present in water pollution, all of which can damage your hull over time.

Therefore, correct and timely hull maintenance is essential in protecting your investment. If the hull is properly maintained, your entire boat remains seaworthy. However, corrosion, filth, and barnacle growth can not only damage your hull, but cause greater resistance, end up slowing you down, and if you own a motorboat, this results in increased fuel costs.

How to Clean A Boat Hull

Cleaning your own hull is not as hard as it sounds, and if done on a regular basis, it will be quite simple. Remember, the best way to keep your hull in excellent condition is to do regular maintenance.

If you let a few cleanings slide, it will be harder to clean due to barnacle growth, thick layers of algae, and grime. The following is a basic guide on cleaning a boat hull yourself and covers cleaning both in and out of the water, procedure, and supplies needed.

Types Of Boat Hulls

The more you know about your boat’s hull, the better off you will be when it comes to proper hull maintenance. If you are new to the world of boating, we encourage you to become familiar with the type of hull you have, as well as the material it’s made from. There are two different types of boat hulls: Displacement and planing

Displacement Hull

The displacement hull is what you see when you observe sailboats. This hull is designed to assist the boat in cutting through the water, or ‘displace’ the water quickly, with as little resistance as possible.

Boats with this type of hull are slower than those with planing hulls but will give a smoother ride. Keeping your displacement hull clean and waxed equals a 12 percent increase in efficiency according to the International Maritime Association.

Displacement Hull Shapes

  • Round Bottom

This is the most commonly seen displacement hull shape. This gives you a nice, smooth ride, but can roll and become unsteady at times.

  • Multi-Hull

This displacement hull gives an extremely stable and smooth ride but does not take corners well.

Planing Hull

If you’ve ever seen powerboats race, you know how they seem to skip over the surface. These boats have what is called, a planing hull. These hulls are specifically designed to rise up and skim the surface of the water as the boat picks up speed as their motor propels them forward.

So, where the displacement hull moves water aside, the planing hull rises above the water. When cleaning different types of planing hull, don’t forget to give it a good waxing, as many boaters feel this helps the boat move through the water more quickly, and less resistance means less wear and tear on your motor.

Planing Hull Shapes

  • Flat Bottom

If you plan on boating in shallow, calm waters, then the flat bottom planing hull is what you’ll want. It does not do well in rough waters, however.

  • Deep ‘V’ Hull

A planing hull designed to give you easy, and smooth handling at high speeds and in choppy water.

The Negative Impacts On Your Boat Hull

Impact Of Water On The Boat Hull

Out of sight, out of mind. Nice saying, but not so nice when it applies to your boat’s hull. What you don’t see happening to your hull while in the water, can cause you great expense and damage to your vessel over time. In just a very short time, a wild and uncontrolled growth of algae and barnacles can accumulate on your hull, negatively affecting your fuel efficiency, hull integrity, and overall engine performance.

In a very short space of time, ‘bio-slime’ will begin to form on your hull. Bio-slime is a slippery layer formed by bacteria and other microorganisms, which then become host to weeds, algae, and finally barnacle growth.

The more growth on your hull, the less efficient your boat becomes due to an increase in friction between the growths and surrounding water. All of this will cost you much over time if not tackled immediately, followed by a proper, monthly maintenance program for your hull. Knowing how to clean a boat hull yourself can save you both time and money.

Cleaning A Boat Hull In Or Out Of The Water?

You may either choose to wash the hull of your boat with the boat in the water or out of the water. Only boat owners who are certified scuba divers should consider washing their hull while the boat is in the water, as you will need to wear scuba gear in order to clean below the boat’s waterline or those comfortable free diving.

If you are not scuba certified, or comfortable free diving, please hire a professional hull cleaner to properly clean your hull while the boat is in the water. Each method will require a different procedure as well as different supplies. In this guide, we’ll go over the basics of how to clean your boat hull underwater, as well as out of the water.

How To Clean And Wax Your Hull When Out Of The Water

1. Gather Your Supplies

Make certain that you’ve taken the time to create a detailed list of all the items you’ll need to clean your hull ahead of time. You don’t want to arrive at your boat, ready for a day’s work, only to realize you forgot an important item. So, create a list and proceed to gather everything on that list in one place, ready to take to your boat.

Maintaining the integrity of your boat hull cannot be understated. In other words, when considering soaps and detergents, please use ‘marine grade’ boat hull cleaners, buffers and waxes only, as they are formulated to be gentle to your hulls surface finish.

Also, for best results, purchase only brushes, microfiber towels, sponges, and cleaning mitts specifically designed for boating. To help get you started, we’ve included a list of supplies you’ll most likely need:

  • Buckets
  • Hose
  • Access to Fresh Water
  • Hull cleaning soap and wax
  • Several sponges or quality microfiber towels
  • Heavy duty gloves

2. Washing The Hull

Once your boat is out of the water, you can begin to clean your hull. Before you get started, make certain that you’ve covered the interior of your boat if you do not wish it to get wet. The first item on the list is to hose any loose grit, grime, algae, sea salts or filth from your boat. If you do not have access to a freshwater hose, you can consider using a bucket filled with fresh water. Only use fresh water on your hull, as salt water may cause your hull to yellow.

Once the hull is good and soaked, inspect it for any slime or grime. Take one of your sponges, or a high-quality microfiber cloth, and gently remove any filth. ‘Gently’ is the operative word here, as you want to avoid scraping or scratching your boat hull. This is where the question of power washers often come up. While some boat owners may use a power washer, we recommend that you stick with your hose and sponge not to risk damaging your hulls protective finish as much as possible.

3. Remove Old Wax

Next, you’ll want to remove any old wax from the hull’s surface. Take some microfiber towels and use your favorite boat wax removal solvent. Let the solvent do the work for you so you don’t have to scrub hard. Please only use products specifically designed for removing wax from boat hulls. If unsure, check the label, it will state if it is for ‘marine’ use.

4. Soaping Up The Hull

We’re at the point now, where we are ready to apply our soap. Proceed to mix your chosen soap as per directions. A good quality boat hull cleaner will be able to remove scum, scale, any light oxidation, algae, yellowing or chalking, and be an environmentally friendly, biodegradable product. Follow the directions of your particular hull cleaner to the letter. Using a proper boat cover you can partially reduce the damage to the boat by the weather.

Some hull cleaners may use a boat body brush, others only sponges. Please remember to wear heavy-duty work gloves when cleaning your hull. Apply the soap with a clean sponge or microfiber towel. Let the soap do the work for you, letting it sit on the surface, softening up the grime, slime, and filth, for about 10 to 15 minutes. Rinse with clean, fresh water. Repeat the process if necessary.

5. Time To Apply The Buffing Compound

Take your chosen buffing product in hand, as it’s time to get to work buffing your boat hull. Always keep in mind that you want to avoid scratching the protective finish on your boat hull, at all costs.

That being said, polishing and buffing products are generally abrasive in nature, designed to refresh your hull, making it shine like new before wax is applied, so don’t use too much pressure.

Following the directions on your chosen product begin to buff in short sections at a time, only. Depending on your personal preference, you may buff by hand or use a specially designed buffing tool. Try to keep your hand pad or the buffing tool flat and equally distributed.

6. Apply The Hull Polish

Once your hull is buffed to your satisfaction, you may now proceed to apply the polish. Application of the hull polish is similar to that of the buffing compound.

As always, for best results, please follow the instructions for your particular product. Once finished, give your boat a final hosing with fresh water, to remove any loose dust or dirt. This is an important step before you begin to apply the wax.

7. Waxing Your Hull

Make certain that you only use an appropriate boat wax which is made for your type of boat. Waxing functions to further protect the surface of your hull from the water and the harmful chemical pollutants often present which can damage your hulls surface.

How you apply the wax is a personal preference, as you may apply it with a power buffer or by hand, moving in tight, controlled circular movements. If your brand of wax states to allow it to dry, then let it sit for about 5 minutes or so. Once you notice it becomes dry and cloudy, it’s time to buff that area with a quality microfiber towel, to a lovely, bright, reflective shine.

You can also choose to paint your boat. Knowing how to paint a boat, it will be more appropriate to paint it in many cases.

How To Clean A Boat Hull In The Water

1. Preparing To Clean Your Hull Underwater

Cleaning Boat Hull Underwater

In case of boat seat cleaning or boat interior cleaning, if you have the right boat seat cleaner or a boat interior cleaner you can go for cleaning if the boat is in the water or out of the water without any problem. Now, in case of a boat hull, it is different.

While many boat owners perform maintenance when the boat is out of the water, there are those who are able to wash their hull while it is in the water, using scuba gear to work on the hull beneath the waterline.

Other boat owners choose to free dive, using a mask, fins, and snorkel, which is much more time consuming and tiring as well. If free diving, you may choose to use some dive weights to help steady yourself while working.

If you are new to boating, learning how to clean a boat hull underwater is not as hard as it sounds.

However, as previously stated, do not choose the scuba method unless you are properly scuba certified before proceeding, if not we strongly recommend you hire a professional hull cleaner who is certified.

2. Gather Your Supplies

  • 6-inch putty knife
  • 1-inch putty knife
  • Small wire brush for propeller and rudder only
  • Carpet scraps or microfiber towels if hulls have ablative paint

3. Dress Properly

Make certain that as much of your skin is covered as possible, to lessen the risk of being cut by sharp barnacles. Light, long sleeve shirts and loose-fitting pants should do fine.

Remember to wear gloves to protect your hands as well. Also, only clean your hull underwater when the current is calm. Never start a cleaning process if the waters are rough and choppy. If the waters become rough during the cleaning process, leave the water immediately.

4. Begin The Cleaning

Start by using a soft cloth or sponge to gently remove any algae, slime or filth. Once you have finished, it’s time to concentrate on the barnacle growth.

We cannot stress enough, the importance of removing the barnacles without scarring, scratching, or scraping the surface of the hull. Take your putty knife and delicately pry away any barnacle growth, taking great care to not mar the surface of the hull.

There are some boat owners who believe that metal scrapers remove too much of your hull’s paint, so use only plastic.

When you clean, start from the top of the waterline, and work down from there. This prevents you from being scraped by barnacles when you surface.

If you purchase a hull cleaning kit that has stainless steel pads and brushes, use them on unpainted areas only. Under no circumstances are you to scrub or scrap hulls with ablative paint, only use soft sponges, or carpet scraps. If you see a cloud of paint rising, stop cleaning immediately.

5. Propeller, Rudder, And Thru-hulls Cleaning

For these jobs, it’s best to use your 1-inch putty knife to prevent damaging these areas. For the thru-hull, a flat head screwdriver should work just fine.

Make certain any small openings are also free from slime, grim and growth using very small wire brushes. When these areas are free from debris and growth, your engine will run more efficiently and be less stressed, which also improves your fuel economy costs.

Fiberglass Boat Hull Cleaning

The steps to clean a boat hull will remain unchanged in case of fiberglass boat hull cleaning. Let’s go through the steps again:

  1. Wash the fiberglass hull and remove the dirt from the surface
  2. Clean the harder stains
  3. Buff and polish
  4. Wax the hull to shine

But we should take some extra care when working with fiberglass. The fiberglass dust is bad for health as it can produce irritation in our skin, eyes and respiratory system. We should protect ourselves using musk, goggles, and long clothes to cover our skin. Hand gloves are essential too.

Don’t use hard brushes or steel wool to clean fiberglass. Use microfiber towels or, nylon brush applying with circular movements. A soft sponge can be used for more difficult stains.

The soap or cleaner should not contain bleach as bleach can damage the fiberglass surface. A paint remover will help to remove the boat bottom paint and the top side paint. You can try marine grade cleaners with phosphoric acid to remove the rust or hard stains produced by the water.

Try to wash your boat after every outing with soap and fresh water to maintain the fiberglass perfectly for a long time. Taking care of your fiberglass boat it will shine around fifteen years without any problem.

Aluminum Boat Hull Cleaning

For cleaning an aluminum boat hull the method and the steps will be the same as described above for a boat hull. So, wash, clean, polish and wax the aluminum hull maintaining the sequence.

  1. For washing freshwater hose and hot water will do better. It will remove the external grit, grime, algae, sea salt, and dirt. You can use microfiber towels or soft sponges to remove the external elements.
  2. Now when selecting the cleaning product we must take an appropriate cleaner which is specially made for cleaning the aluminum boat. Use the soft nylon brush and microfiber clothes or soft sponge with the circular motion to apply and scrub the boat hull. Don’t use hard brushes but repeat the process if necessary one or two times more.
  3. Polish and wax the boat with proper polish and wax made for aluminum boat and must be marine grade. Many people like to use just a marine grade aluminum boat paint.

Aluminum always reacts with the weather and produce oxidation. So, if you don’t go for winter fishing on your boat, cover the boat with a good boat cover to protect the boat as much as you can.

Conclusion

As you can see, learning how to clean a boat hull yourself is not that hard. Properly maintaining your boat hull every month will not only keep the integrity of your boat intact, but will also increase its lifespan, and be cost-effective in the long run.

If your hull is coated with slime, grime, growth, and barnacles, you’ll lose valuable fuel efficiency, and even risk your motor overheating and burning out sooner, due to the increased work needed to propel it through the water.

While you can hire professional boat hull cleaners, you can also choose to perform this task yourself, either above water or underwater. Both methods have different procedures and supplies, so it’s a good idea to be familiar with each method. If you love to do small boat jobs of your own, how to mount a trolling motor can be interesting for you.

Best Fish Finder For Kayak 2021 | Reviews & Buying Guide

Sometimes a smaller and more portable kayak can come in handy for fishing. In fact, you can use the best fish finder for kayak to help you find the fish that you want out there. Why? Most people assume that you need a large boat to go fishing.

Best Fish finder For Kayak

This is due to not only the potential for you to collect many fishes but also from the massive materials you might need to get just to go out and find fish. But not everyone can afford to get a large boat.

You don’t have to get a large boat out if you want to go fishing. A kayak can be all you need when looking to get out there onto the open water.

You will love getting close to the water while enjoying time out fishing. The peaceful scenery of the water and the great outdoors will make for an experience unlike anything else you might get into. But you will have to look at what you can get when finding a quality fish finder.

There are many options to see when finding the best fish finder for a kayak. These are made with smaller bodies that are easier to handle. They will also include various details to help you identify where the fish are in your area. This could make your fishing trip all the more enjoyable as you can find all the fish you want to catch.

This guide is all about identifying a great fishfinder that you know will work for your demands. Be sure you look around here to get a clear idea of what you can use and that you have the best possible choice for your demands. As you will see in this guide, these fishfinders are diverse over how they are laid out and the features that they offer for your trip needs.

Comparison For The Best Fish Finder For Kayak

Fish FinderSize (inches) Depth (feet) Transducer Data
View On Amazon
Venterior VT-FF001 Portable Fishfinder332825 foot cable on a round transducer
Check Price On Amazon
Deeper Smart Portable Fish FinderVaries by phone or tablet130130 foot casting range on the spherical transducerCheck Price On Amazon
iBobber Wireless Bluetooth Smart Fish FinderVaries by phone or tablet 135Syncs with a Bluetooth-enabled device up to 100 feet awayCheck Price On Amazon
HawkEye Fishtrax 1C2240Uses its own extending arm
Check Price On Amazon
Eyoyo 7” TFT LCD Monitor Fish Finder 1000TVL7About 100 feet30m cable for viewing what is under the water
Check Price On Amazon
Vectorcom Portable Fish Finder2300100-foot casting range on the unitCheck Price On Amazon
Venterior Portable Fish Finder230025-foot wire for the transducerCheck Price On Amazon
Docooler Portable Fishing Finder3.598425-foot wire on the transducerCheck Price On Amazon
Deeper Smart Sonar PRO+Varies by phone or tablet260Operates with a Wi-Fi link up to 330 feet away
Check Price On Amazon
Deeper Smart Sonar PRO Varies by phone or tablet 260Operates with a Wi-Fi link up to 330 feet awayCheck Price On Amazon

Elaborated Features Of The Top Fish Finders For Kayaks

The fish finders listed here are all different based on how they operate and what displays they will include. Some options are rudimentary while others might link to a larger mobile device.

Whatever you use, you must look at how well each of these choices works for your demands. Top ten fish finders for kayak:

  1. Venterior VT-FF001 Portable Fish finder
  2. Deeper Smart Portable Fish Finder
  3. iBobber Wireless Bluetooth Smart Fish Finder
  4. HawkEye Fishtrax 1C
  5. Eyoyo 7” TFT LCD Monitor Fish Finder 1000TVL
  6. Vectorcom Portable Fish Finder
  7. Venterior Portable Fish Finder
  8. Docooler Portable Fish finder
  9. Deeper Smart Sonar PRO+
  10. Deeper Smart Sonar PRO

These fish finders can be used in a kayak, canoe or boat. Those who like kayaking, canoeing, or fishing, they should know the canoe vs kayak pros & cons.

Venterior VT-FF001

Venterior VT-FF001 Portable Fish finder

Start your search for the best fish finder for kayak by looking at the Venterior VT-FF001. This offers a design where you can link the transducer to not only the bottom part of your boat but also to someplace a little deeper in the water.

With this fish finder, you can attach it to a 25-foot cable and allow it to float in the water or to move a little deeper down with a pole. Whatever you plan on doing with it, you can use this to generate the appropriate signals you wish to work with.

This will detect the water depth in your area and list information on any short or tall weeds in a spot. The fish displays will help you identify the approximate location of where each fish is in a spot.

It can identify most types of fish and always works to find active ones. It does not read anything that does not produce substantial vibrations, thus ensuring the fish you find are the ones that are actually moving around in the water.

Pros

  • Versatile for working in many environments
  • Fish alarms let you know when something has been found
  • Works at around 300 feet deep

Cons

  • Fish readouts are not accurate
  • The screen looks extremely rudimentary and can get jumbled up fast

Check Availability & Customer Reviews On Amazon

Deeper Smart Portable Fish Finder

Deeper Smart Portable Fish finder

The attractive design of this spherical fish finder makes it a popular choice to have in your kayak. It uses a Bluetooth connection that links to your mobile device. With this, you will secure the base to the rear end of your boat while a ball will be hung onto the back of the kayak. As the ball trolls the water, it identifies signals through its transducer. This identifies vibrations in the water and can be cast out by around 130 feet from your kayak. This also reads fish up to 130 feet in the water although it works best in clear conditions.

The Bluetooth link will move the data on your fish finder to a mobile device like a tablet or smartphone. You would have to use the appropriate app from Deeper on your mobile device to help you read what you are coming across while you use it.

A dual-frequency sonar beam is used here. This works at two frequencies and angles to create a wider scan range. This, in turn, produces a more accurate readout when used accordingly.

Pros

  • Dual sonar system offers a better readout
  • Works in many water conditions including salt water
  • Compatible with Android and iOS devices

Cons

  • Will not work well if the water is too cloudy
  • Might be difficult to carry a tablet with you while fishing

Check Availability & Customer Reviews On Amazon

iBobber Wireless Bluetooth Smart Fish Finder

iBobber Wireless Bluetooth Smart Fish Finder

Another Bluetooth-enabled device for Android and iOS users, this iBobber model features a smart layout. The unit can link up to your kayak as a bobber or even as something you can cast out into the water further from your kayak.

You can use this fish finder without having to permanently install it onto any surfaces in your vessel. This also works with a detailed app that helps you to record more information on what you are finding while on the water. The finder lists information on things like the specific areas you are at through a GPS readout, a trip log that mentions details on your fishing trip based on readouts, and even real-time weather information. The details listed give you a clear idea of what you are finding during your trip and could help you to plan future fishing trips.

This all works with readouts that are comparable with what you might get off of a much larger fish finder. But this all works without having to add an extra receiver. You just have to use your own mobile device to make it work without being too complicated or hard to use.

Pros

  • The battery lasts for up to ten hours on a recharge
  • LED beacon lets you see where the fishfinder is
  • Alarms go off when fish are identified

Cons

  • Needs consistent Bluetooth connection and extensive setup
  • Might be harder for the fishfinder to work if cast too far away from you

Check Availability & Customer Reviews On Amazon

HawkEye Fishtrax 1C

HawkEye Fishtrax 1C

The fourth option to find here is the HawkEye Fishtrax 1C. The 14-degree beam angle adds a good touch that helps you find fish with ease. It includes a fish depth scale that measures the approximate depth from your boat to the fish.

A series of indicators are also used to see how the bottom of the water floor looks. The sonar setup can be adjusted into one of many intensity levels with two sonar settings working to find more fish. You can adjust the intensity to determine the specific types of fish you are aiming to come across.

The display screen reveals a full-color layout of the ocean floor with the colors changing based on how close you are to certain spots. The screen also gives you an idea of how deep the water in your area is and what the water temperature is. These give you ideas on what to find in the water and can even help you to plan your bait based on the conditions.

Pros

  • Sonar signals travel fast into the water
  • Easily portable, although you can mount it to your kayak too
  • Can eliminate noise by avoiding smaller items that will not make an impact

Cons

  • More accurate in spots closer to you
  • The screen looks too ordinary or vague at times
  • Sensitivity levels might cause you to find more than what you are really looking for

Check Availability & Customer Reviews On Amazon

Eyoyo 7” TFT LCD Monitor Fish Finder 1000TVL

Eyoyo TFT LCD Monitor Fish finder 1000TVL

Eyoyo makes this model with a slightly different approach to how it works. Instead of using a sonar device, this uses an actual camera that you move into the water. The link produces a full-color image, but the items that come with it ensure that your connection works well.

This LCD monitor finder uses a 7-inch TFT monitor with a sun visor on the top. You can remove the visor if desired.

The 7-inch screen uses an HD layout with around a thousand lines on its body. This produces a clearer and more realistic appearance.

The camera comes with twelve LED lights to produce enough visibility in even the darkest or toughest spaces under the water. You can adjust the light through the controls on the screen.

This is all prepared with a sturdy case. The case allows you to transport the screen, camera, and other items anywhere. This is valuable considering how the camera itself has some fragile parts that need to be protected as well as possible.

The wiring used on the camera itself is also sturdy and will not wear out in most basic water conditions. The coating that goes over the wiring ensures that everything inside the space is fully protected.

Pros

  • The clear screen offers a brilliant look
  • Easy to move the camera in and out of the water
  • Adjustable lights make seeing in deep water conditions easy

Cons

  • Camera parts are fragile
  • Does not provide a 360-degree view like what a traditional fish finder offers
  • Does not work in extreme temperatures whether they are hot or cold

Check Availability & Customer Reviews On Amazon

Vectorcom Portable Fishfinder

Vectorcom Portable Fish finder

Vectorcom makes this fish finder a basic option that is suitable for a majority of fishing needs. The finder uses a body that connects to a transducer through a simple wire and plug. The transducer can particularly handle most water conditions and can go more than 300 feet into the water.

This is a flexible model as the transducer does not have to be fixed to the boat at all times. You can use the float feature on the transducer to get it a little further into the water.

You can also attach the unit onto the kayak hull or you can use a pole to get it away from your local spot. The design lets you carry this around in any spot and could even be used during the winter season for ice fishing purposes.

This all comes with a readout that gives you information on how deep the water in a spot is and where the fish are located. This includes information on where they are in relation to the underwater floor. The estimates are designed to be accurate while providing you with a decent range for getting your fishing items out there well enough.

Pros

  • Simple setup makes using it easy to handle
  • Offers a wide detection range
  • Can read the information on most fish in your local area

Cons

  • The screen can be difficult to read
  • Accuracy is not as strong as what you might find on some other models

Check Availability & Customer Reviews On Amazon

Venterior Portable Fish Finder

Venterior Portable Fish finder

Venterior makes this fish finder as a model that gives you additional information on what is happening with the fish where you are. It can work at depths of about 300 feet and uses a 25-foot cable for the transducer.

A removable float is available to let you get the transducer out to more spots near your boat. The transducer float works well for moving it into the water, but you might need to add an extra lead weight onto the bottom just to be safe if the water is a little too intense.

Like with some other models on this list, the Venterior transducer lets you move it into many spaces around the water. By using this appropriately, it becomes easy for you to see where fish might be no matter what the conditions are.

You can even use this in some deeper spots by using a longer rod to let the readout move outward even further. But you would have to watch for how the transducer wire can go out by only a certain amount of space at a time.

The small digital display provides points on the fish in your local area and is easy to read from any spot on your kayak. The layout shows the information on the water depth and the temperature of the water. These are available in standard and metric readouts as well.

Pros

  • Uses an auto-shutoff feature when idle for a few minutes
  • Gives you more information on all the items on the waterbed

Cons

  • The receiver does not do well when it gets wet
  • Auto-shutoff might active without much warning
  • Wire for the transducer is rather short

Check Availability & Customer Reviews On Amazon

Docooler Portable Fish Finder

Docooler Portable Fish finder

FThe 3.5-inch LCD screen on this fish finder makes it a popular model for those who want to find fish in any spot. The unit can even read items from nearly a thousand feet deep in the water, thus making it one of the strongest fish finders for kayakers to use.

The dual-beam sonar system makes it easy for you to get the finder to identify fish no matter how deep you go.

The display gives a detailed and curvy look at what the waterbed is like while the fish on the display are listed alongside approximate details on how deep they are in the water. It all comes with the standard distance and temperature readouts that you would expect to find out of a fish finder such as this.

You can even adjust this to work with either one of the two sonar frequencies or both at the same time. Be advised that using both at once will cause the battery to run out a little faster, although that can be said about any kind of fish finder that uses sonar technology.

The flat surface on the bottom gives you the opportunity to get the fish finder mounted onto the area near your seat. You would have to get this part installed carefully with the proper transducer setup added if possible.

It might still be better for you to get a separate transducer for your use as the one that this comes with might not work well enough for getting too deep or far off into a spot.

Pros

  • Simple readout adds a convenient look
  • Display setup is not overly complex
  • Offers better depth coverage than most other similar models

Cons

  • The transducer that comes with this has too short of wire for it
  • The receiver does not handle water well

Check Availability & Customer Reviews On Amazon

Deeper Smart Sonar PRO+

Deeper Smart Sonar PRO+

Deeper has made this special edition of its sonar fish finder with a brilliant layout that does more for finding things underwater. In addition to its strong sonar capabilities, this model also comes with a series of lights to help give the unit an easier time identifying what is under the water.

This uses a Wi-Fi connection to link up to your mobile device. It works with your smartphone or tablet to quickly produce a clear display that shows what the fish finder is identifying. It works effortlessly to find what is in your area and will produce maps on your device quickly. You can even save those maps for later use, thus allowing you to keep the unit working.

This even works from more than 300 feet away. It can give you information on fish, vegetation, rocks, temperatures, and many other points. You could even leave the unit out in the water for as long as desired so long as the Wi-Fi connection on the unit continues to stay strong and work accordingly.

Pros

  • The body is very sturdy and easy to set up
  • Information on your app is more detailed than what most other fish finders might offer

Cons

  • Tough to hold onto a smartphone or tablet in your kayak in some cases
  • Takes a while for some GPS maps to load up

Check Availability & Customer Reviews On Amazon

Deeper Smart Sonar PRO

Deeper Smart Sonar PRO

The last of these fish finders to see is a more basic version of the Sonar PRO+ model that Deeper makes. This works with many of the basic controls and functions that the old model uses. It offers a Wi-Fi connection range of around 330 feet and can review things in the water from 260 feet deep.

This unit is extremely precise. It can identify fish as little as half an inch in size. But you can always adjust the unit to display only things that are a little larger in size. You would have to use the app that comes with this program to get this feature to work.

The unit offers a carefully arranged layout where people can identify the temperature and depth of the water among other vital points. You can also use the Boat Mode feature to create a full map of the waters in your area. You can also use the Lake book data management program to make it easier for you to review the data.

Pros

  • Reads items quickly
  • The strong body does not wear out fast
  • App lets you link to a larger computer to plan your fishing trips and to analyze your performance

Cons

  • Might have a harder time reading things in salt water bodies

Check Availability & Customer Reviews On Amazon

Buying Guide 

This section focuses on many points that you should explore when getting the best fish finder for kayaks. These concentrate on many points that make it easier for you to go fishing, but you should see how well your model of interest is laid out.

Review the Display

The key for the display on your fish finder is to keep it from being overly large. Stick with something that is about five inches in size at the most. This is enough to create something visible without getting in the middle of your line of sight.

Some displays come with full-color layouts while others are simply in black and white. A design may come with a full layout showing the specific size of a fish or how deep it is.

Others might produce an accurate layout of how the underwater floor looks. Some models might be rather rudimentary without offering much information at a time. Be aware of what you are coming across when finding a good display screen in any case.

What Are the Mounting Points?

The mounting system you use on your fish finder should not add lots of weight. The mount should attach to the seating area of the kayak while not taking up far too much space.

Keep the mounting system at just a few pounds in weight in the best case so the system does not add far too much drag in the process.

Not all fish finders need to be mounted. Some models are portable, but those units are much smaller in size and could be easy to lose if you are not careful enough with handling them.

Of course, anything that would link up to a smartphone or tablet would not have to be mounted, although you could always try to find a third party mounting unit for something like this if you really feel a need for it.

Analyze the Transducer

A transducer is vital for your fish finder. You need the transducer to take in details on movements in the water and where they may be located. Some fish finders come with their own transducers, but sometimes you might have to spend a little something extra on one depending on how your finder is laid out.

The transducer on your fish finder should come with a body that you can quickly mount. It can be mounted inside the hull. You can also get it added through a pipe within the Scudder hole.

Some suction cup attachments or others that use adhesives might allow you to get the transducer attached to any part of your boat. Such cups or other binding agents might come apart quickly if not used well enough.

You would have to regularly check your boat to see that the transducer, in this case, is actually attached properly.

How Can the Transducer Work?

Depending on the model you order, you might get the transducer on your fish finder to identify fish from well off of your boat. You can use some models that feature a pole or wire that lets you move the transducer into one of many spots.

Some transducers might work alongside a floating item you add into the water. Others could even be completely removed from your kayak and be used in small ice fishing holes during the kayak fishing offseason. Check with any fish finder you want to see how well it might be laid out along the water.

What Is Sonar?

Some transducers work with sonar features. Sonar is a popular technology that identifies items underwater. It produces sound waves and reviews the reflections produced in the water. These include reflections from fish, plants, and the bottom of the water surface.

A sonar readout will give you an approximate layout of where fish might be. A series of displays on your screen should include spots that show the sizes of the fish being identified.

The sonar unit can also read the information on how the fish are moving around in the water. This includes looking into how they are vibrating in the water.

Sometimes the sonar might work with one angle from the transponder into the water. In other cases, the sonar may work with two separate angles to add a better readout and to cover more space for finding fish. For more information about this matter, you may have a look at how does s fishfinder work.

Can It Link To Your Phone?

Some of the choices you will come across when finding the best fish finder for kayaks include links that let you get what’s on the finder onto a mobile device.

These include fishfinders that come with cable links or Bluetooth connections to let you see what is in the water through your mobile device.

Having a good link might be perfect in that you can get more information on what is in the water through a mobile app. The screen might be a little easier to read in some cases.

You can always take the device out of your pocket without having to mount it anywhere too. It might take a bit of time for a connection to be set up though. This is especially for a Bluetooth link.

The instructions for making this work will vary based on the fish finder you have and your mobile device.

Some fish finders may work with Wi-Fi signals instead. These signals are easier to handle because they can be read fast without having to get an overly complicated technical setup ready.

But you would have to watch for any obstacles that get in the middle of your Wi-Fi signals. Your fish finder will stop working if the Wi-Fi signal or any other wireless connection is suddenly disrupted.

Be aware of the distance you can place between the fish finder and the mobile device too.

Get the Power Supply Ready

The power supply you use for your fish finder should be checked properly. You will have to use some kind of battery that links up to the fish finder itself. This comes as the kayak will not have its own dedicated motor in most cases.

You can always add a portable marine battery into the inside part of your kayak if desired, but you would have to keep that battery from being far too heavy if it is going to work well enough.

Also, some batteries might be included with a fish finder to help you use it without having to connect to anything larger. But those batteries can run out quickly and will have to be recharged after a bit. Keeping the fish finder linked up to a larger battery for a while might be the best thing to do when trying to keep things running well.

GPS Features

You can get a GPS setup ready in your fish finder in some cases. A GPS unit will help you to monitor where you are in particular. It may work with map data loaded onto your fish finder, thus giving you a detailed idea of how the water looks.

You can also save waypoints on your unit. This lets you save information on where you might be going.

For better performance, you can use the Lowrance hook2 4x with a Bullet Skimmer transducer.

Be advised though that the GPS functionality on a fish finder will use up more battery power. You do have the option to turn off the GPS feature on most fish finders. In such a case, you would have to get the battery turned off.

Our post about the best GPS fish finder combo may be convenient for some of you.

What Is the Operating Temperature?

The operating temperature for your fish finder should be good enough for most of the environments you plan on getting out into. A fish finder can work at temperatures from around 0 to 150 degrees Fahrenheit.

This should be enough for a majority of fishing activities, including any ice fishing events you want to get into during the kayak fishing offseason.

Batteries May Be Needed

Sometimes a fish finder might link to a larger marine battery, but in other cases, it might simply need a few disposable alkaline batteries. Smaller models use AAA batteries while larger choices come with AA batteries. A proper model should have the option to be tied up to a larger battery so you will always have power on hand.

Rechargeable batteries can also be used on some models. These include options that can be recharged through a dedicated charging port or even through a USB link depending on the model you utilize.

Check on how well your fish finder operates based on such a battery before using it or getting it charged up. Also, such a unit that features a rechargeable battery would require you to fully charge up the unit before you use it for the first time; you cannot get such a device to work out of the box immediately.

Recharging Points

It can take a little longer for the battery on a fish finder to recharge than what you might expect. You might have to spend about six to eight hours on average to get it fully charged up again. Take a look at how well the recharging feature on your fish finder works before using it.

More importantly, you would have to avoid keeping the fish finder in a charging station for far too long. By keeping a unit in a charging spot for too long, you risk overheating the battery and possibly reducing its capacity.

Screen Brightness

Take a look at how well the screen on your fish finder is laid out. The problem with some fish finders is that they have screens that might be hard to read while in the sun. They might produce huge glares that make it harder for you to see what is out in a space.

The best fish finder for kayak should have a screen that can resist glare and create a good layout that you can see in any light. A model that has an adjustable brightness feature might also work. This lets you adjust how the display looks while also keeping the battery usage down when you dim it by a bit. The adjustable brightness setup would have to be accessed through a separate control layout.

What About a Floating Unit?

An interesting thing about some fish finders is that they use little bobbing devices that float on the water. Such a device works by using a floating item on the back end of the boat. This might come with a ball shape although the design will vary based on where you go for it.

The floating item will emit signals to the bottom to help identify what is in a spot. It can be trolled along the back of the boat to create a larger readout that covers more information. This can even be linked to either a standard fish finder readout or onto your own mobile device. The control setup offered here adds a good design that you will want to utilize.

Waterproof Functionality

You are bound to get way on your fish finder, what with your kayak being so close to the water. But the best fish finder for kayaks can be made with a great waterproof body that keeps you from struggling with water getting in the way and hurting the inside components of your unit.

The seals and openings on your fish finder should be secure and capable of keeping water out of the way. This point is critical to see if you plan on going on any saltwater surfaces that might disrupt the components inside your fish finder.

Working With a Mobile Device

As you read earlier, some of the fish finders available for your use can work with your existing mobile device. These include items that link to a smartphone or tablet through a Bluetooth connection.

These items can work well provided that you have a close enough link between the fish finder and your mobile device. It might be difficult to get a Bluetooth link ready if the distance between your item and the reader is too great.

Also, many of these fish finders will work with most mobile devices. Check with your individual device to see how well it might work for you in any situation and that you can get a good enough link ready on it.

Frequently Asked Questions

Where on the kayak should the fish finder be mounted to?

Although you can get a fish finder mounted anywhere on your kayak, you should keep it in the middle part of the vessel if possible. This is to keep the boat from tilting in one direction.

The transducer part should be affixed to the back part of the boat. The wires leading from the transducer to the display can move along on the inside part of the kayak cabin. The display should then appear on the front part so you can see it while moving forward in the water.

The key is that the fish finder is in a safe spot while still being easy to read. You have to keep it visible so you will not lose track of anything you are trying to manage at a time.

What will you need when getting your fish finder installed?

To install the best fish finder for a kayak, you would have to get a few bits for securing holes inside your kayak. These holes are needed for getting wires, bolts, and other items secured inside the kayak.

All holes should be smaller than the bolts and screws you plan on using. A waterproof seal should be produced when those units move through all the way. You will also require the transducer and display among other items that you have when getting it installed.

What steps work in the installation process?

The installation process can vary based on what you are using, but you should look at how well you can get it to work for you. Several steps must be followed when trying to install your fish finder the right way:

  1. Start by getting the transducer around the back part of the ship’s hull.
  2. Move the cable for the transducer into the hull. The sensors and cables around the transducer should straddle the bottom of the kayak and not hang off.
  3. After everything is tightened well enough, the transducer wires can link to power cables.
  4. You can get the power cables connected to a battery. Sometimes they can attach to the battery with clips, but you might have to solder them together if needed or if you simply prefer that option.
  5. Add the display screen to the unit. You would have to link the battery and transducer wires to the fish finder display, but some models come with Bluetooth features that let you operate this without any extra wires.
  6. You should turn on the display and battery to get the unit to start working.

This is only a sample of ideas of what you should do when getting your fish finder ready. Check the instruction manual with your fish finder and transducer to see what you have to do with it.

How big do the fish have to be for your fish finder to actually identify them?

A fish should be at least 10 cm in size for your fish finder to read it. Each fish finder works differently over how it can identify such fish, so look at the specifics for whatever you are using to get an idea of how it can work.

How big can a fish be?

A fish finder should identify fish around three to six inches in size. Some models might struggle to find larger fish.

Is a fish finder capable of distinguishing between one large fish and a group of fish?

Some fish finders might include detailed readouts that show how big fish are, but others might simply generalize the results and just show that there are fish in one spot.

The limitations of the fish finder you are using will make a big difference regarding how well it can work and how you can find fish in any case.

How does the sensitivity feature on a fish finder work?

The sensitivity feature will work by allowing you to adjust how well the unit can identify fish in a spot. This would require you to adjust the unit by having it review the sizes of fish and by eliminating results that are within a certain size. This helps you to keep the results you find under control while keeping you from finding anything that might be too small or unnecessary for your fishing desires.

Can a fish finder identify motionless fish?

A fish finder will typically not identify any fish that isn’t moving. These include baitfish and any dead ones. The lack of vibrations from a motionless fish ensures that your finder will not produce any false alarms off of those fish.

Does the control unit have to include lots of buttons?

Some of the larger or more detailed fish finders on the market can come with a good number of buttons for your control needs. Not all of these devices need to have all of these buttons though. Be aware of what you are using when getting these buttons ready for any situation you run into.

Conclusion

The problem with fishing is that it can take a while for you to find the fish that you want to catch. You need a good tool that will help you with getting the fish that you want sooner. Working with a quality fish finder will make a world of difference when you consider how well it can work for catching fish in any space.

Be advised when getting out on the water that you will need to get an appropriate fish finder ready for your use. A great fish finder model makes it easier for you to go outdoors and find all the fish you want to catch. It should be compact without adding lots of weight to your kayak.

More importantly, it should not be tough to set up. Be sure when looking at a quality model that you have something that fits perfectly into your space without being a challenge to use.

Exit mobile version