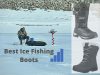
If you go ice fishing and if you are living in areas that are usually snowy for most of the year or touring some, you probably have been wondering how you can get the best ice fishing boots that suit your tour. Why? If you go for ice fishing and get cold on your feet or if the boots are not waterproof, you will simply pass a horrible day or you will have to come back home.
There is nothing like a bad boot or footwear on the ice that can turn your beautiful day into a nightmare.

You wish to have boots that are comfortable but undecided on which ones to go for? Well, worry no more. In this review, I am going to talk about ten famous boots that you may wish to consider, give you an in-depth understanding of each, and an additional buying guide in case you choose to get either of them.
Quick Answer! Which Is The Best Ice Fishing Boot?
Our quick answer for the best ice fishing boot is the Muck arctic boot for men and the Columbia women’s ice maiden II insulated snow boots for women. The boots I am going to look at today are:
- Muck arctic rubber performance men’s winter boots
- Columbia women’s ice maiden II insulated snow boots
- Kamik men’s Greenbay 4 cold-weather boots
- Sorel men’s bear extreme boots
- kamik men’s nation-plus boots
- Baffin men’s wolf snow boot
- Sorel men’s conquest boot
- Baffin women’s snow goose winter boot
- Sorel women’s Tofino
- Muck arctic adventure women’s winter boot
Comparison Among The Boots For Ice Fishing
| Boot | Material | Performance | Check On Amazon |
| Muck arctic men’s | Leather, synthetic, rubber sole, neoprene | -40°C to 4°C | Check On Amazon |
| Columbia Women’s snow | Leather, textile, rubber sole | Ready for worst winter days | Check On Amazon |
| Kamik men’s Greenbay 4 | Nylon, synthetic, rubber | Up to -40°C | Check On Amazon |
| Sorel men’s bear extreme boots | Textile, synthetic, synthetic sole | Up to -51’11°C | Check On Amazon |
| Kamik men’s Nationplus boots | Leather, rubber sole | Up to -40°C | Check On Amazon |
| Baffin men’s wolf snow boot | Leather, textile, synthetic sole | Up to -40°C | Check On Amazon |
| Sorel men’s conquest boot | Leather, synthetic textile, rubber sole | Up to -40°C | Check On Amazon |
| Baffin women’s Snogoose winter boot | Synthetic, rubber sole | Rated -40°C | Check On Amazon |
| Sorel women’s Tofino | Fabric, synthetic, synthetic sole | Ready for winter’s harshest days | Check On Amazon |
| Muck arctic adventure women’s boot | Synthetic, rubber sole, neoprene | -30°C to 10°C | Check On Amazon |
Features Of The Best Ice Fishing Boots With Pros & Cons
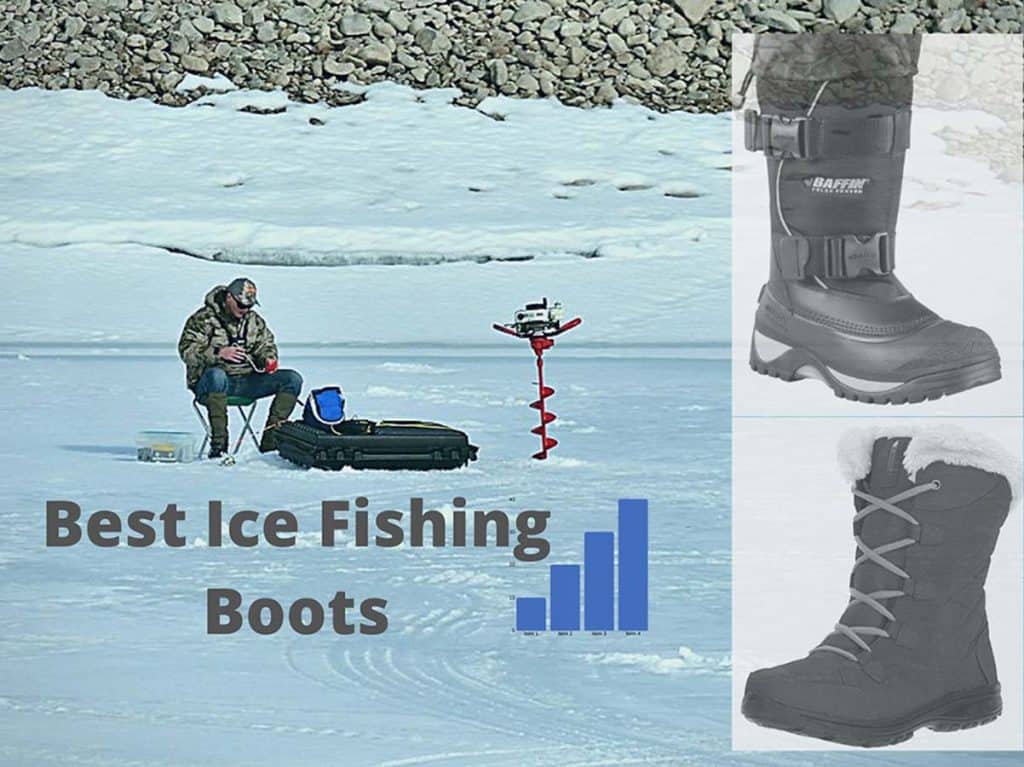
Muck Arctic Winter Boots For Men
The boot is suited for icy weather, keeping your feet warm in such conditions. Muck Arctic Sport Rubber High-Performance Men’s Winter Boots are designed to keep your feet warm even at temperatures that range from -40 degrees. This can be done even when your feet are buried in snow.

The insulating boots have a contoured midsole and a warm fleece lining with thermal foam under the insole. They also have a 5 mm neoprene.
Pros
- Are shock absorbers
- Contain a rubber shell seal that protects the ankles when in deep snow
- Are waterproof
- Retains heat and do not allow chaffing
- Quite durable
Cons
- Likely to loosen with continued mashing of the inside
- Relatively big
- It cannot be used in warm weather. They’re exclusively for frigid weather.
Check Availability & Customer Reviews On Amazon
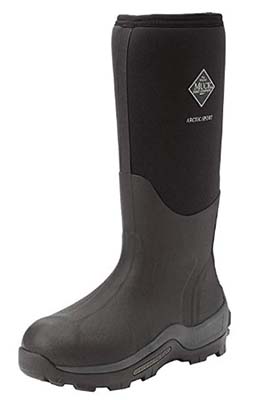
Columbia Women’s Ice Maiden II Insulated Snow Boots
They’re made using leather and textile, with soles being made of rubber. They are light in weight and designed for frigid weather. Have a 200G insulation that lets you walk comfortably on ice. Measurements are taken by folding up the dotted ends and marking them against your longest toe, with the heel placed on a flat surface. The largest measurement is then compared with a size chart.

Pros
- They are incredibly light in weight
- Quite comfortable
- Offers insulation, thanks to the 200G toasty insulation
- Waterproof
- Durable
- Have a nice grip
Cons
- Cannot be used by men
- Water gets through when exposed for too long
- Sizes are a bit unrealistic
Check Availability & Customer Reviews On Amazon
Kamik Men’s Greenbay 4 Cold-weather Boots Review
Have their soles made from synthetic rubber? A drawstring is at the top line, as well as a boot opening that measures an estimated twenty inches all through. It is made using high technology that makes it easier to use in icy weather. It has a Velcro strap that helps enclosure and a rubber sole with an excellent grip.


Pros
- Durable
- Waterproof
- Light in weight
Cons
- There is no insole
- Designed solely for cold weather
- Cannot be used for extended snowshoeing
Check Availability & Customer Reviews On Amazon
Sorel Men’s Bear Extreme Boots Review
Designed to provide comfort, warmth as well as waterproofing in your ice fishing and other extreme weather conditions. It has an exterior that is resistant to wind coupled with a lining (Omni-heat) that retains heat in extremely cold temperatures.


Pros
- Waterproof
- Wind resistant
- Quite comfortable
- Crampon compatible
- Affordable
Cons
- Loose fit
- Indicated sizes don’t usually fit
Check Availability & Customer Reviews On Amazon
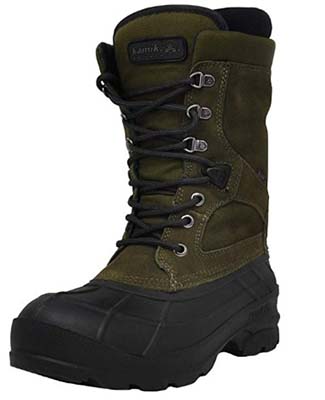
Kamik Men’s Nationplus Boots
It is made from pure leather with a rubber sole, fit for extreme weather conditions.

Pros
- Very strong and yet pliable
- Durable
- Waterproof
- Cozy and comfortable
- Come with removable liners
- Affordable compared to other brands such as sorel
Cons
- Rubber sole sometimes cracks
- Flimsy soles
Check Availability & Customer Reviews On Amazon
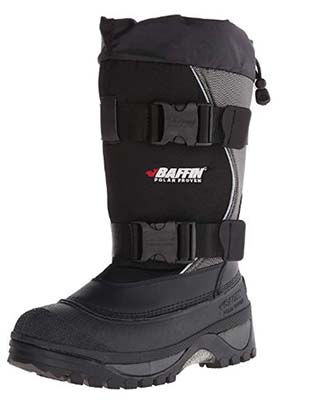
Baffin Men’s Wolf Snow Boot
Made from imported leather with a synthetic sole. They have an EVA midsole and inner boot made from foam. Both the sole and midsole have been molded in the middle for strength and better heat retention.

Pros
- Comfortable
- Fits well
- Waterproof
- Greater grip
- Less expensive
- Can be used as snowshoes
Cons
- You have to order a larger size because the indicated ones don’t fit
Check Availability & Customer Reviews On Amazon
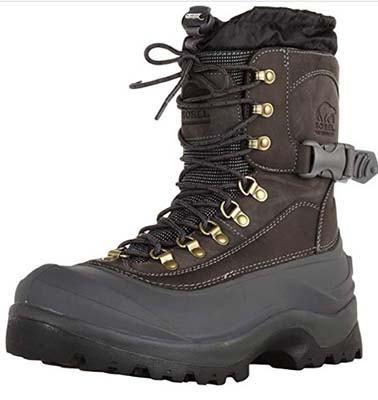
Sorel Men’s Conquest Boot Review
Purely leather and a synt5hetic rubber sole. They have an inbuilt gaiter with a drawstring and a barrel lock and a footbed made from molded Eva. It has close to 400 grams of insulation.

Pros
- Durable
- Comfortable
- Less expensive
- High insulation
- Comfortable and easy to work with
Cons
- Liners cannot be removed
- The rubber cracks more often
- Poor customer service for refunds or returns
- Poorly constructed
Check Availability & Customer Reviews On Amazon
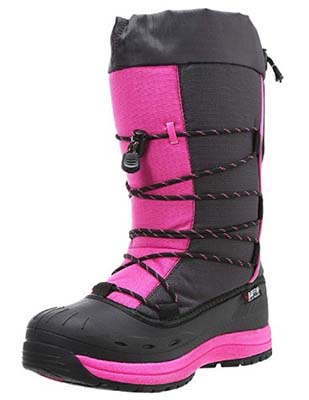
Baffin Women’s Snogoose Winter Boot
This winter boot is made from synthetic materials with a rubber sole. It is water-resistant and has a firm grip that helps you avoid sliding on ice. It has full insulation complete with a drawstring strap to retain the heat.
Pros
- It is waterproof
- Very comfortable to work with
- Suited for extremely cold weather
- Firm grip
- Light in weight
Cons
- They are not as soft as you are made to believe
- The inner sole has a rough spot making it a bit uncomfortable
Check Availability & Customer Reviews On Amazon
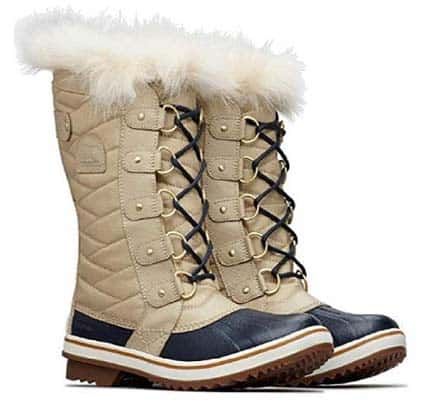
Sorel Women’s Tofino Review
They are made from imported fabrics and synthetic faux fur. the boot is elevated for maximum performance. It has almost all the relevant features you will require, together with a footbed made from molded Eva.

Pros
- 100 grams of insulation
- They are very comfortable with a collar made from faux fur
- Quite warm
- Water resistance
Cons
- Poorly designed
- They are not ideal for straight ice
Check Availability & Customer Reviews On Amazon
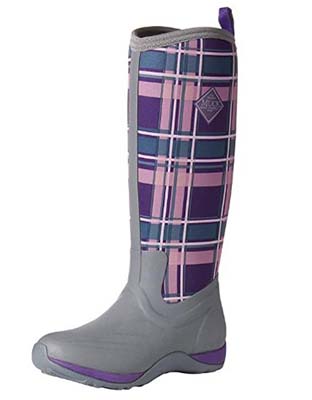
Muck Arctic Adventure Women’s Winter Boot
This lightweight boot provides good traction on risky surfaces. The neoprene used in this boot gives us comfort and flexibility. The 16-inch boot is made for maximum protection in the winter season.
For more extreme conditions the Muck boot arctic sport extreme conditions women’s tall winter boot can be the alternative option.

Pros
- The great design by the Muck boot makes it shock absorbing
- The boot fits nicely with the shape of the foot
- Waterproof
- The extra cushions provide resistance and support all day long
- The boot conserves the heat
- The durability and toughness of the boot make it a perfect boot
Cons
- The boot is rated up to -30 degrees Celsius.
Check Availability & Customer Reviews On Amazon
Buying Guide For The Best Ice Fishing Boots
You need to be on the lookout for several features when enquiring about or buying boots. These characteristics include insulation, traction, waterproofness, grip, boot stiffness, removable liners, material, durability, design, cover, size, and weight. We will take a look at each of these in detail.
A good quality boot is one of the essentials for ice fishing, our guide will clarify the factors before selecting your boot for this winter. If you know all the tips and tricks for ice fishing, then you must know that you can do nothing without a pair of good boots.
Boot Stiffness
It is advisable to check how stiff the boot is before purchasing it. Rigid boots are ideal for ice fishing. This is because they relieve your body of pressure, and are the best when you encounter surfaces that are not only rough but also icier. When ice fishing, you always standstill at the same spot for a long time, and this is when rigid boots come in handy.
Going for rubber boots is not the best option when ice fishing since they lack the stiffness you need. Since rubber boots are prone to bending, they are suited for walking outside.
Material(s)
Its material determines the quality of the boot you are purchasing. There are three distinct materials you ought to consider for ice fishing or handling in icy areas/conditions. These are:
Leather: This offers a surface that is too stiff to tear or wear out quickly. Most leather boots come with toe and heel surfaces that are reinforced to enhance their rigidity.
Rubber Upper: These feature an outer shell that can easily be bend coupled with an inner lining (synthetic). The thickness and waterproofness of these materials help in heat retention, thereby keeping your feet warmer.
Synthetic Materials: These entail nylon components that make the boot lighter in weight and quite soft.
Insulation
The insulation of the boot determines how good the boot is. Irrespective of your current condition (mainly when ice fishing), your feet should be free from cold (warm).
Besides, they should allow the circulation of air to avoid any moisture forming from within the boot. You’re likely to come across a cold-weather lining, found around the least temperatures that can be supported by the boot.
Basically, the higher the amount of insulation, the more protection the boot has, although it translates to an increase in the weight of the boot.
Cover
When looking for boots, you are supposed to go for those that won’t just cover your feet. Going for higher ones (10+ inches high) ensures your ankle and heel are well protected. The length should be considered to make it ensure to move around with the boots as being too long will make them cumbersome.
Certain boots also have steel covers at the tip that protect your toes/ankles from getting hurt by any rough items.
Traction
The terrain is likely to be slippery when you go ice fishing. You can slip and be easily hurt while walking over ice. For fear of this, you must have the traction of the boot you are buying checked.
There are various forms of boot traction for multiple conditions. If you will be walking in the snow, get yourself a deep tread. This will be the most suitable. For icy conditions, getting a boot that has spikes will secure you in position. Modern-day designs have rugged grips that ensure you don’t slip and fall.
Flexibility
Although having boots that are too rigid could make it difficult to walk, it is essential to have boots stable enough to protect your ankles from any injuries. Flexibility is the balance between these two.
Design
The materials, combined with the quality of the shoe, contribute to its design. This is in addition to the extra features that include the heel and toe caps. A clear distinction between the shoe and the cuff should be made. This implies that tough/durable materials should be used around the foot while the softer materials used around the calf.
Sufficient traction is also necessary on the sole to make you easily navigate through different conditions. You should, therefore, go for boots that are highly engineered, with the ability to not only keep your feet insulated but also get rid of the moisture regardless of the conditions around you.
Durability
Since ice fishing boots are quite expensive, it is important to ensure you get value for your money. As a result of this, the pair of boots you get should be too rugged to last for a longer period. This has everything to do with the material used to make the boot. Boots that come with a warranty are the best options since they allow you to get value for your money.
Waterproofness
Being able to withstand different weather conditions or water-resistant doesn’t mean your boot is suited for ice fishing. There are instances when you will step in the water. If your boots are not sealed properly, the effect will be felt. You will get too cold to continue fishing.
Waterproof boots are usually made of properly sealed with materials made from tough rubber (rugged). This is usually done on the lower part; the upper part is made of lighter materials such as rubber or nylon to ensure the boots are not too heavy.
Putting the fastening mechanisms into consideration goes a long way in ensuring your shoes are waterproof. We recommend going for boots that use zippers instead of laces as these provide an even stronger form of protection.
Size and Weight
The size and weight of your boots should be proportionate. Heavier boots make it hard for you to walk freely and over long distances. On the other hand, when the boots are too light, they lack the necessary insulation for extreme conditions.
Grip
Unlike traction, which makes it easier for you to move around without tripping, grip enables you to stay firm in a given spot without slipping. This helps you prevent injuries and secures you back in case you slip.
Besides, a good grip reduces the amount of energy you spend to keep yourself straight. It is important to have everything working for you as you fight to get your fish reeled in, including the grip.
Removable Liners
Havi9ng liners that can be taken off easily is an added advantage for you. This makes it easy for you to get them off, clean them, and dry your boots inside, thus increasing the life of the boot. It also helps in reducing moisture from the boot and avoid the odor.
Frequently Asked Questions
Here are some of the questions frequently asked about these boots.
Why Do We Need Special boots For Ice Fishing?
It’s important to have the right boots for ice fishing. A bad boot or shoe on the ice activities will end your day before the expected time or you will have to pass a very displeasing and uncomfortable day.
The poor footwear can also be really dangerous if you are with them for a long time on the ice. You can fall sick quickly. We need to protect our feet from the cold.
Can we use the boots for snowshoeing?
The boots can be used for snowshoeing.
Do the indicated sizes fit our feet properly?
Sizes are a bit absurd in the sense that, sometimes you may have to order a larger size for you to get the exact size that fits you.
Are the boots available in different colors?
They are also available in various colors such as grey, black, red, brown, and many more.
Conclusion
If you want to have a great ice fishing experience, make sure you go for a boot that will not only offer you comfort and waterproofing but also that which is flimsy and can be used to drive. I prefer either the Muck boot or the Columbia Women’s boot. But, they are not so comfortable when you are driving.
It is important to understand our situations, fishing spots, weather, etc to select the desired boot.